Project Management
/Quotation
Offers Module
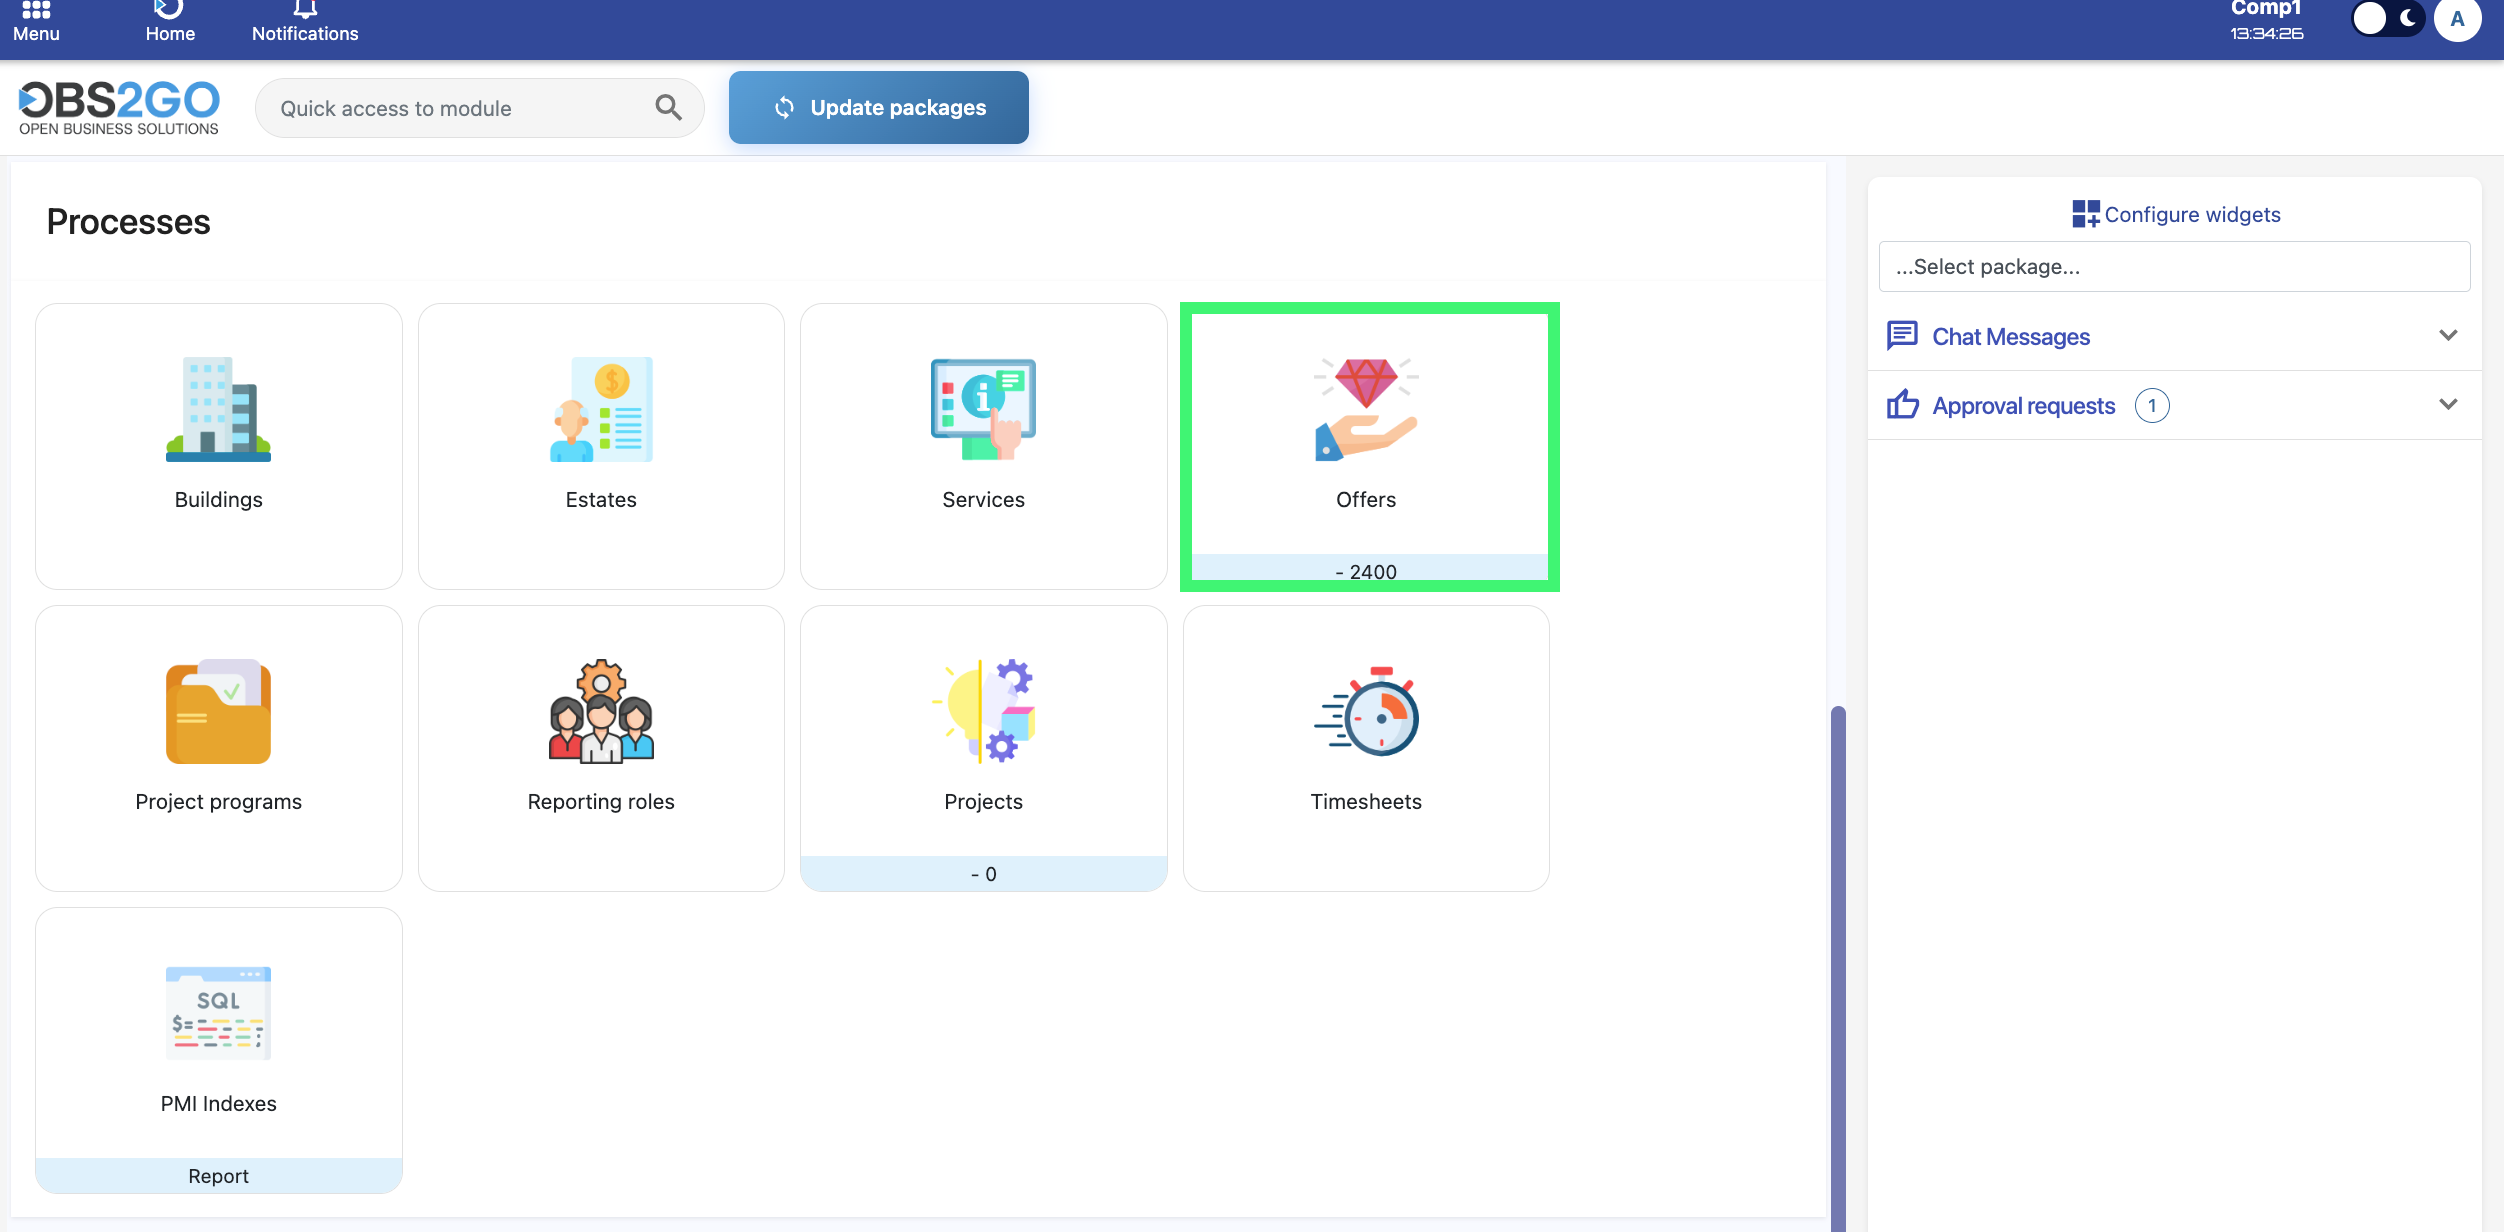
How to Access the Offers Module
- Select the Offers module from the Processes menu.
- The Offers module page will open, showing all existing offers and options to create new ones.
Creating a New Offer
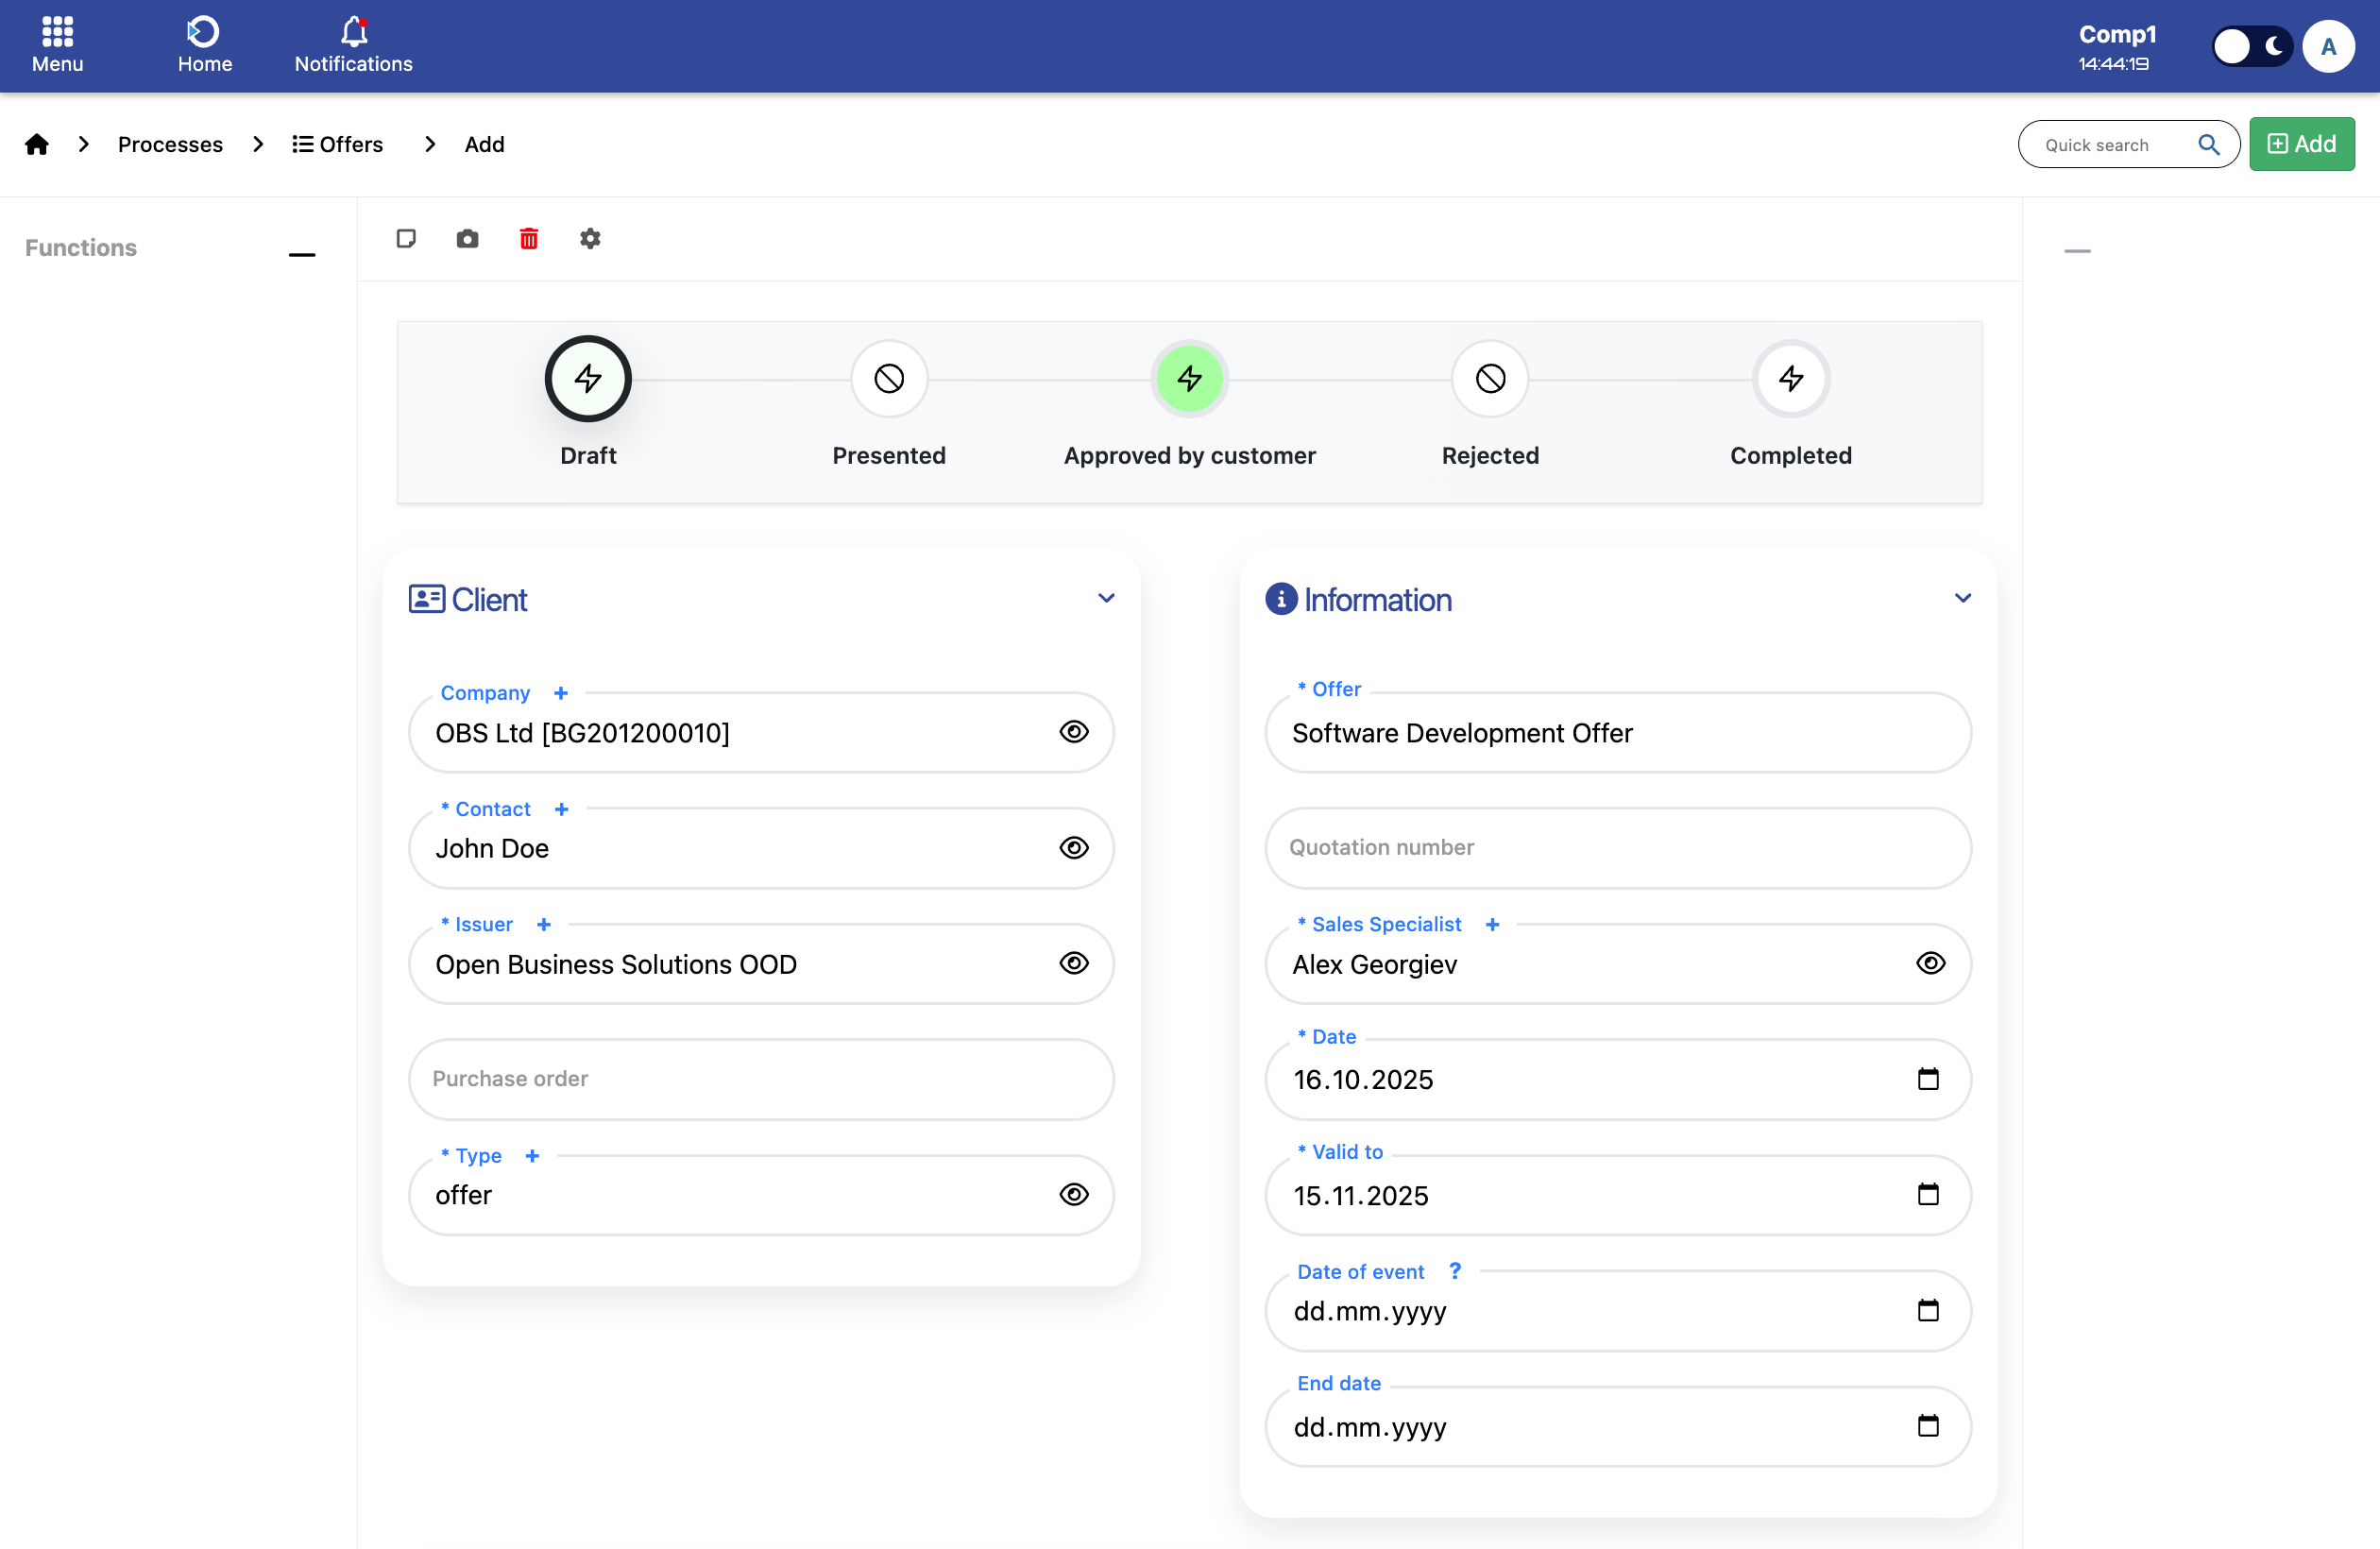
To create a new offer, click the Create button on the Offers module page. This opens a form where you can enter all required details for the quotation.

Offer Information and Key Fields
- Company: Select the company for which the offer is created.
- Contact: After selecting a company, the dropdown will display only the contacts linked to that company.
- Offer Field: Enter the offer’s name.
- Quotation Number: Generated automatically by the system for each new offer.
- Purchase Order: Connects the offer to an existing or future purchase order.
- Type: Indicates the kind of quotation being created.
- Sales Specialist: The employee responsible for preparing and managing the quotation.
- Date: Creation date, filled automatically but adjustable if needed.
- Valid To: Expiration date of the quotation.
- Date of Event: Start date of the related event or project, if applicable.
- End Date: End date for the event, project, or service related to the offer.
Offer Details Fields
Description
- Description: Main description of the offer, including products, services, or terms.
- Comment: Optional internal notes.
Delivery
- Delivery Time Days: Estimated number of days for delivery.
Prices and Discounts
- Tax Rate: Select the rate from the dropdown menu.
- Currency: Choose the currency of the quotation.
- Taxes: Options: Tax Included, Tax Excluded, Tax Exempt.
Text
Offer type: Select the type of offer. For this dropdown, only "Quotation" is available, indicating a formal proposal to the customer.
Text field: Enter any extra information or instructions here. This information will appear on the quotation, giving the client additional context or details.
Attachments
Attach files (PDFs, images, documents) to the offer.

After filling in Offer Information and Offer Details fields, click the Add button. This opens the Offer Summary Table.

Offer Summary and Items Management
After clicking the Add button, the Offer Summary Table appears, allowing you to review the saved offer, including its name, milestones, assignees, and start/end dates. Next, continue with item management by clicking the Items submodule.

In the Items submodule, you will see the item management menu. To create a new item for the offer, click the Add button, as shown in the image below.

Adding Item Details
Once the Add form opens, fill in the fields to define the item or service. The main fields include:
- Description: Provide a short description of the item. Group field will be automatically filled Delivery. For Delivery , select the type from the dropdown menu
- Warehouse: Choose one of the three available warehouse options as shown in the image.
- Amount: After selecting the warehouse, enter the Quantity and the Unit Price for this item.
- Extras: Use this field to apply additional options to the item:
- Discount: You can manually type a discount value if applicable
- Tax Rate: Choose the tax rate from the dropdown menu.The options are the same as previously explained.
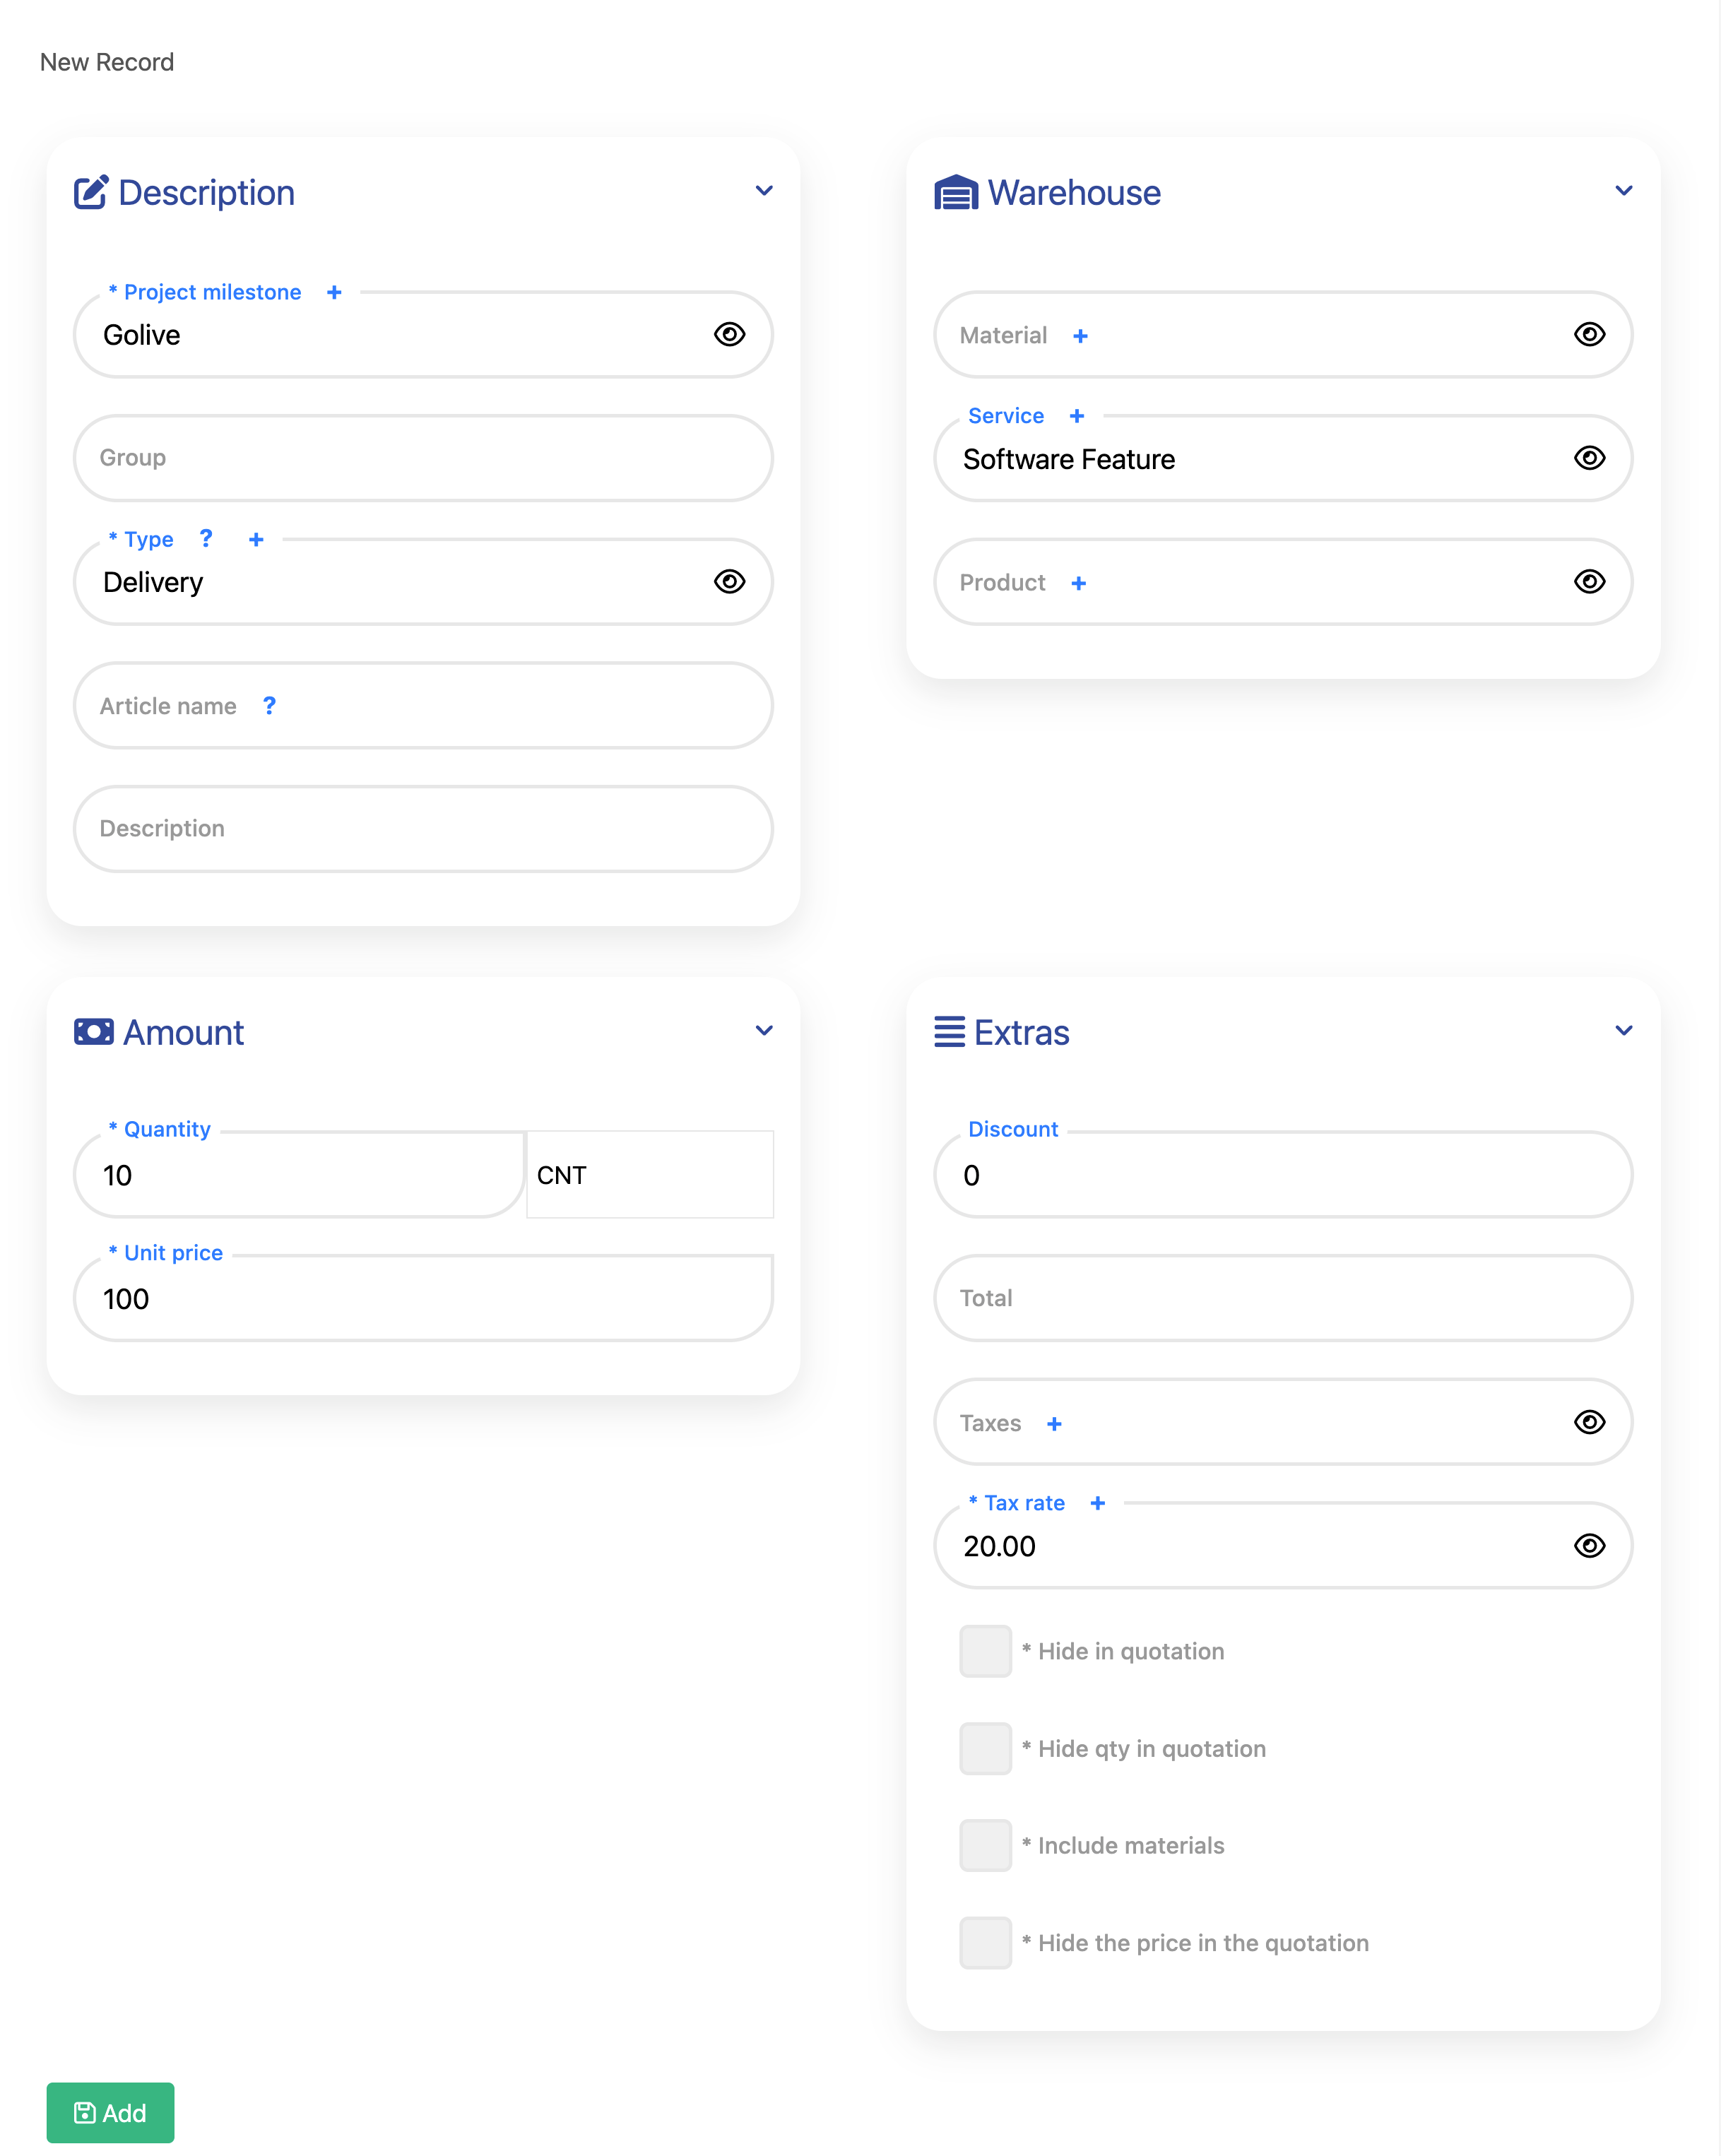
- After filling in the item details, click the Add button to create the item entry. This will open the Item Summary Table shown in the image below and three new column which are:
- Base Amount: Shows the total value before taxes and discounts.
- Tax Rate: Displays the tax applied to the item.
- Total Amount: The final amount including tax and after any discounts.

Next, click on the Subcontracting Cost as shown above in the picture.
Subcontracting Cost
After opening the Subcontracting Cost submodule, click the Add button — the same way as in the Items submodule. This will open the subcontracting details form, as shown in the image below.
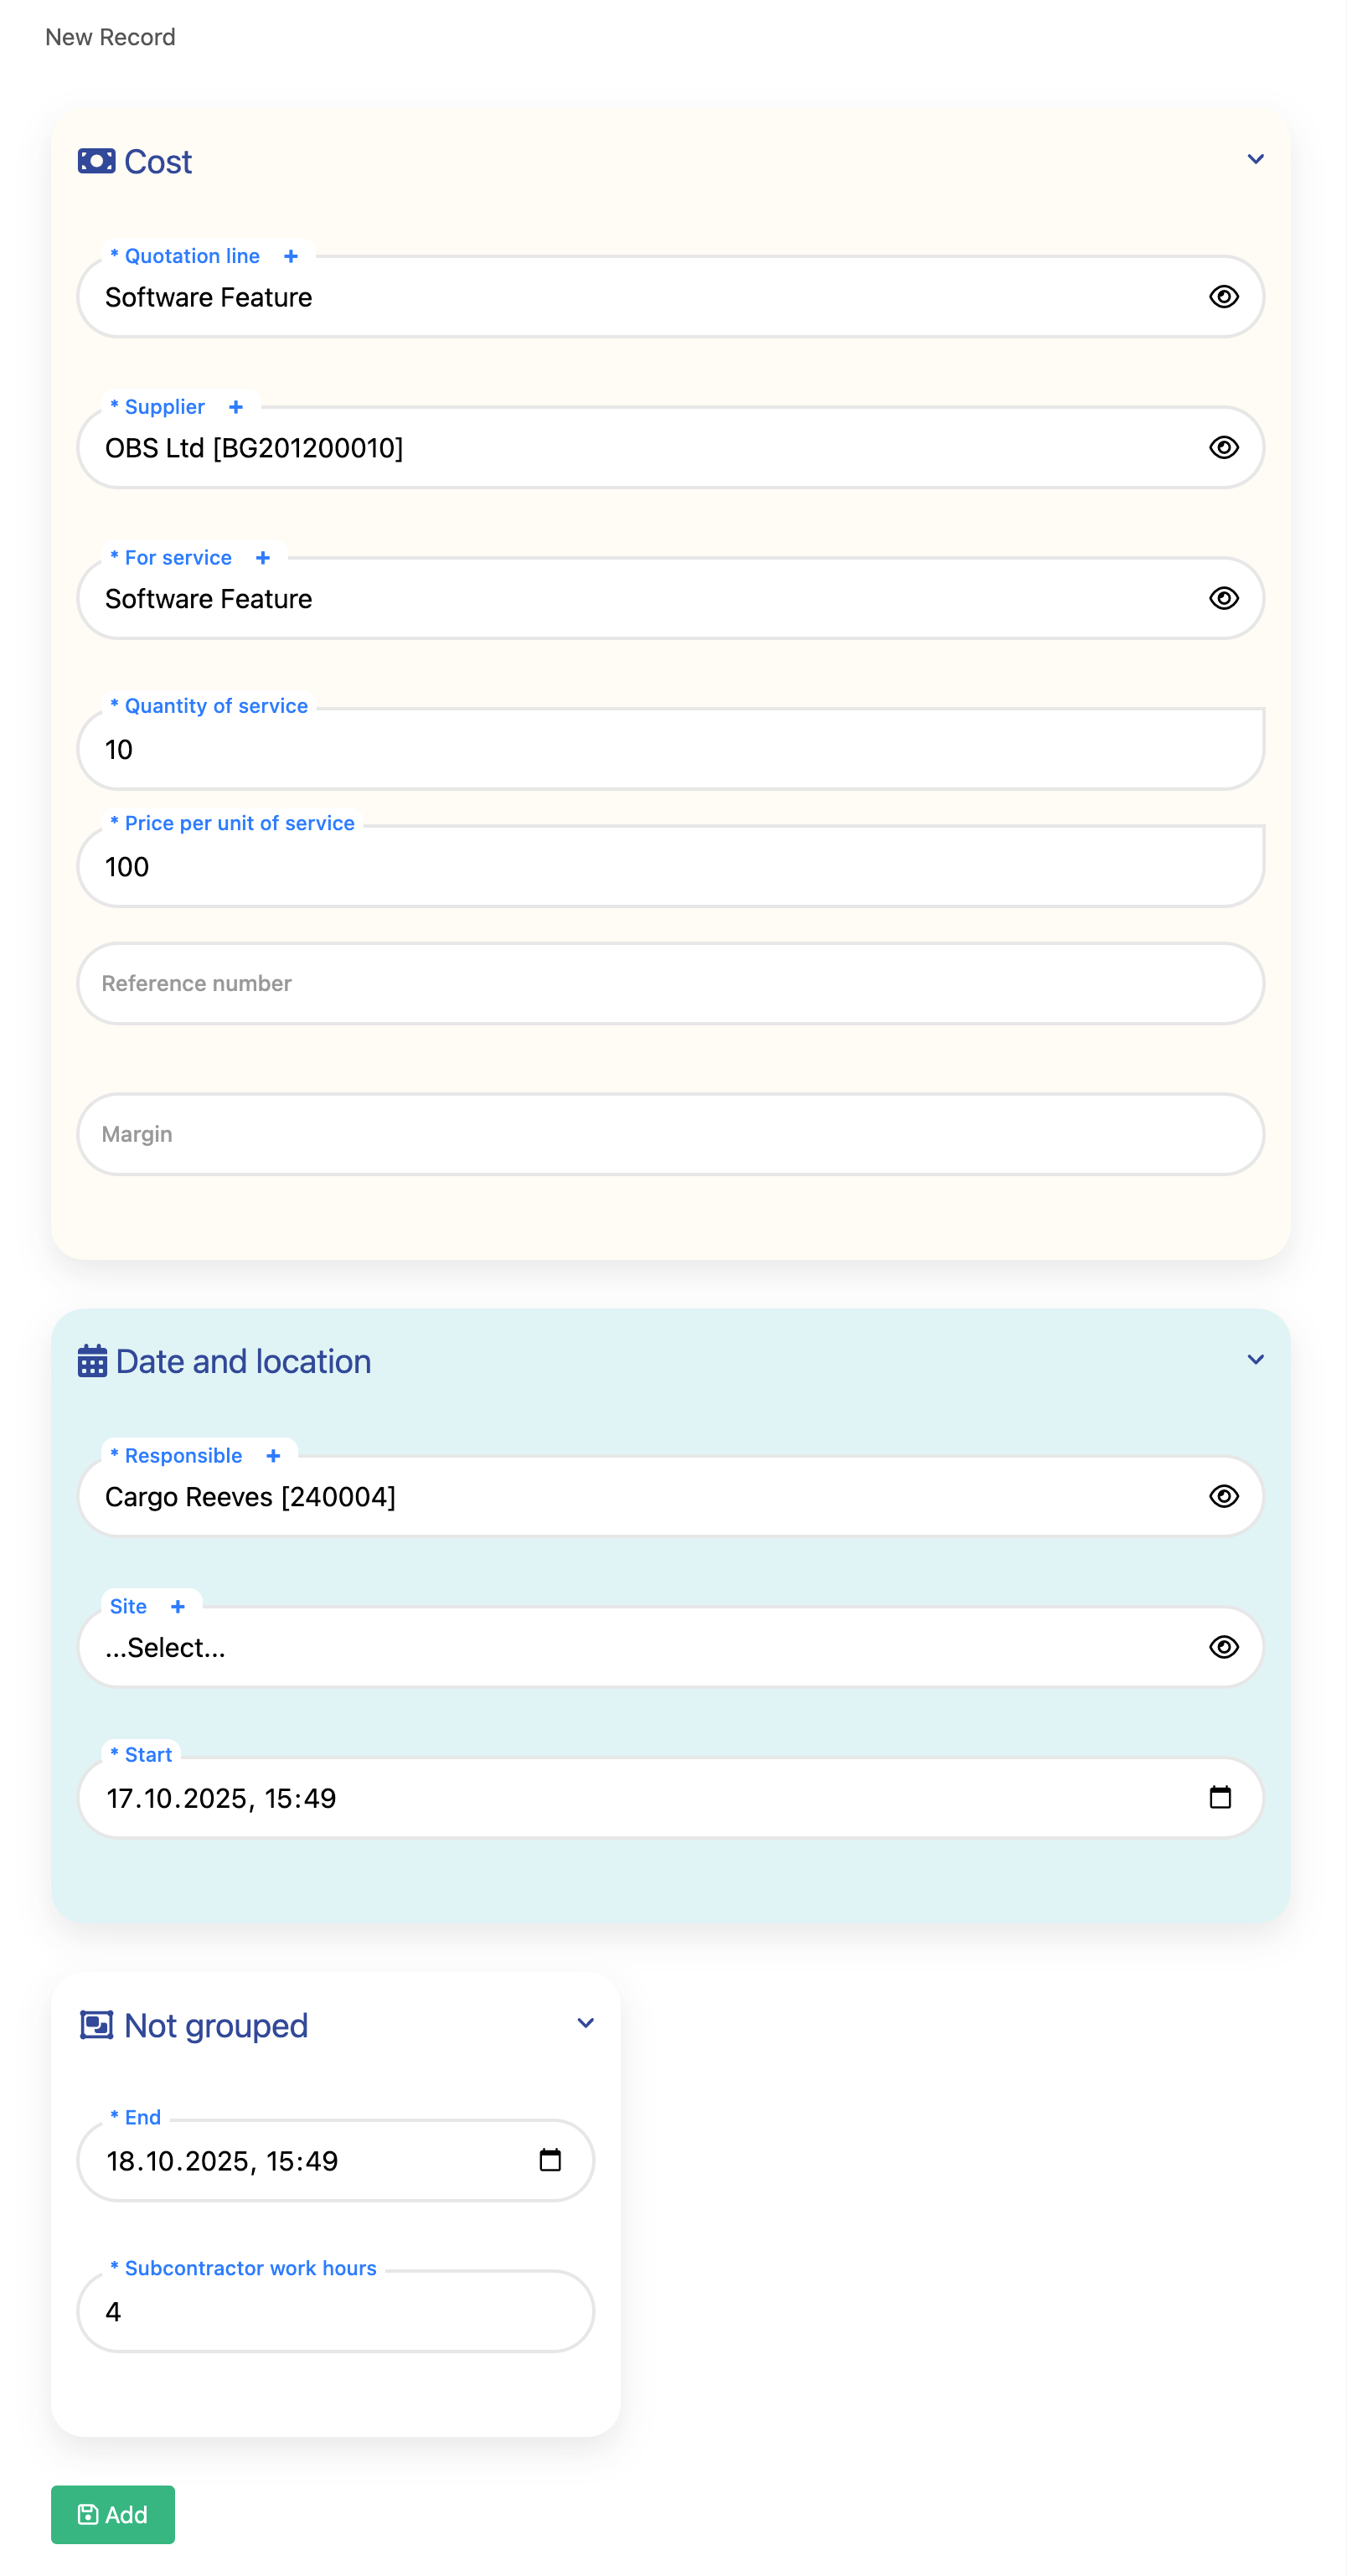
Note: This is an example of a filled subcontracting cost entry. It shows how the fields can be completed to represent a subcontracted service or external expense in the quotation.
After filling in the subcontracting details, click the Add button to create the entry. This will save the subcontracted service as a quotation line and display it in the Subcontracting Cost Table.
After adding the subcontracting cost entry, it will appear in the Subcontracting Cost Table, as shown in the image below.

Next, click on the Working Hours for Implementation submodule to continue with the implementation details of the subcontracted work.
Working Hours for Implementation
After clicking on the Working Hours for Implementation submodule, you will see the form with fields to enter and manage the working hours for the implementation of the subcontracted services. These fields allow you to specify the resources, hours, and associated costs required for the work.
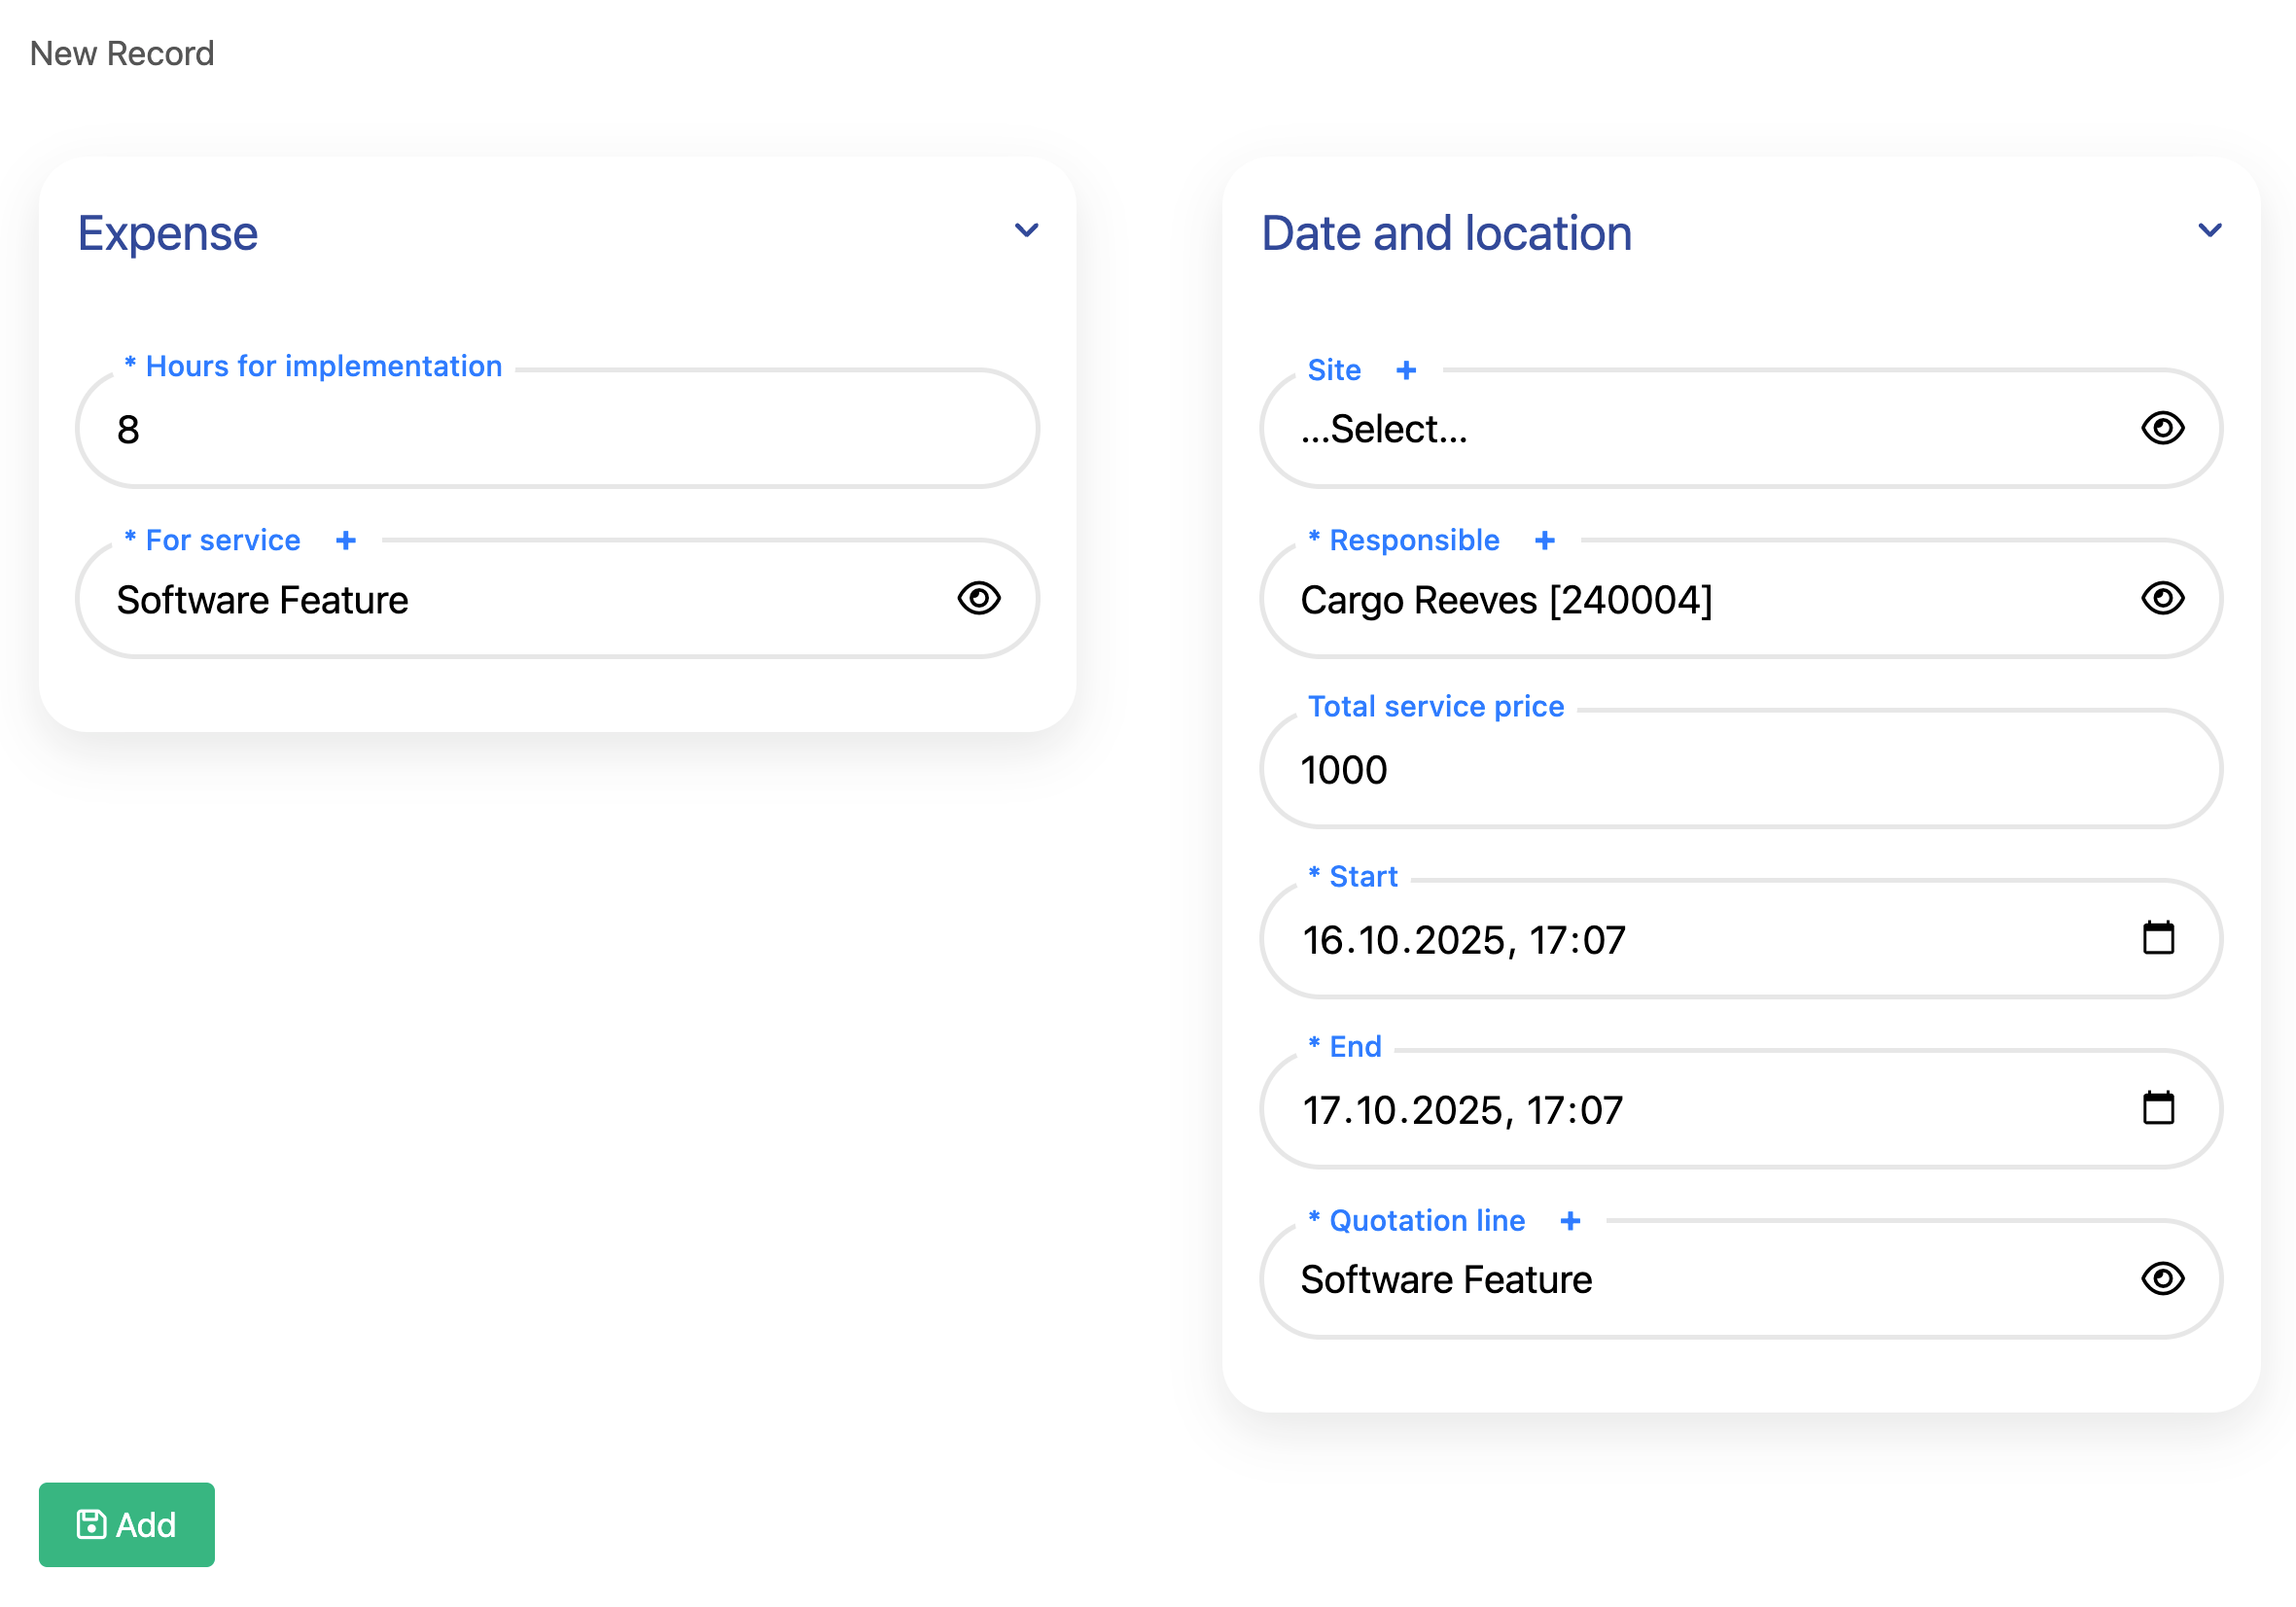
After filling fields in the form, click the Add button.The entry will appear in the Working Hours Table, as shown in the image below.

Once the working hours entry is saved, you can proceed to the final submodule to complete the remaining steps of the quotation process.
Site
After entering the Site submodule, you will see the interface with a single field.This site is just and example which u see in the image.

Once you fill in the field and click the Add button, the entry will appear in the Site Table, allowing you to review and manage site information.

Quotation Lifecycle
The diagram below illustrates the different stages a quotation goes through from creation to completion. Each stage defines a specific state and corresponding action within the project management process.

The stages of the quotation and their descriptions are as follows:
- Draft: The quotation is first created and saved in draft mode. You can freely edit and review it internally before presenting it to the customer.
- Presented: The quotation has been formally shared with the customer. At this stage, you are awaiting their feedback or decision.
- Approved by Customer: Once the customer accepts the quotation, its status changes to Approved by Customer. At this point, a Project is automatically created based on the quotation details, allowing you to continue with project execution.
- Rejected: If the customer declines the quotation, set the status to Rejected. This marks the quotation as inactive and prevents further progress on it.
- Completed: This status is used once the quotation has been fully executed. Before marking it as Completed, you must first create an Invoice and Expense. (These steps will be explained in the next section.)
Managing quotation statuses properly helps maintain a clear and traceable workflow. It ensures every quotation follows the same approval process and is linked correctly to its corresponding project, financial documents, and final reports.
Example: Approved by Customer
The image below shows an example of a quotation that has been Approved by Customer. At this stage, the quotation is confirmed and the system automatically creates a related Project based on the quotation details.

Generating and Printing Offers
Once your offer is fully prepared and reviewed, you can generate a document version for preview, download, or client delivery. To do this, use the Print menu located in the top toolbar of the offer page, as shown in the image below.

When you click the Print button, you’ll see three available options:
- Preview: Displays a quick on-screen preview of the generated offer document. This option is useful for checking formatting, item details, and pricing before finalizing.
- Generate PDF file: Creates a downloadable PDF version of the offer. You can save or send this file directly to the customer as part of your communication or proposal.
- Generate and attach PDF file: Generates a PDF document and automatically attaches it to the offer record in the system. This is ideal when you plan to send the offer for electronic signature (for example, through Evrotrust or another e-signature provider).
Using the Print menu options helps you manage your offers efficiently — whether you need a quick preview, a ready-to-send file, or a version attached for e-signature and record keeping.
Example: Offer Preview
The image below shows an example of the offer preview displayed after selecting the Preview option from the Print menu. This view allows you to review all details before generating or sending the final PDF.

Functions Menu
The Functions menu provides quick access to key actions and additional operations related to your offer. You can find it in the top toolbar of the offer page, next to the Print menu, as shown in the image below.

Each option in the Functions menu performs a specific task related to the offer lifecycle or project connection:
- Open Project: Opens the project automatically created from the offer once it has been Approved by Customer. This allows you to manage all project activities directly from the linked record.
- Create Invoice: Generates an invoice based on the offer’s approved items and amounts. This is typically done before marking the quotation as Completed.
- Create Expense: Allows you to record project-related costs or subcontracting expenses associated with the offer. This ensures that all financial data is accurately tracked.
- Recalculate Amounts: Updates totals and tax values automatically if any items, quantities, or discount details were changed after the offer was created.
- Duplicate: Creates a copy of the current offer with all its details. This is useful when you need to prepare a similar offer for another client or project.
Using the Functions menu simplifies the offer management process by allowing you to generate, update, or connect documents and projects without leaving the current page.
