Project Management
/Project Management
Project Management
OBS ERP offers the capability to create projects, guiding users through the project creation process. Once a project is created, it can be used to generate tasks for the corresponding project.
Projects
Steps for Creating a Project:
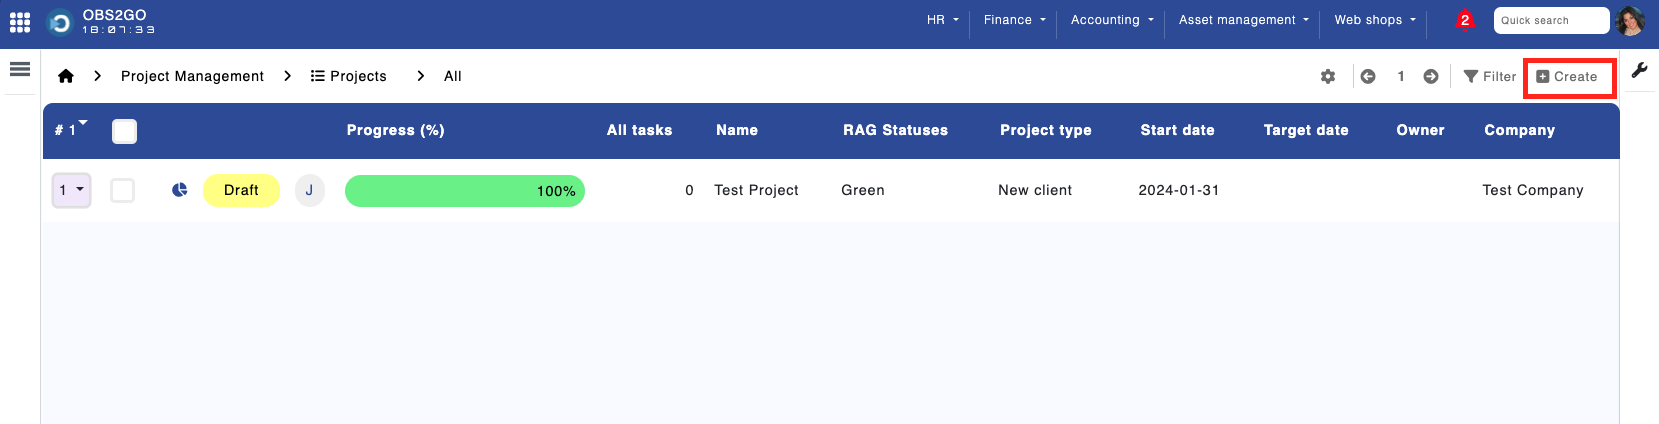
1. First, navigate to the Projects module.
2. Click the 'Create' button located at the top-right corner of the screen.
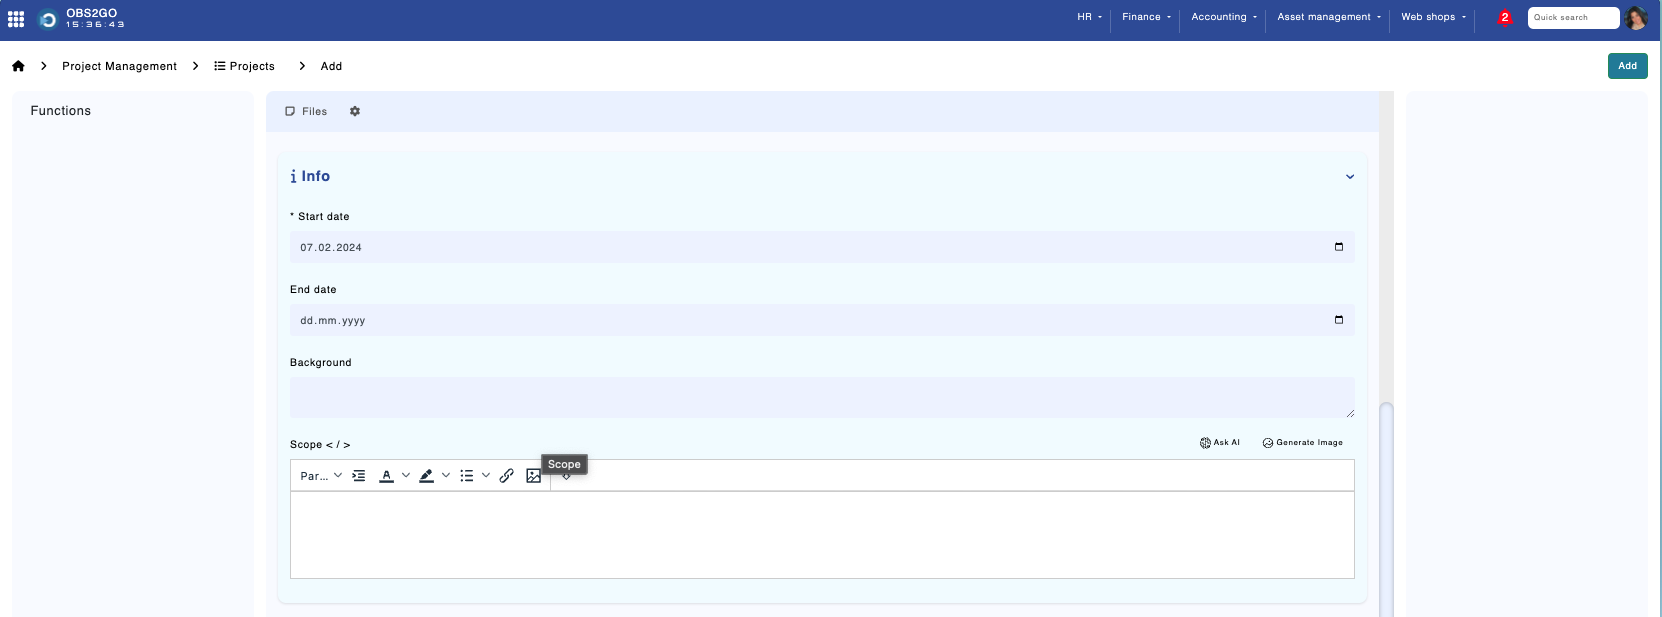
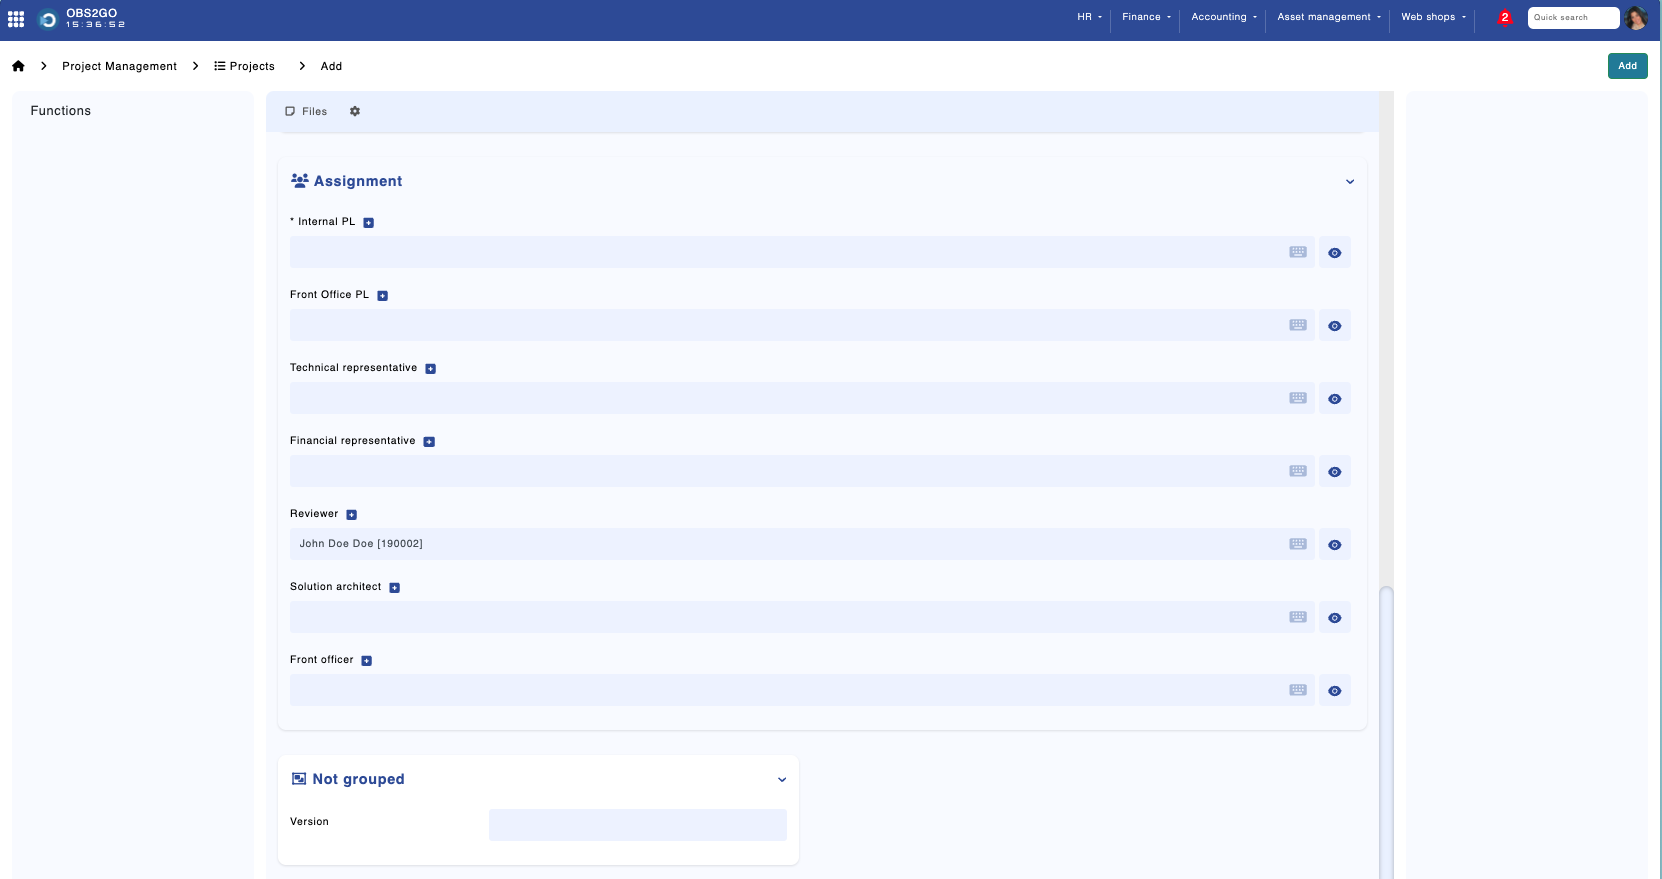
3. A form will appear, prompting you to enter all the necessary information for the project.
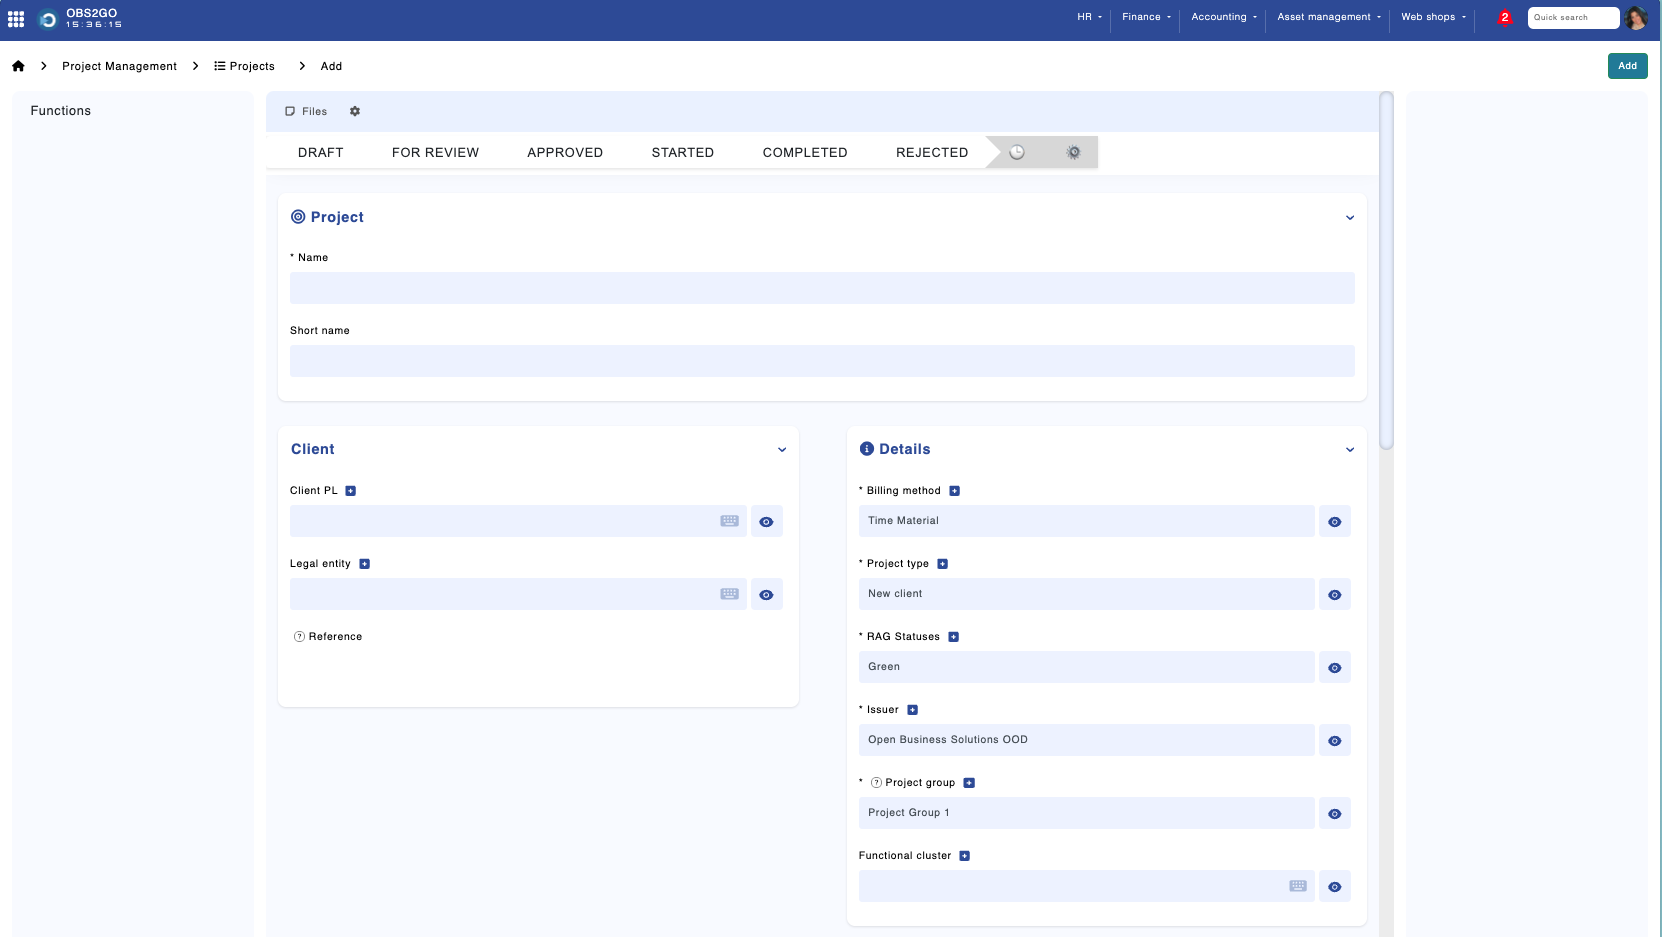
Module Projects / Create
4. After filling in the necessary information, click the 'Add' button to create the project.
Once your project is created, it will appear in your project list, accompanied by a progress indicator. This progress is represented as a percentage in the table and will update automatically based on the tasks assigned to the project. Here's how it works:
- Progress Calculation: The progress percentage reflects the completion status of all tasks associated with the project. As you complete tasks and update their status, the project's overall progress percentage will adjust accordingly.
- Monitoring Progress: You can monitor the progress of your project directly from the projects table. This visual indicator helps you quickly assess how far along the project is and what remains to be done.
This dynamic progress tracking feature ensures that you always have a clear and current view of each project's advancement, facilitating better management and coordination of your efforts.
WBS Task Manager
The WBS Task Manager is a powerful tool inside OBS ERP that allows you to plan, organise, and track all tasks related to a project using a hierarchical Work Breakdown Structure (WBS). Tasks are arranged in a tree-like structure where each task can have sub-tasks, making it easy to break down complex projects into manageable pieces.
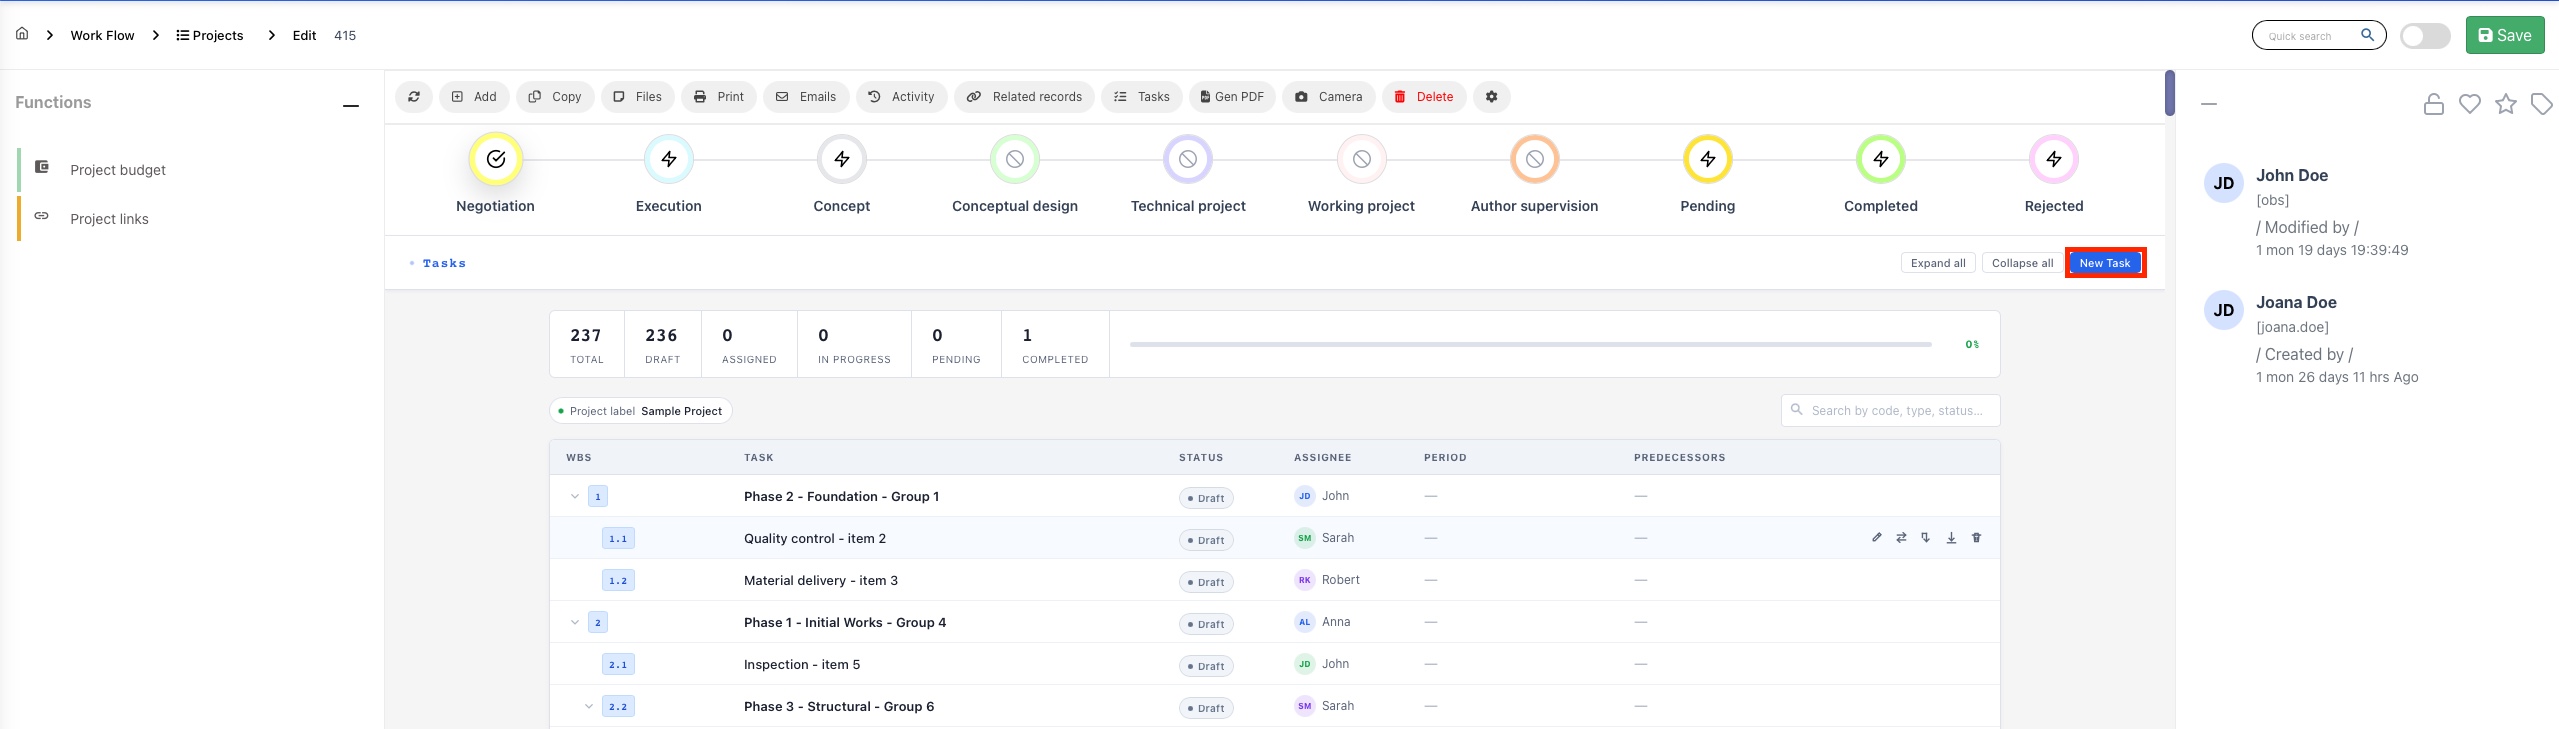
Overview of the Task Table
When you open the WBS Task Manager for a project, you will see a table listing all tasks. Each row in the table represents a single task and contains the following columns:
- WBS: The hierarchical code of the task (e.g. 3.1.2). Tasks with child tasks have a collapse/expand arrow next to their code.
- Task: The name of the task. Parent tasks are displayed in bold to distinguish them from child-only tasks.
- Status: A colour-coded badge showing the current status of the task (e.g. Draft, Assigned, In Progress, Pending, Completed).
- Assignee: The team member responsible for the task, shown with their initials avatar and first name.
- Period: The planned start and end dates for the task. A dash (—) means no dates have been set yet.
- Predecessors: Any tasks that must be completed before this task can begin.
- Actions: A set of buttons to edit, reposition, add a child task, insert a task below, or delete the task.
At the top of the table you will find a stats bar showing a summary of all tasks: the total count and how many are in each status (Draft, Assigned, In Progress, Pending, Completed), along with an overall progress bar reflecting the percentage of completed tasks.
You can also use the Search field in the toolbar to filter tasks by their WBS code, type, or status. The toolbar also has Expand All and Collapse All buttons to quickly show or hide all child tasks at once.
Creating a New Task
You can create a new task in two ways:
- From the toolbar: Click the 'New Task' button at the top-right corner of the screen. This will create a root-level task at the top of the hierarchy.
- From the actions column: Each existing task has two quick-add buttons:
- The Add Child button creates a new task nested inside the selected task.
- The Insert Below button creates a new task at the same level, placed directly after the selected task.
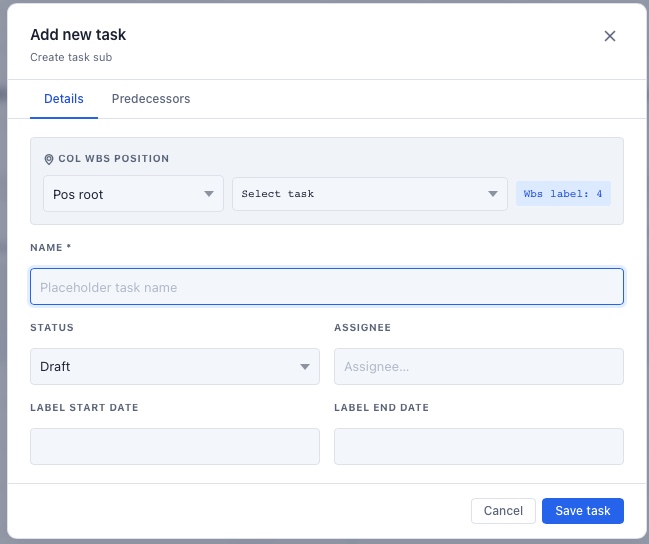
In all cases, a modal window will appear with the following tabs:
Tab 1 — Details
This is the main tab where you fill in the task information:
- Position: At the top of the form you will see a position selector. This lets you define where in the WBS hierarchy the task will be placed. You can choose:
- Root — place the task at the top level of the project.
- Child of — place the task as a sub-task of another task you select.
- After — place the task directly after another task you select, at the same level.
- Before — place the task directly before another task you select, at the same level.
- Name: The title of the task. This is a required field.
- Status: Choose from Draft, Assigned, In Progress, Pending, Completed, Testing, or Unifying.
- Assignee: Search for and select the team member responsible for this task.
- Start Date / End Date: Optionally set the planned period for the task using the date pickers.
Tab 2 — Predecessors
This tab allows you to define which tasks must be finished (or started) before this task can begin. Click the 'Add predecessor' button to add a new predecessor entry. Each predecessor is defined by:
- WBS code of the predecessor task (e.g. 3.1.1.6.4).
- Relation type — how the two tasks are linked:
- FS (Finish to Start): The predecessor must finish before this task can start.
- SS (Start to Start): The predecessor must start before this task can start.
- FF (Finish to Finish): The predecessor must finish before this task can finish.
- SF (Start to Finish): The predecessor must start before this task can finish.
- Lag (optional): A delay in days added after the relation. For example, writing FS+5d means the task can start 5 days after the predecessor finishes.
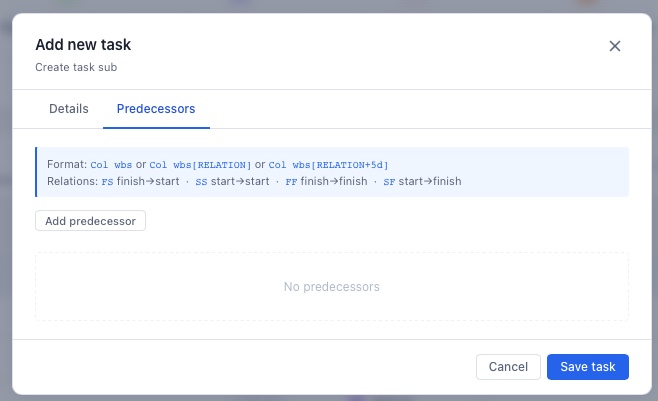
Predecessor tags will appear in the Predecessors column of the task table once saved.
Once all information is filled in, click 'Save task' to create the task. The table will refresh and the new task will appear at the position you defined, with its WBS code automatically assigned.
Editing an Existing Task
To edit a task, click the Edit button (pencil icon) in the actions column of the task row. The same modal window used for creating tasks will open, but this time it will be pre-filled with the current information of the task — its name, status, assignee, dates, and predecessors.
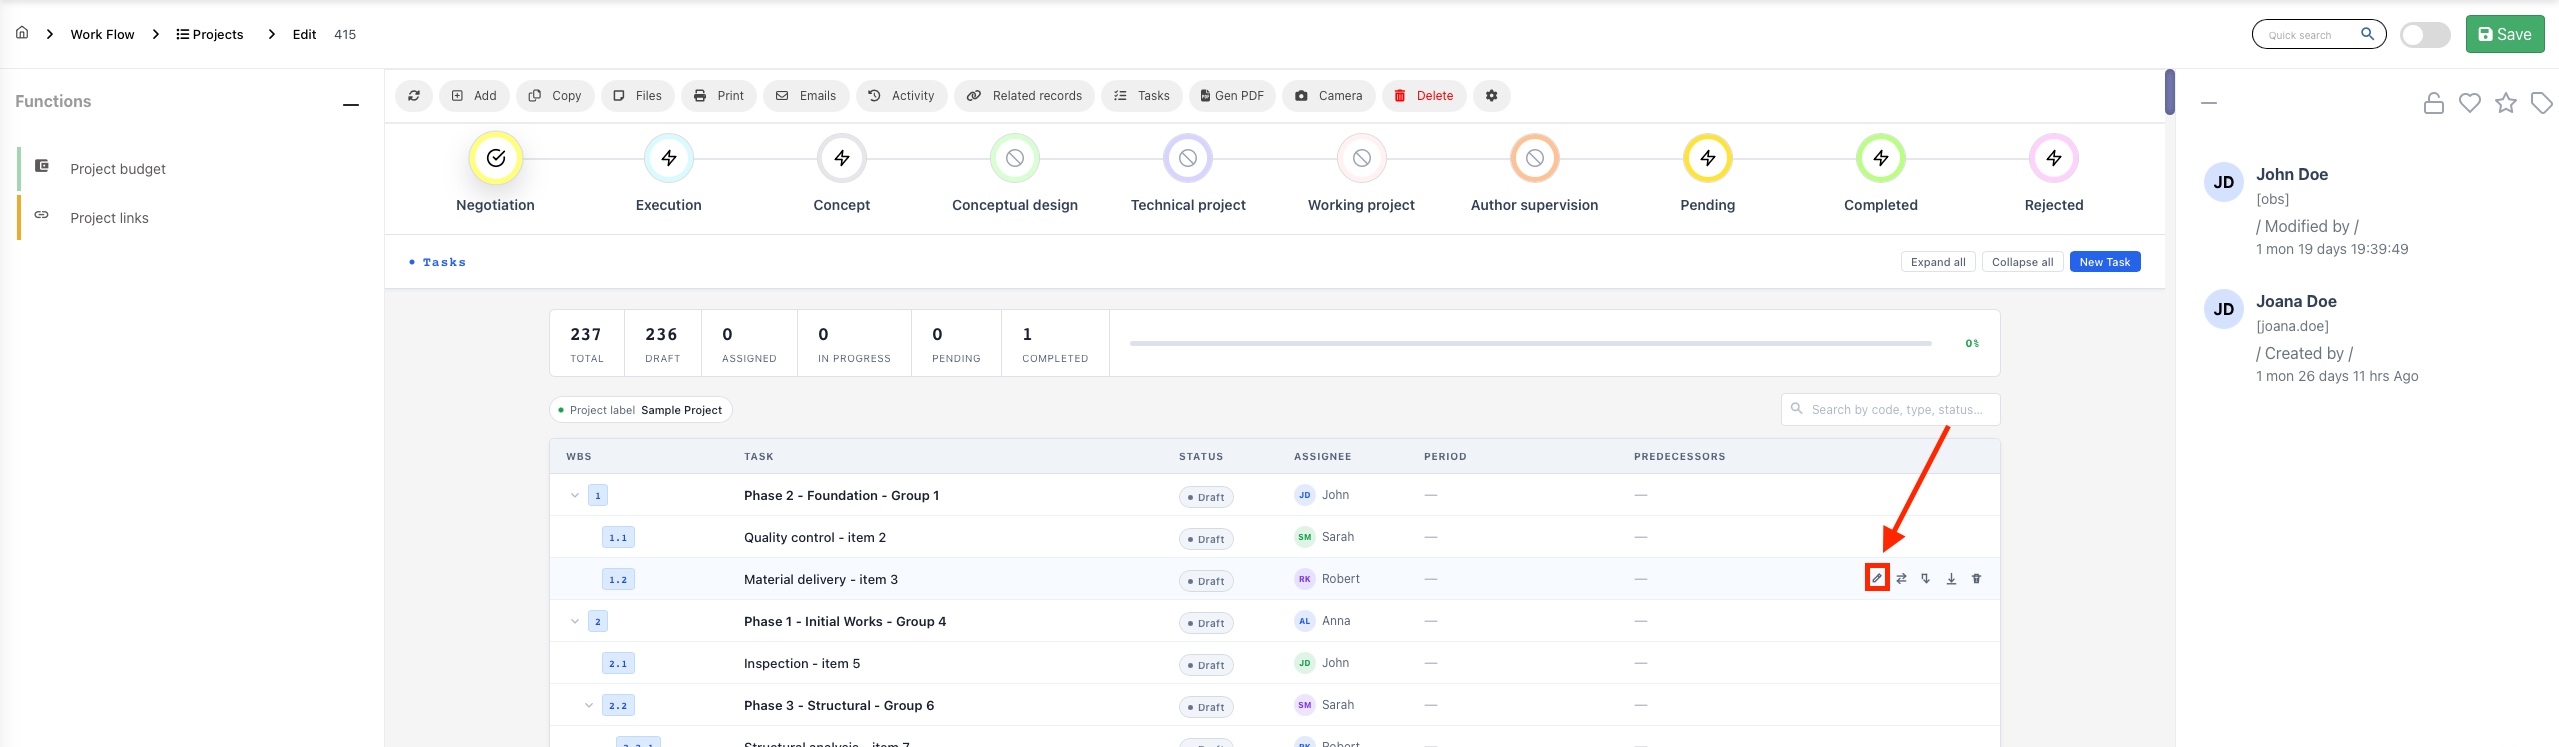
You can update any of the fields across the Details and Predecessors tabs. When you are done making changes, click 'Save task' to apply them.
When editing, a third tab becomes available:
Tab 3 — Reposition
The Reposition tab allows you to move a task (and all of its sub-tasks) to a different place in the WBS hierarchy without deleting and recreating it. This is useful when the project structure changes or tasks need to be reorganised.
Steps to reposition a task:
1. Open the edit modal for the task you want to move.
2. Switch to the Reposition tab. You will see the task's current WBS code displayed on the left.
3. Use the position type selector to choose where you want to move the task: as a root task, as a child of another task, after a task, or before a task.
4. Use the reference task dropdown to select which task you are positioning relative to.
5. A preview of the new WBS code will appear on the right side of the panel.
6. Click 'Apply move' to confirm. The task and all its children will be moved to the new location and their WBS codes will be updated automatically.
Note: If the task you are moving has child tasks, all of them will be moved together, preserving the sub-hierarchy.
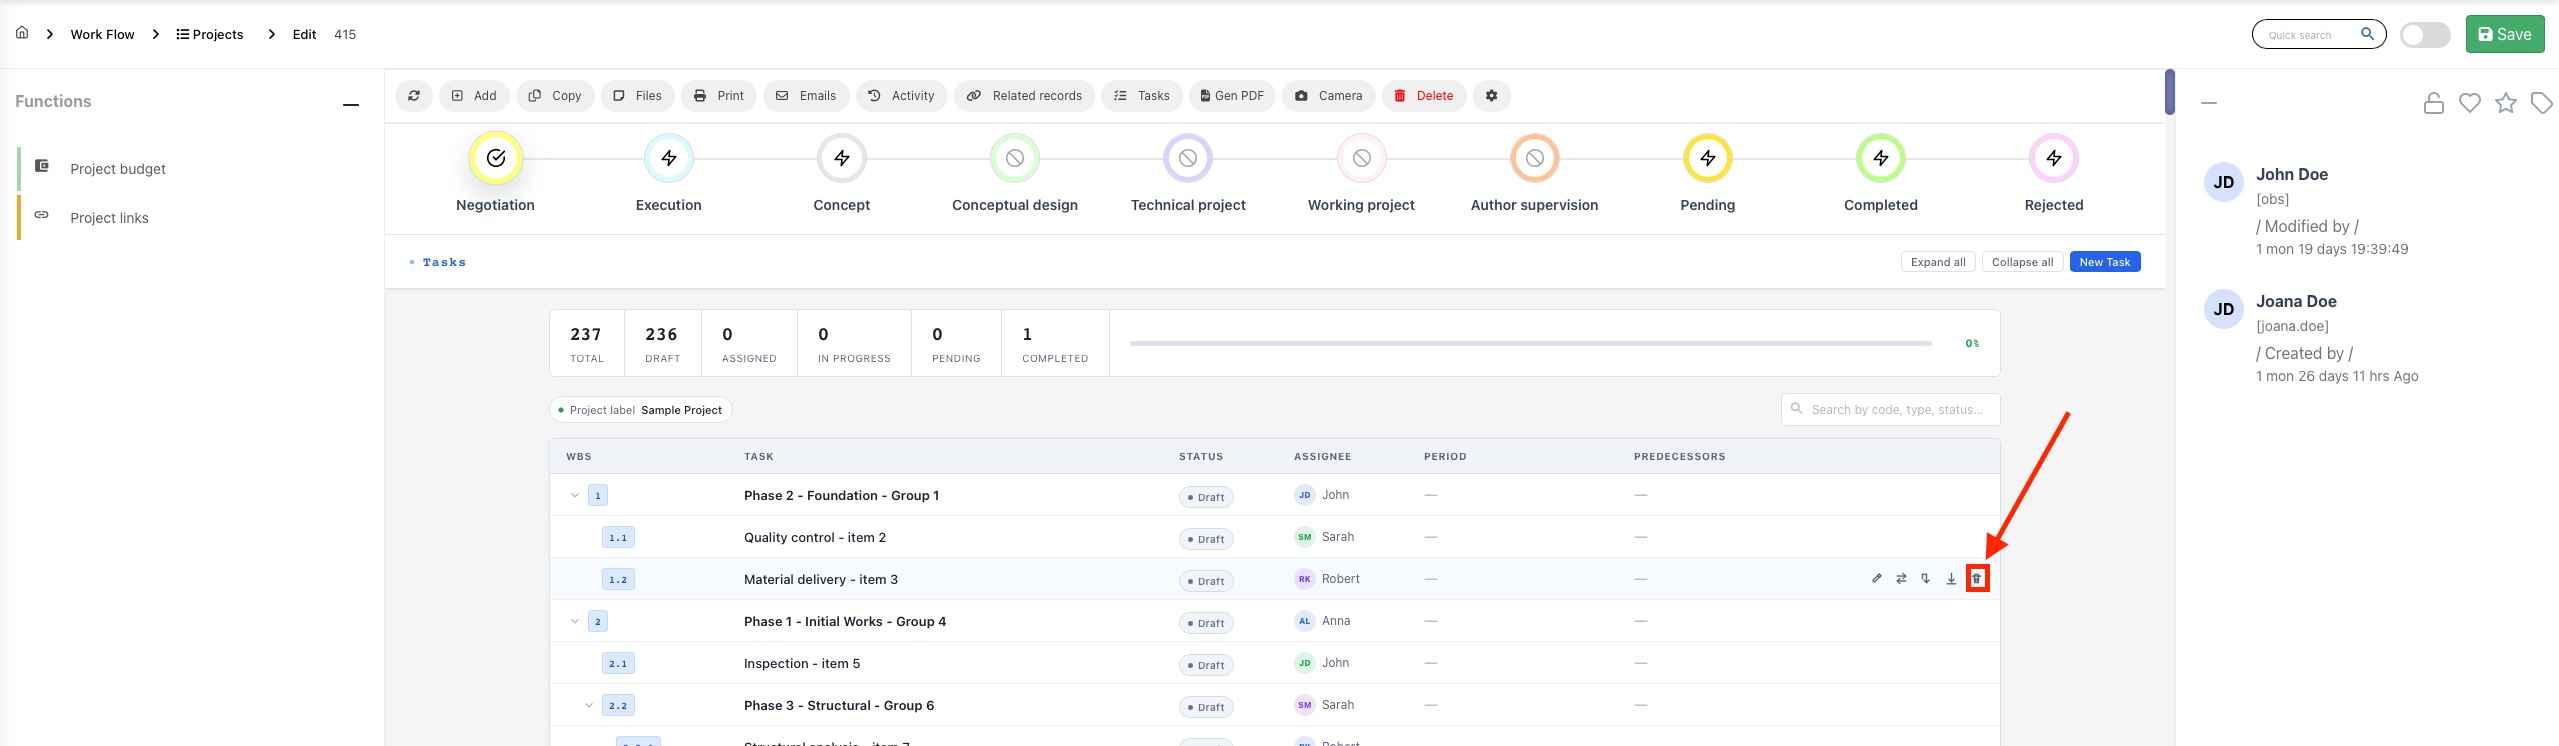
Deleting a Task
To delete a task, click the Delete button (trash icon) in the actions column of the task row. A confirmation prompt will appear before the task is permanently removed.
Note: Deleting a parent task will also delete all of its child tasks. This action cannot be undone, so please proceed with care.
Task Statuses
Each task has a status that reflects its current state. The available statuses are:
- Draft: The task has been created but work has not started yet.
- Assigned: The task has been assigned to a team member.
- In Progress: Work on the task is actively ongoing.
- Pending: The task is waiting on something before it can continue, such as a decision or a predecessor task.
- Completed: The task has been finished. Completed tasks contribute to the overall project progress percentage.
- Testing: The task is in a testing or review phase.
- Unifying: The task is in a consolidation or integration phase.
The stats bar at the top of the task table always shows a live count of tasks per status, giving you an at-a-glance overview of the project's current state.
Expanding and Collapsing Tasks
Tasks that have child tasks display a small arrow icon next to their WBS code. Clicking this arrow will collapse or expand the list of children under that task.
To manage all tasks at once, use the buttons in the top toolbar:
- Expand All: Shows every task and sub-task in the table.
- Collapse All: Hides all child tasks, showing only the top-level tasks.