Project Management
/Offers
Offers
The Offers module allows you to create, organize and track all client quotations in a single system. From drafting detailed proposals to generating branded PDF documents, the module ensures that each offer is professional, well-structured and linked to the relevant project or contract. By keeping the process centralized, teams can respond faster and maintain a clear record of all client interactions.
How to Access the Offers Module
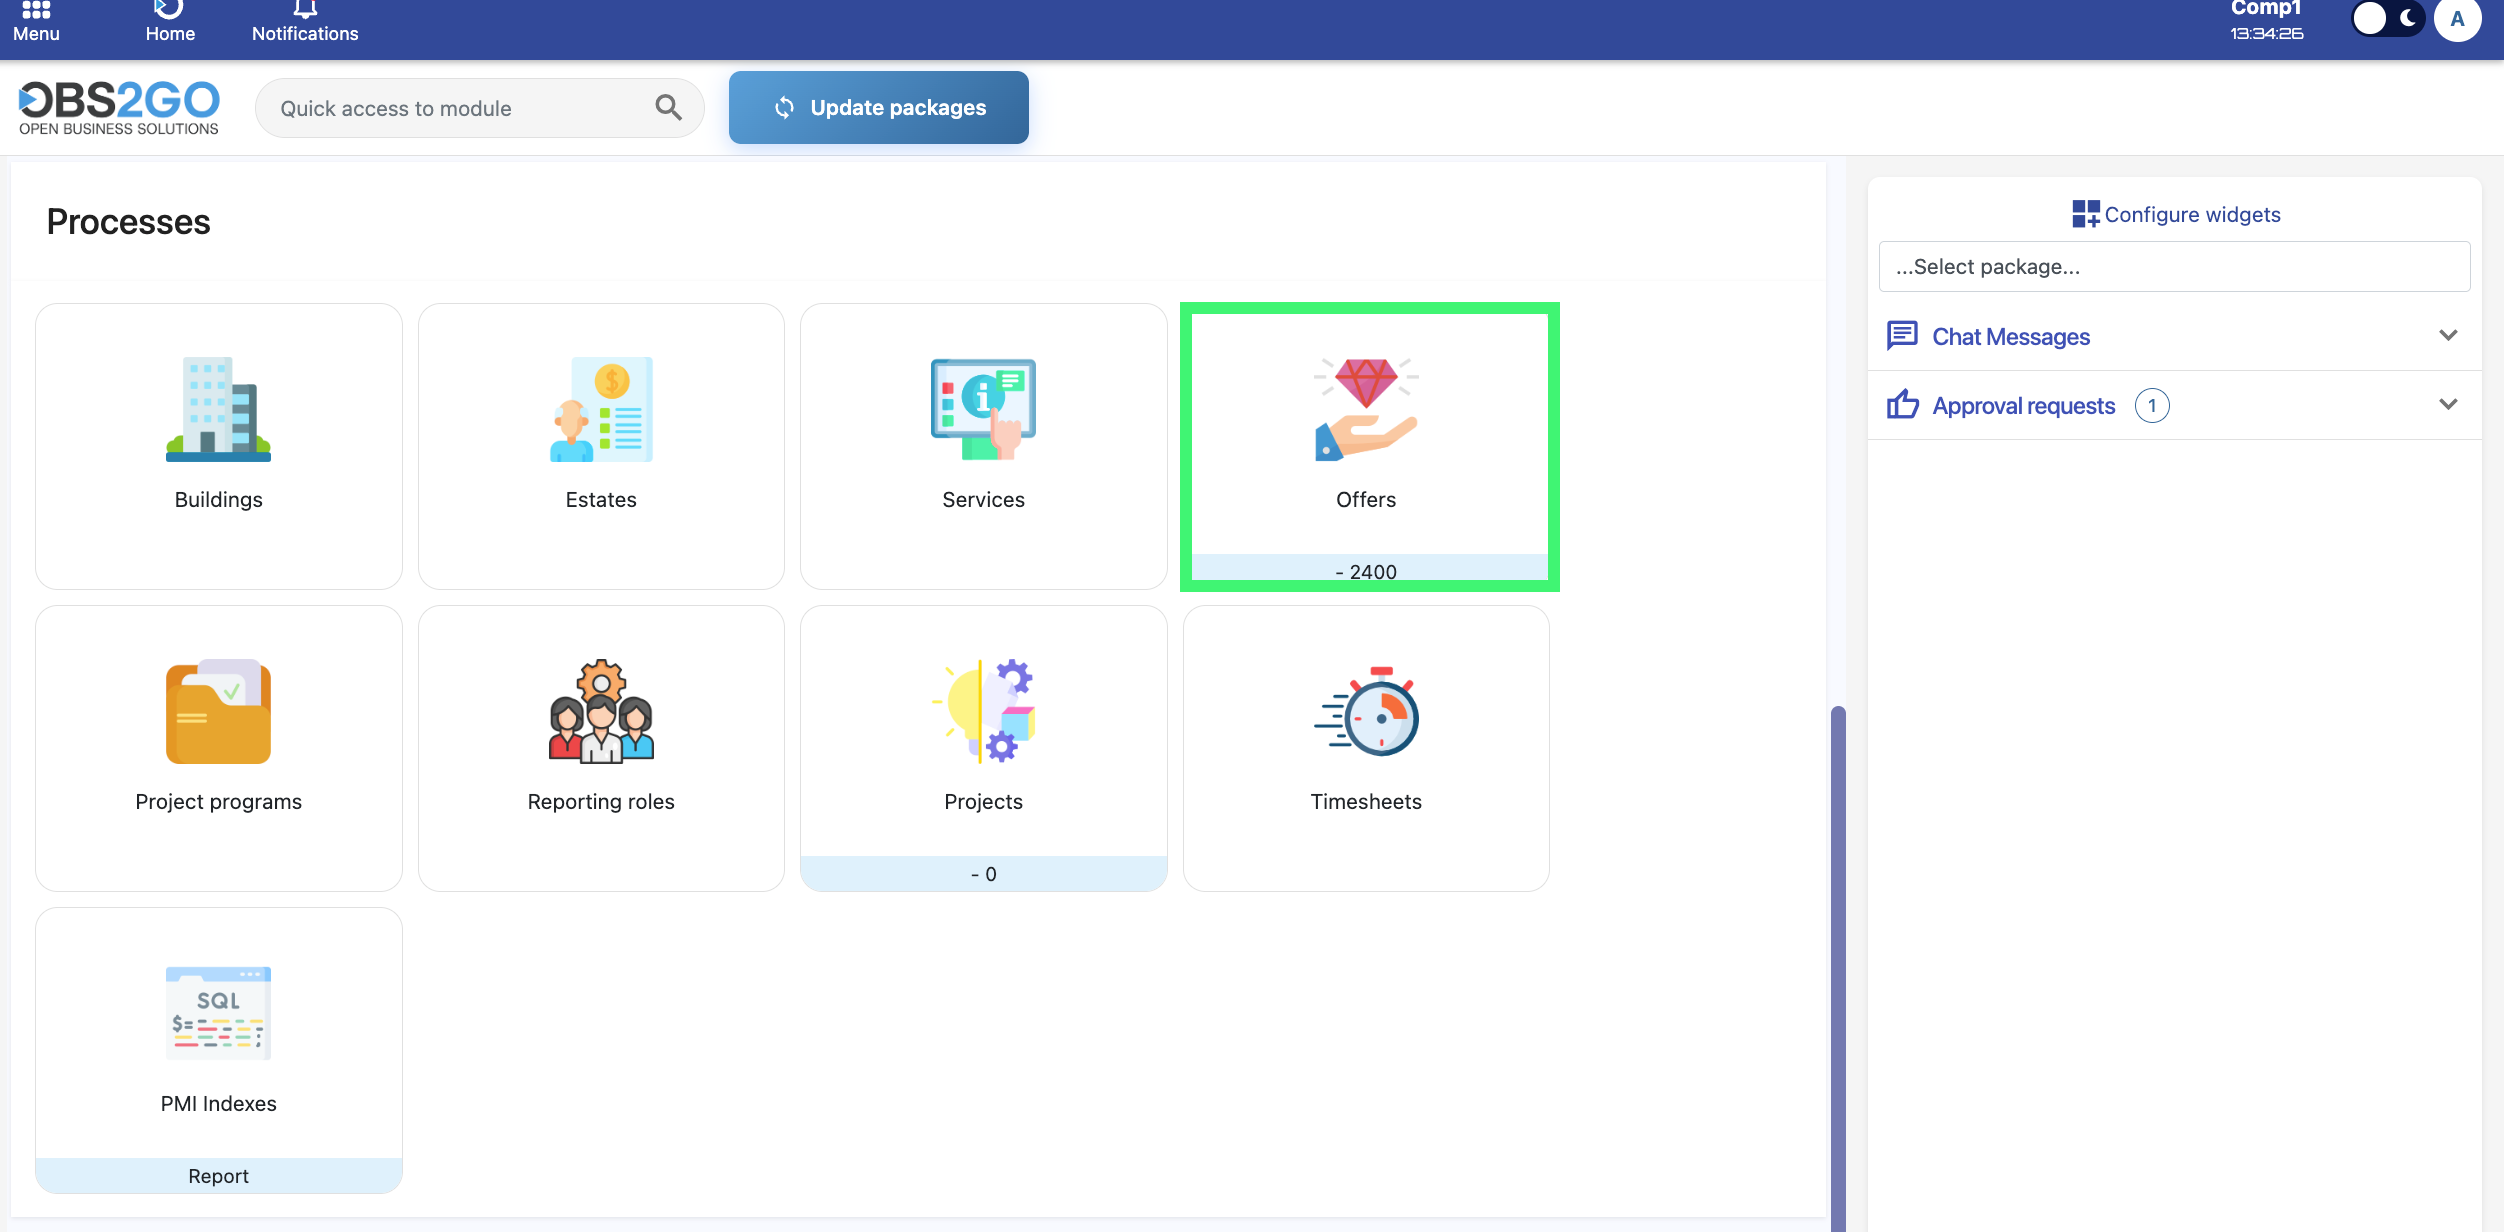
- Select the Offers module from the Processes menu.
- The Offers module page will open, showing all existing offers and options to create new ones.
Location: Home screen
Creating a New Offer
To create a new offer, click the Create button on the Offers module page. This opens a form where you can enter all required details for the quotation.
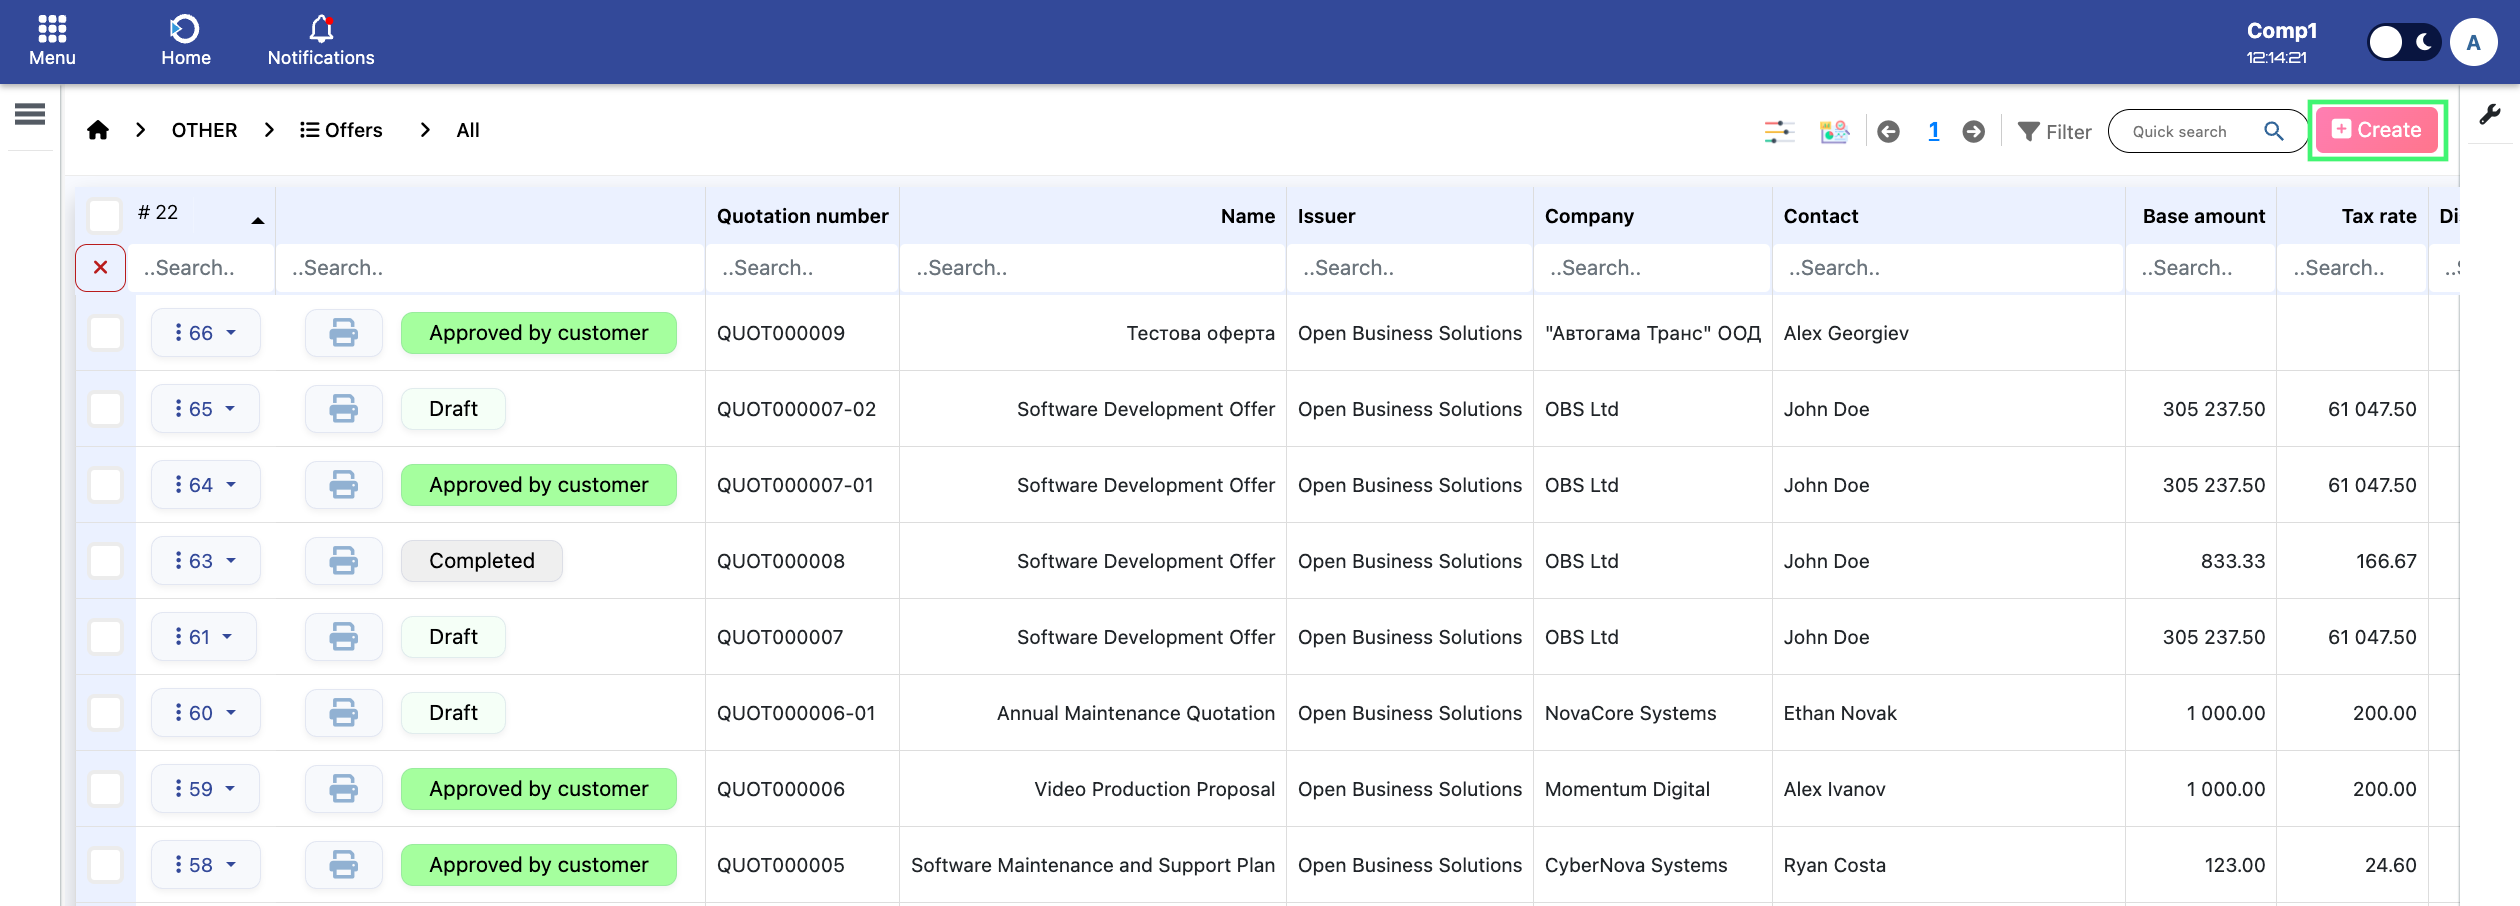
Location: Home screen > Offers
Main Form Fields
- Company: Select the company for which the offer is created.
- Contact: After selecting a company, the dropdown will display only the contacts linked to that company.
- Offer Name: Enter the offer’s title or internal reference name.
- Quotation Number: Generated automatically by the system for each new offer.
- Purchase Order: Connects the offer to an existing or future purchase order.
- Type: Indicates the kind of quotation being created.
- Sales Specialist: The employee responsible for preparing and managing the quotation.
- Date: Creation date, filled automatically but adjustable if needed.
- Valid To: Expiration date of the quotation.
- Date of Event: Start date of the related event or project, if applicable.
- End Date: End date for the event, project, or service related to the offer.
Location: Home screen > Offers > Add
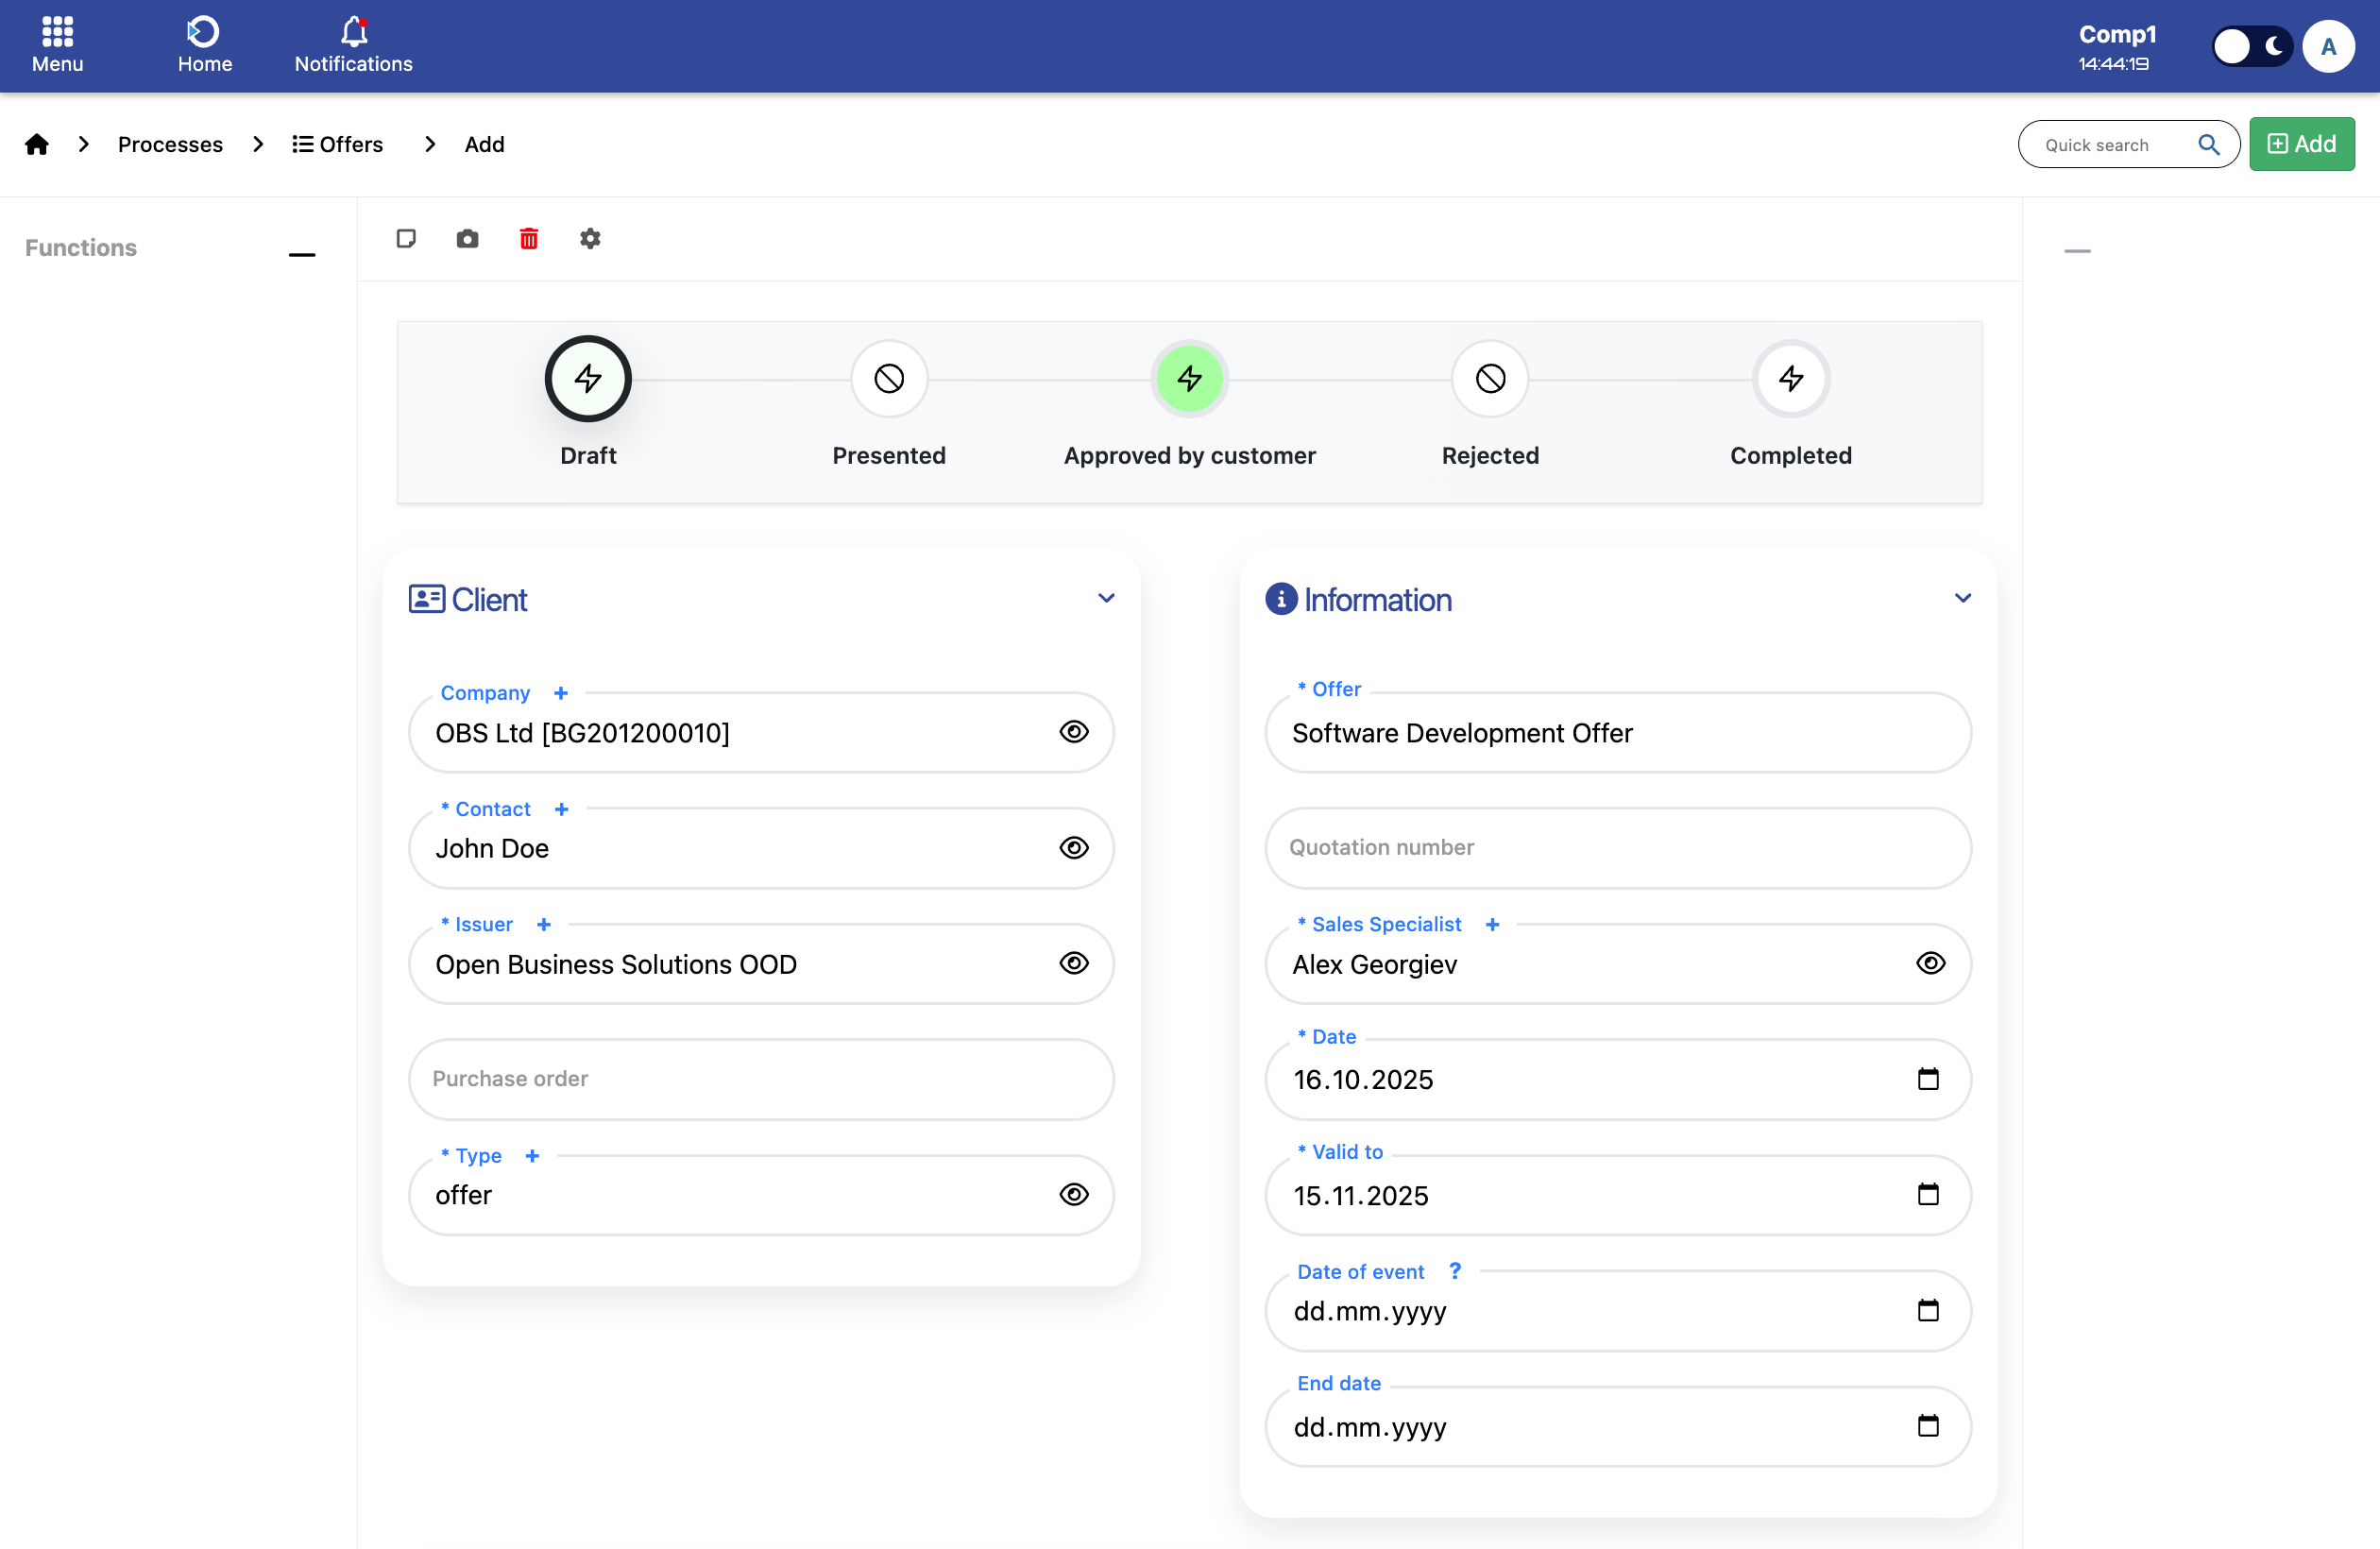
The image is showing how the form appears in the system.
- Enter the main information about the offer, including details for the customer and any internal notes if needed.
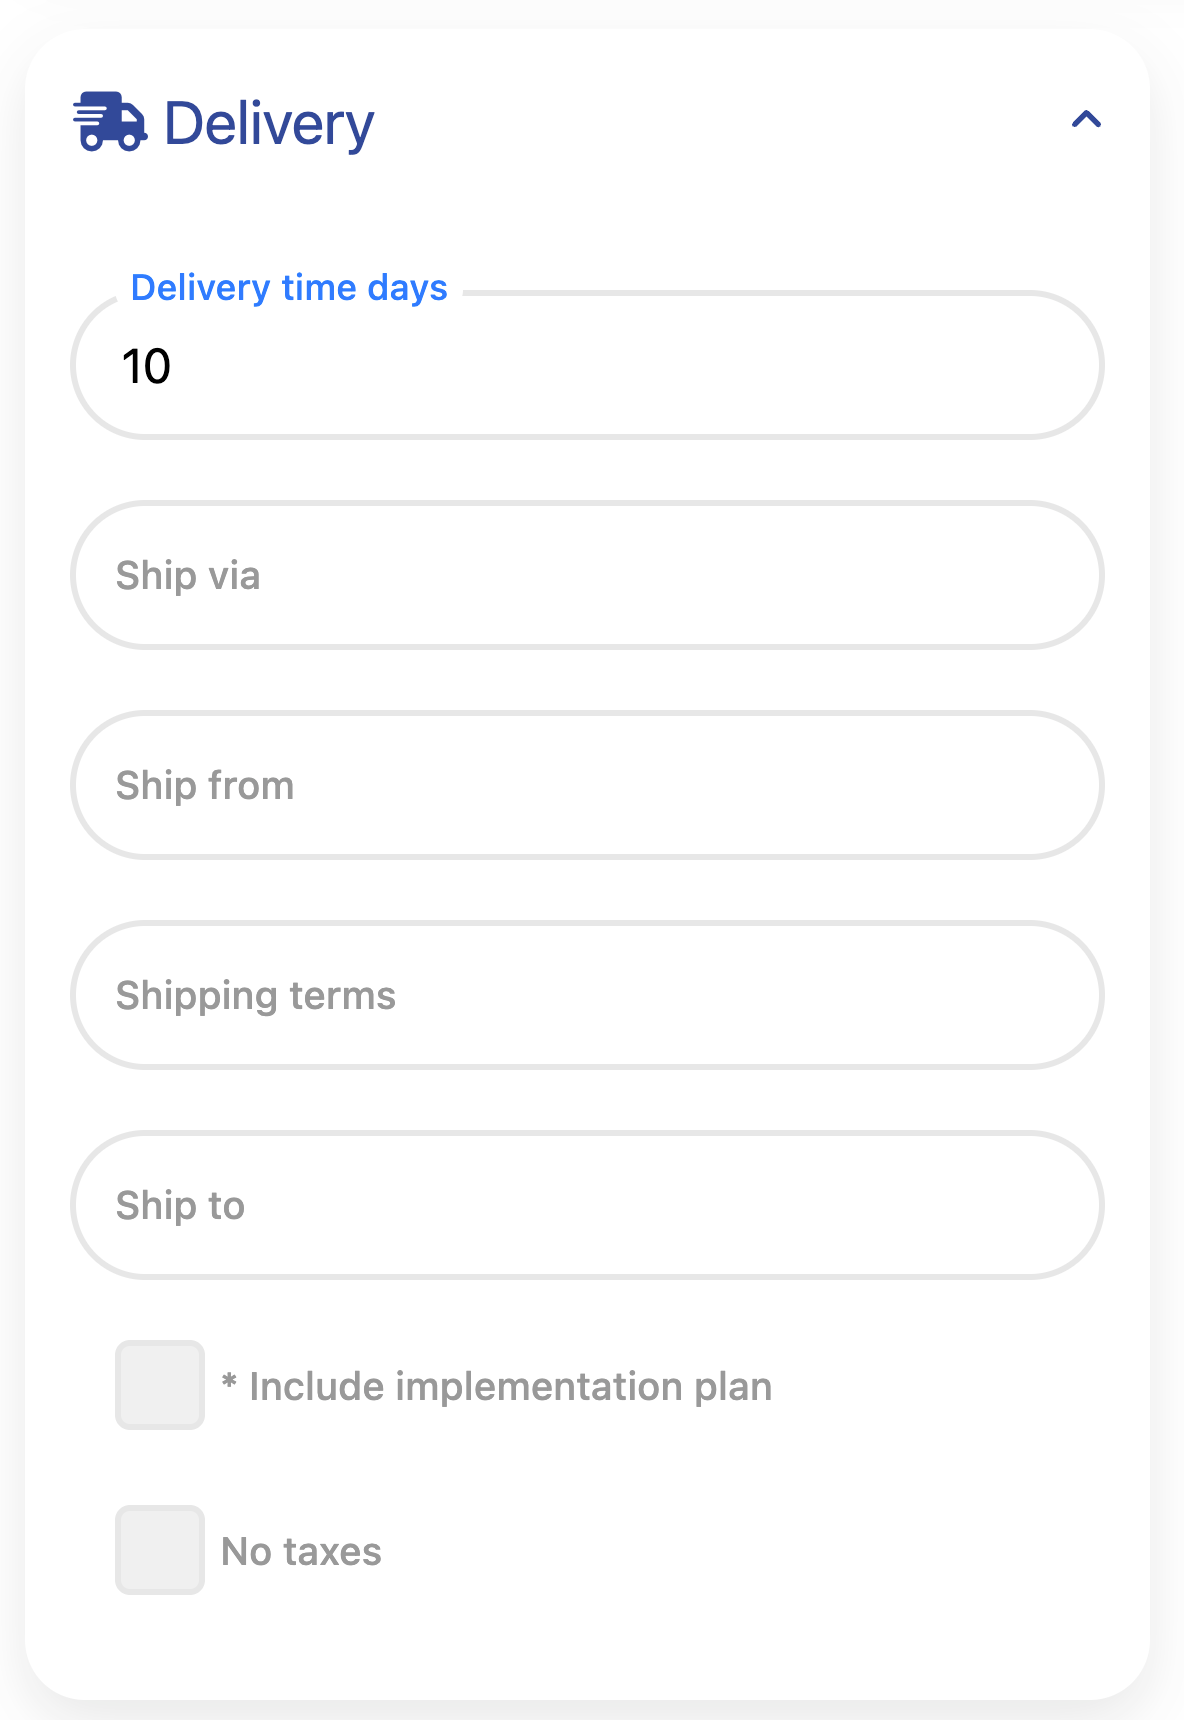
- Provide key delivery information such as estimated delivery time, shipping method, and destination. Include implementation details if the offer requires a delivery or setup plan.

- Select the Currency for the offer, choose the applicable Tax rate, and define how taxes are applied using the Taxes field (options: Tax included, Tax exempt, or Tax excluded).
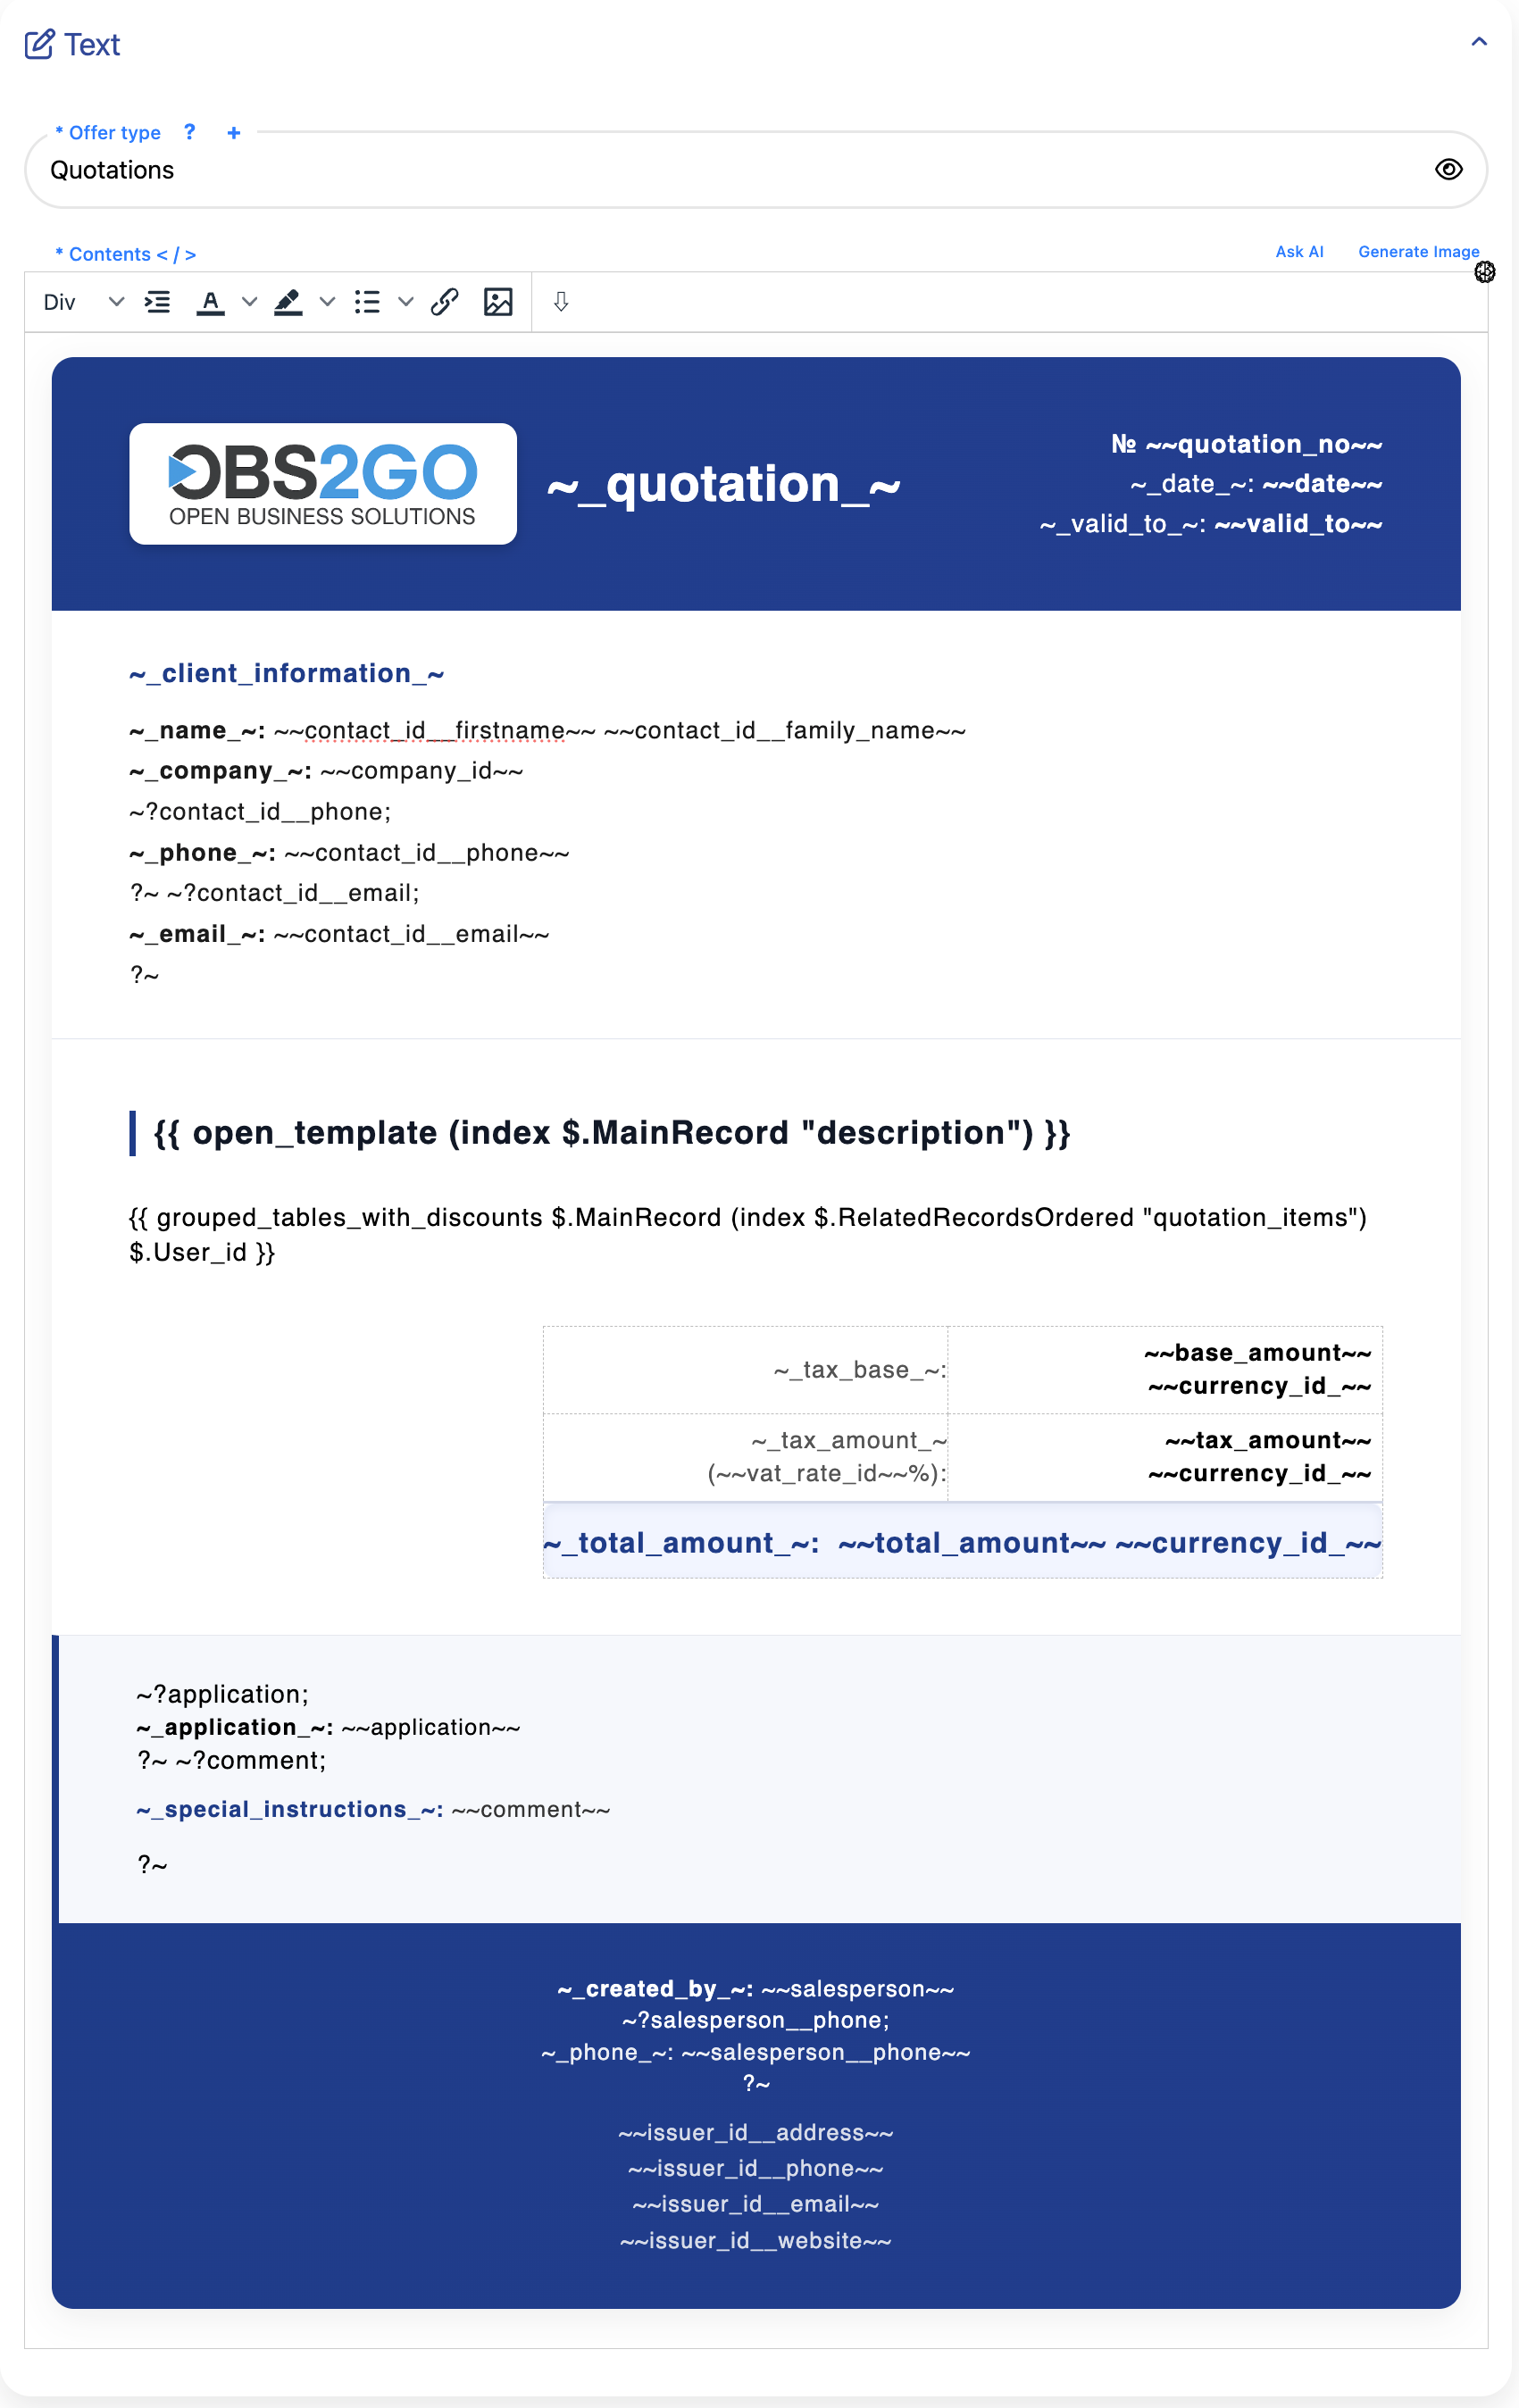
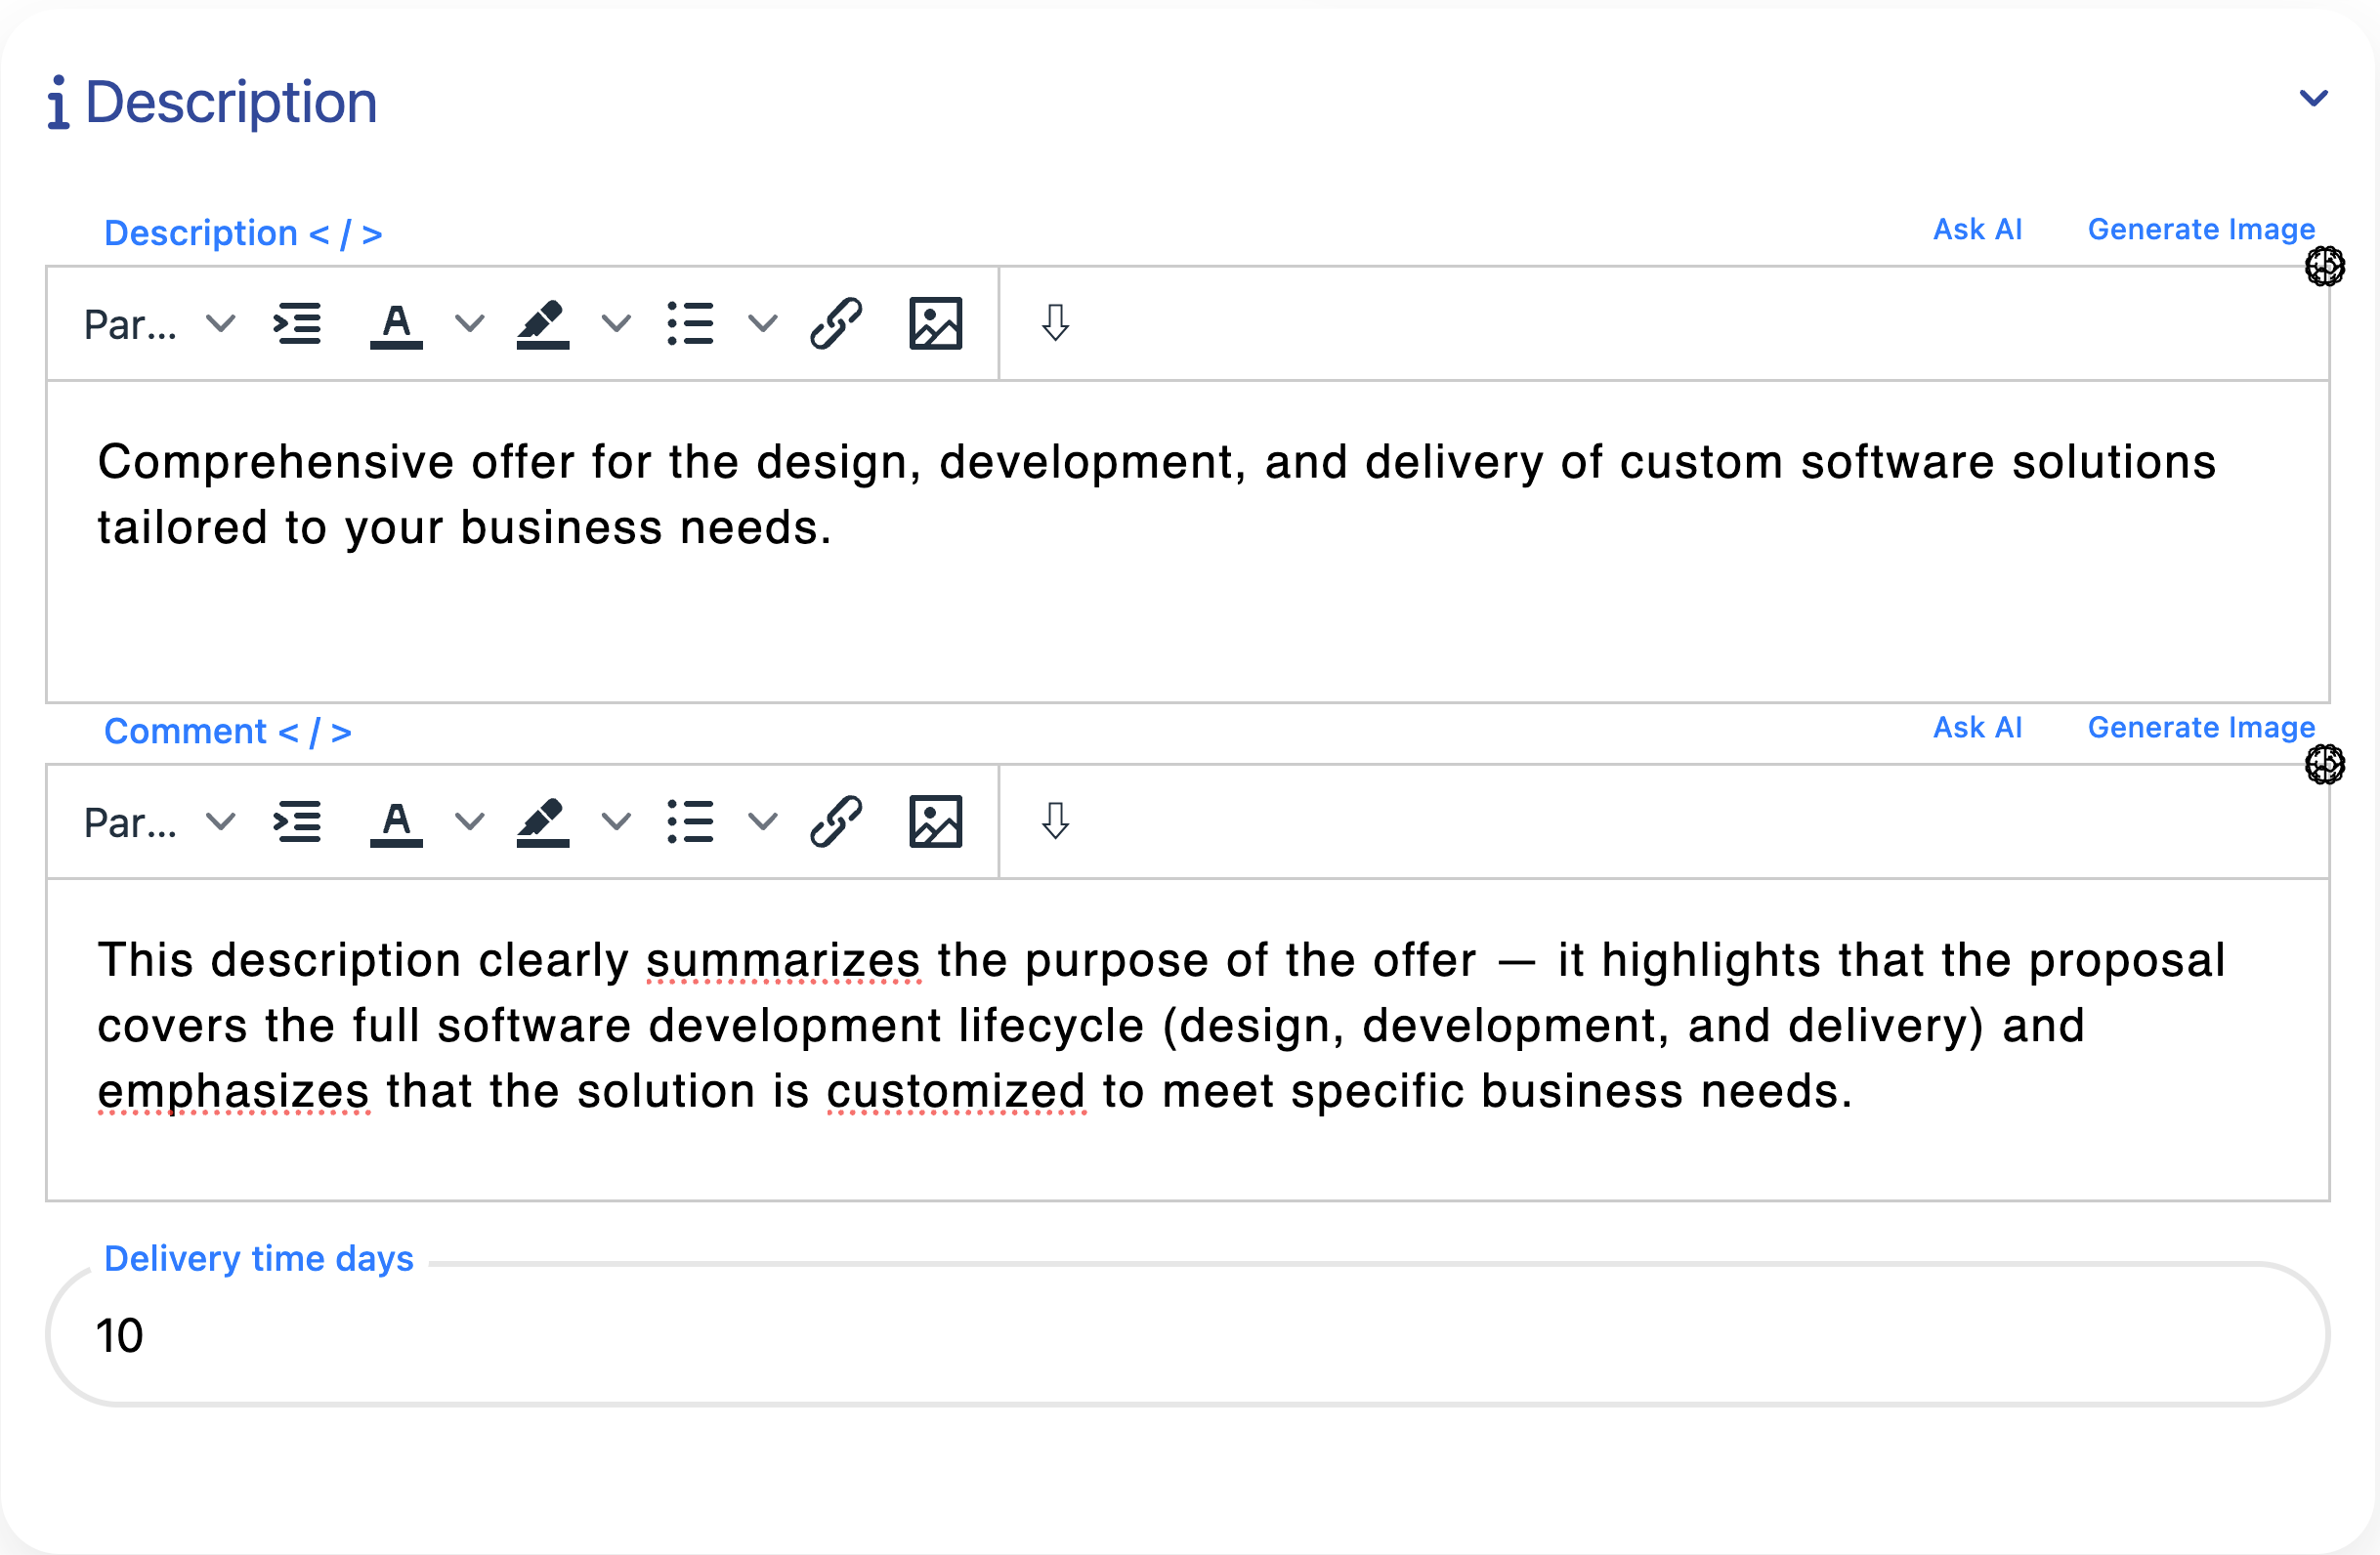
- In this section, you can select the offer type and template, and then edit the text that will be displayed to the customer.
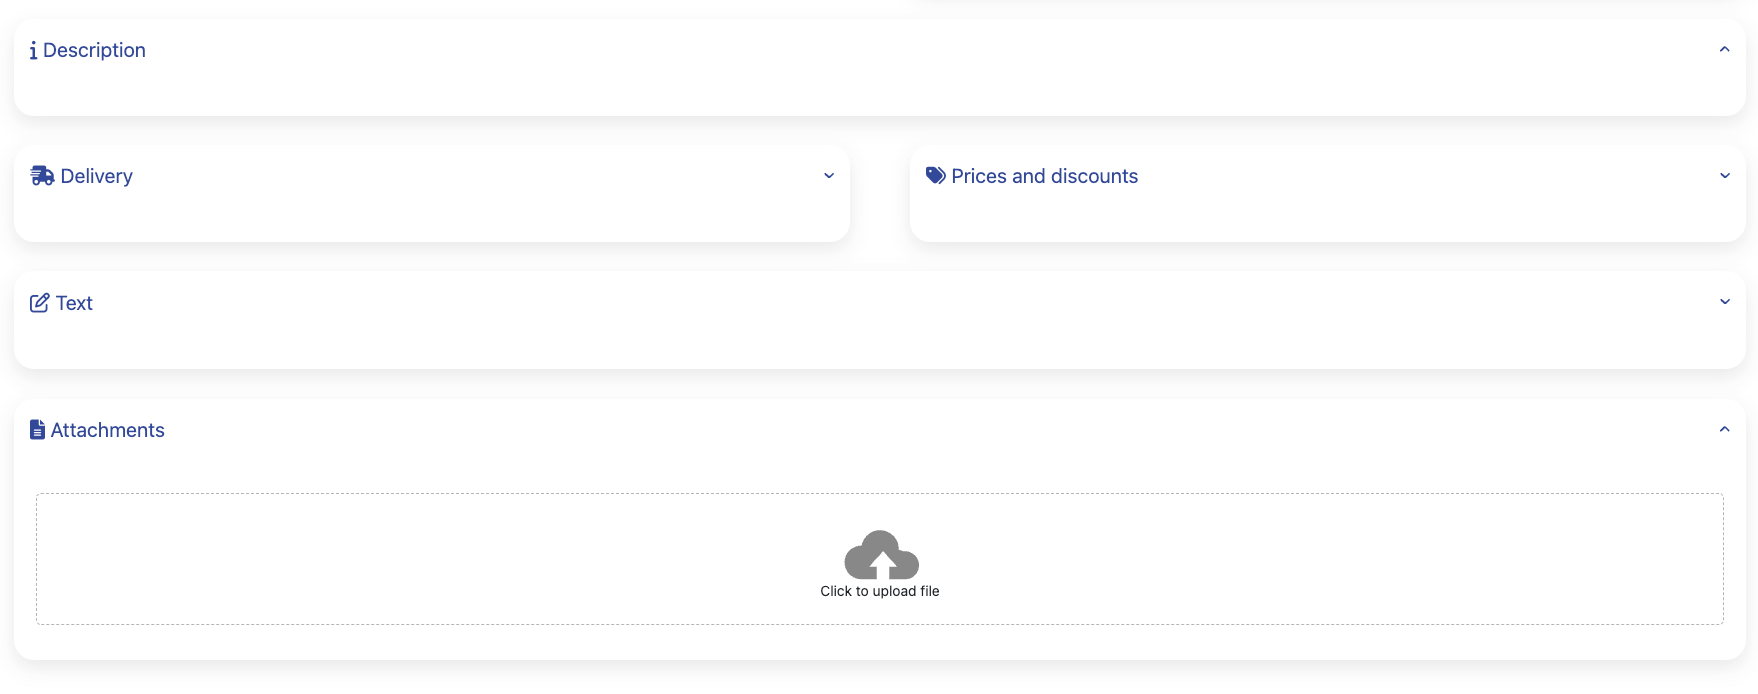
- Attach any files related to the offer — for example, specifications, product images, or supporting documents. These help the customer better understand the proposal.
After filling the necessary fields, click Add to save
Project Phases
The Project Phases section provides the option to define phases directly from a quotation. These phases are later transferred and become project phases when a project is automatically created from an approved quotation.
Each quotation item must be linked to a specific phase - this ensures proper organization of tasks and project milestones. If your organization does not actively use project phases, the system can automatically create one by using a predefined automation setting. This automation adds a default phase (for example, Start) whenever a new quotation is created, so all quotation items are assigned to it automatically.
This ensures that even if project phases are not manually managed, the quotation remains valid and ready for project generation.
Location: Home screen > Offers > Project Phases
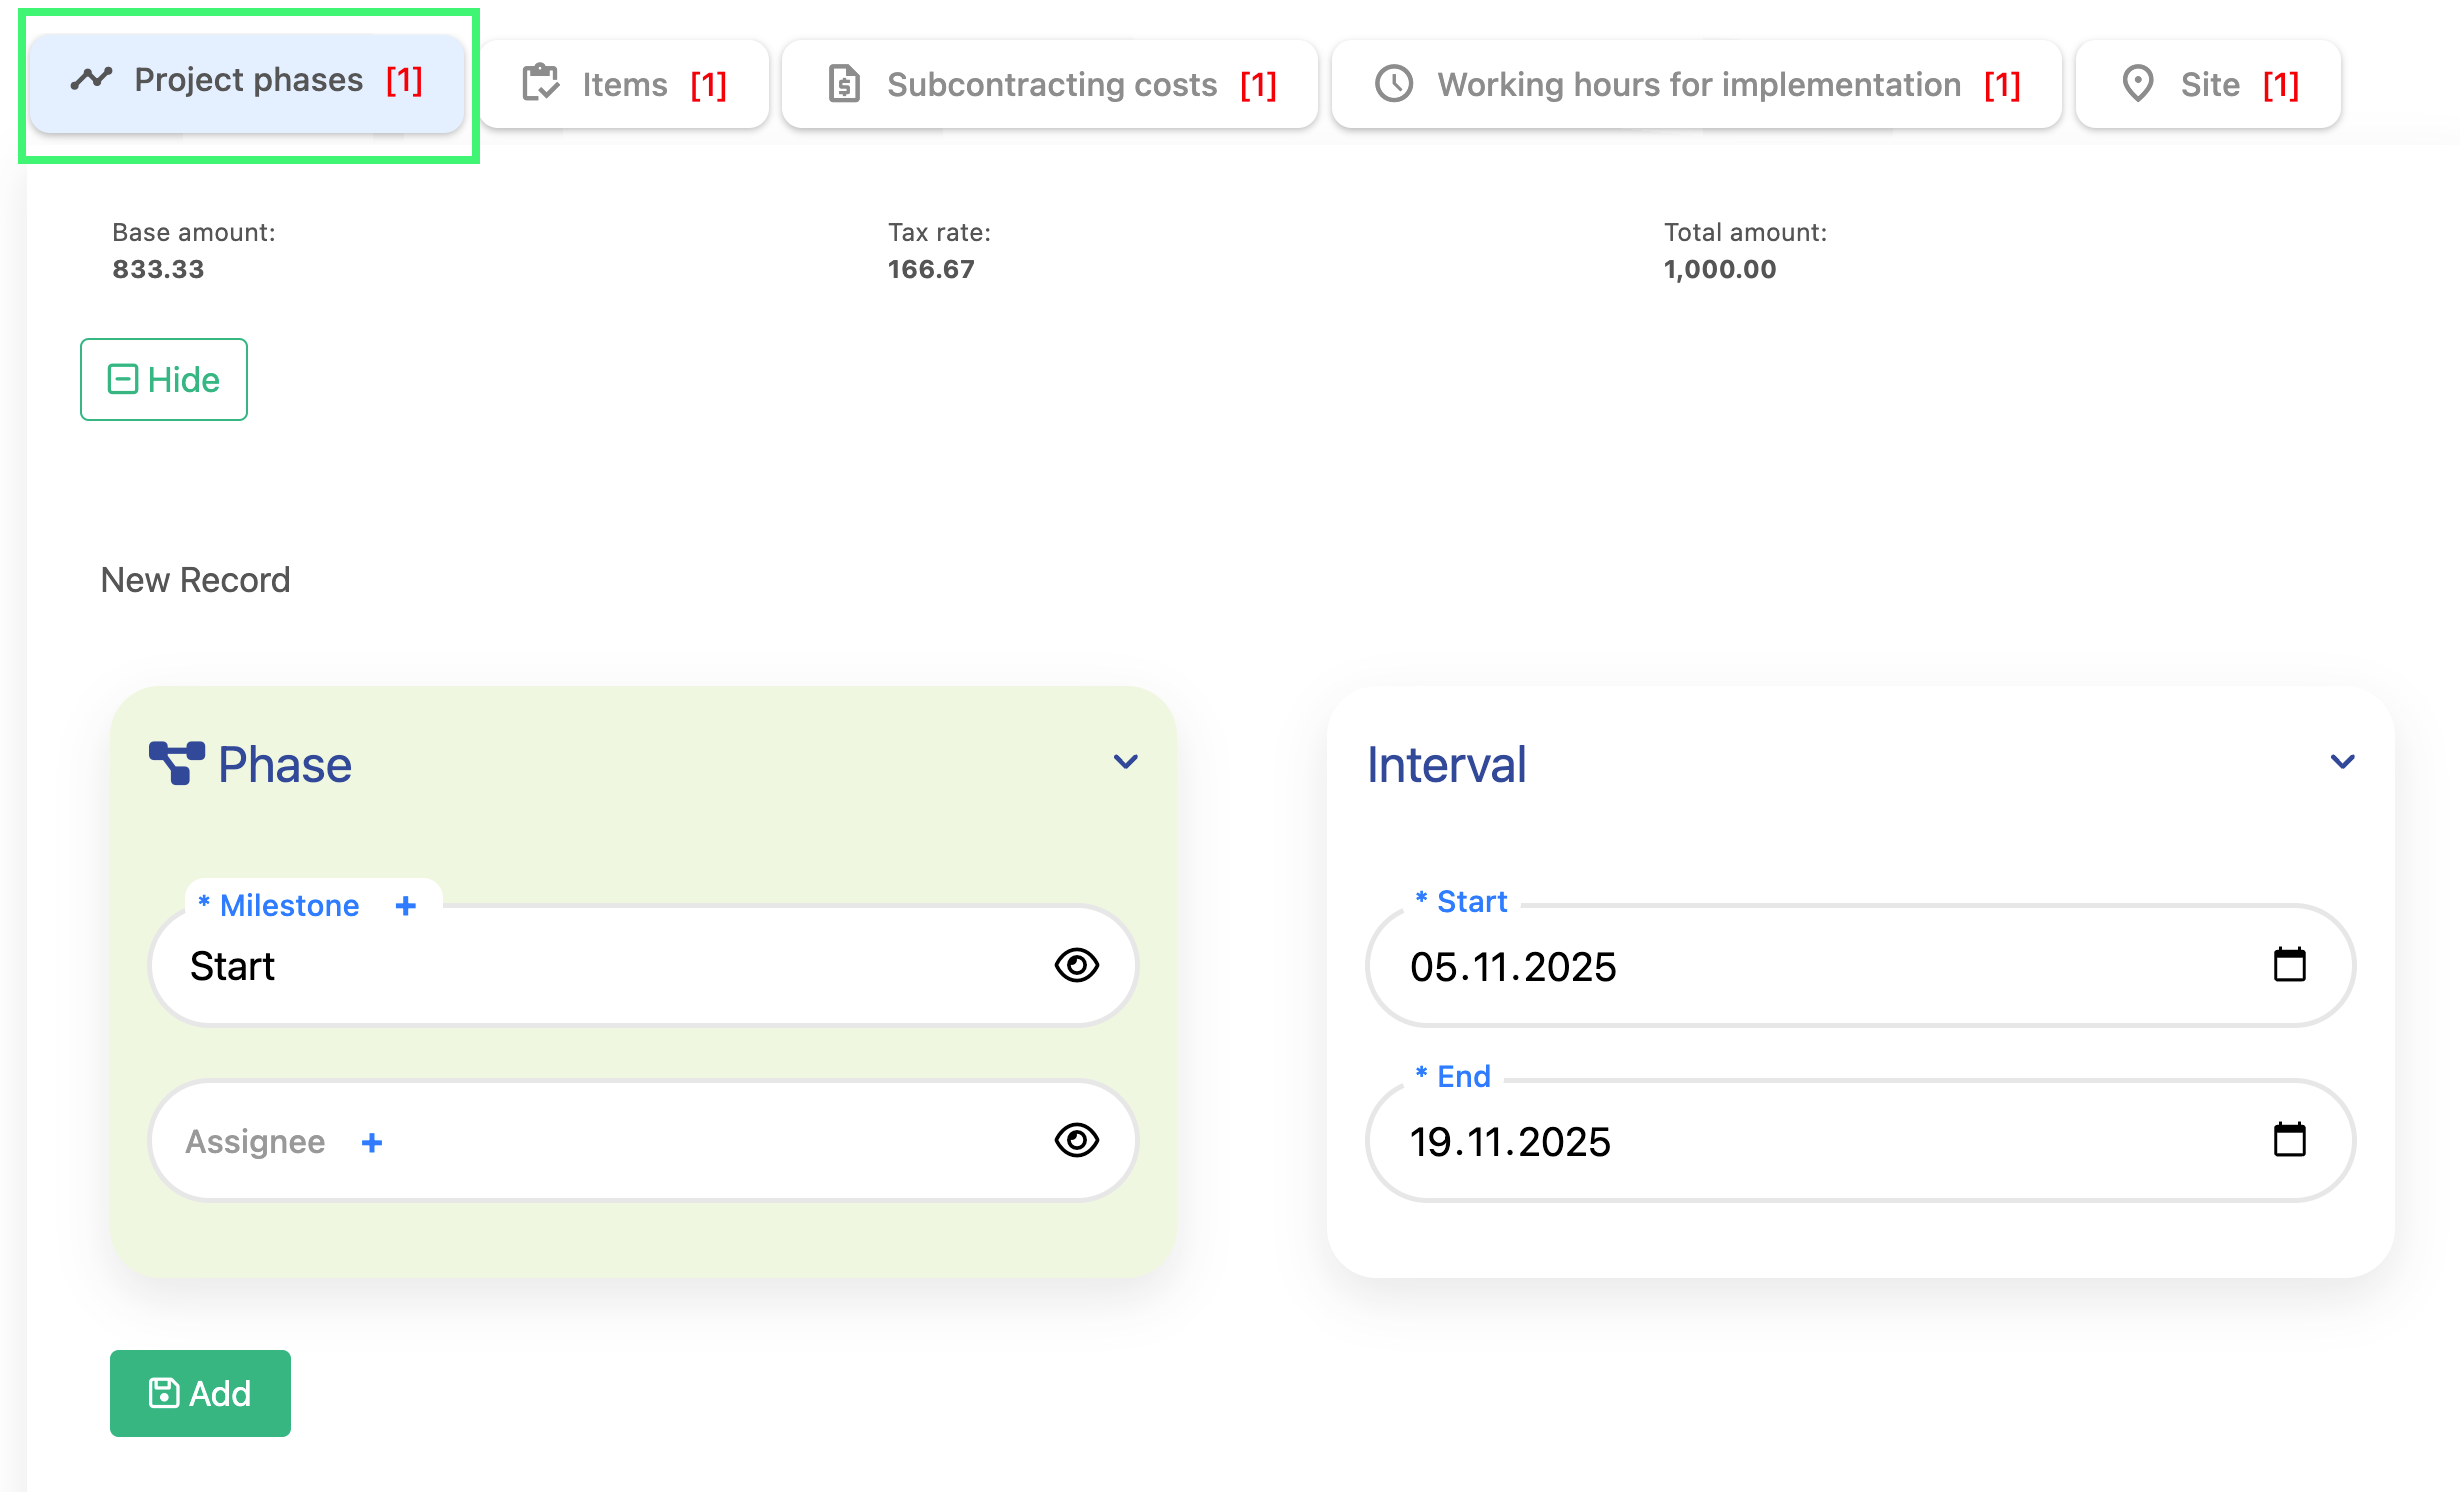
The image below displays the Project Phases Table, showing the available fields such as milestone, start and end dates and assignee.
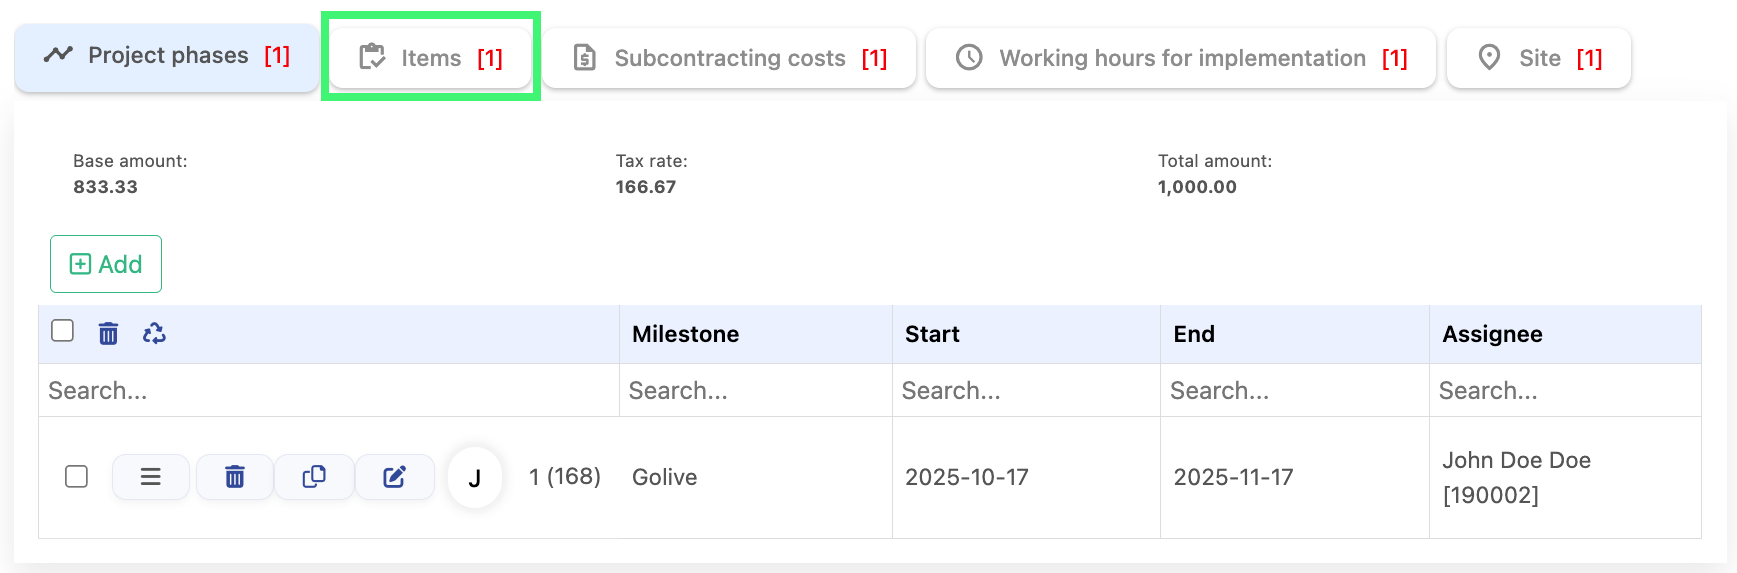
Next, select the Items submodule, illustrated in the image, to continue to the following section.
Offer Items
In the Items submodule, you will see the item management menu. To create a new item for the offer, click the Add button, as shown in the image below.

Location: Home screen > Offers > Items
Adding Item Details
When you click the Add button, the form opens and displays the fields that need to be filled in. The main fields include:
- Description: Provide a short description of the item. Group field is filled in automatically when a Service is selected. If you choose a Product or Material, the group will not be set automatically and can be entered manually.Type you can select it from the drop down menu.
- Warehouse: Choose one of the three available warehouse options as shown in the image.
- Amount: After selecting the warehouse, enter the Quantity and the Unit Price for this item.
- Extras: Use this field to apply additional options to the item:
- Discount: You can manually type a discount value if applicable.
- Tax Rate: Choose the tax rate from the dropdown menu. The options are the same as previously explained.
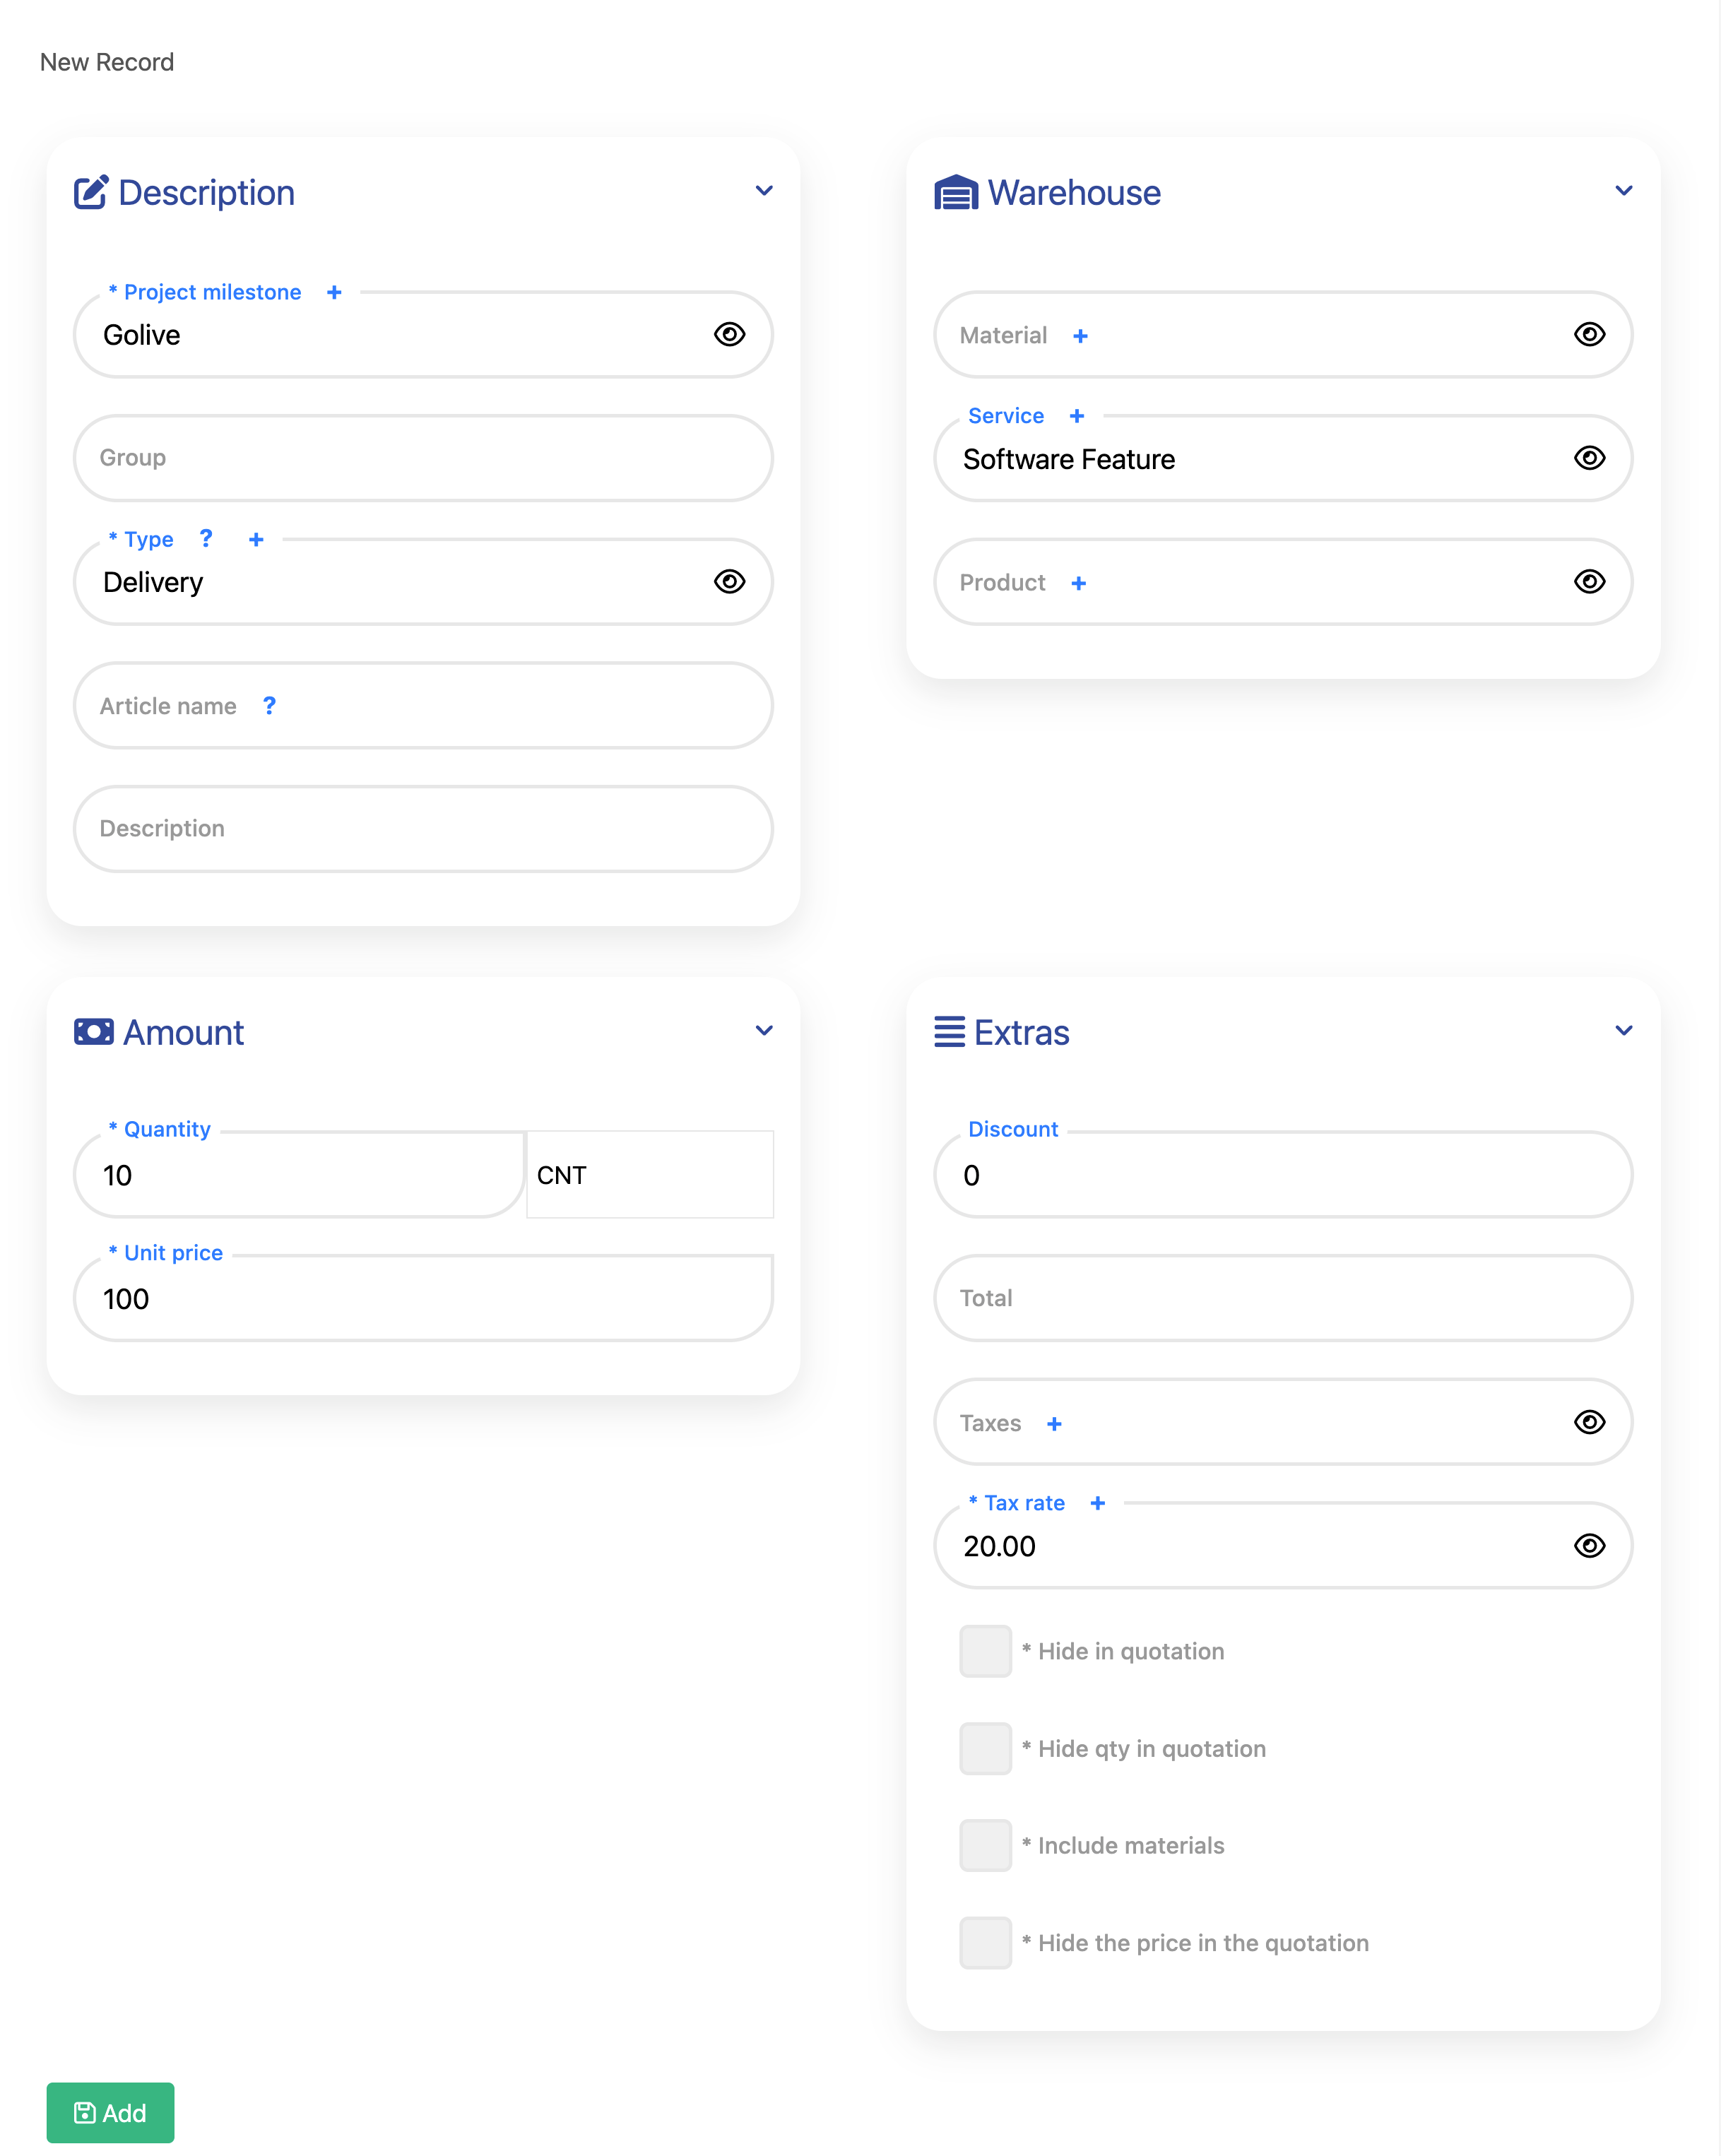
The image is showing: Item details form including description, warehouse, amount and extras
After filling in the item details, click the Add button to create the item entry.This will open the Item Summary Table shown in the image below, which includes three new columns:
- Base Amount: Shows the total value before taxes and discounts.
- Tax Rate: Displays the tax applied to the item.
- Total Amount: The final amount including tax and after any discounts.
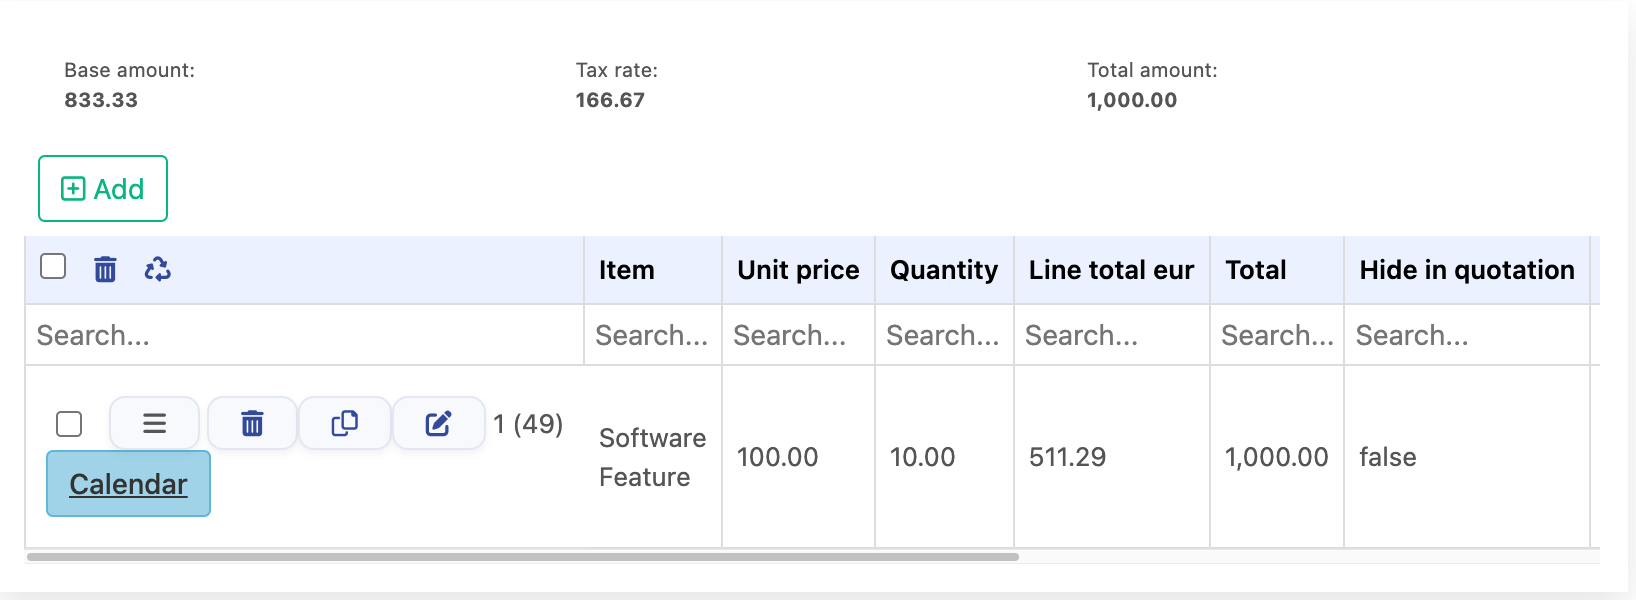
The image is showing: Summary table displaying calculated item totals, unit price and quantity
Subcontracting Costs
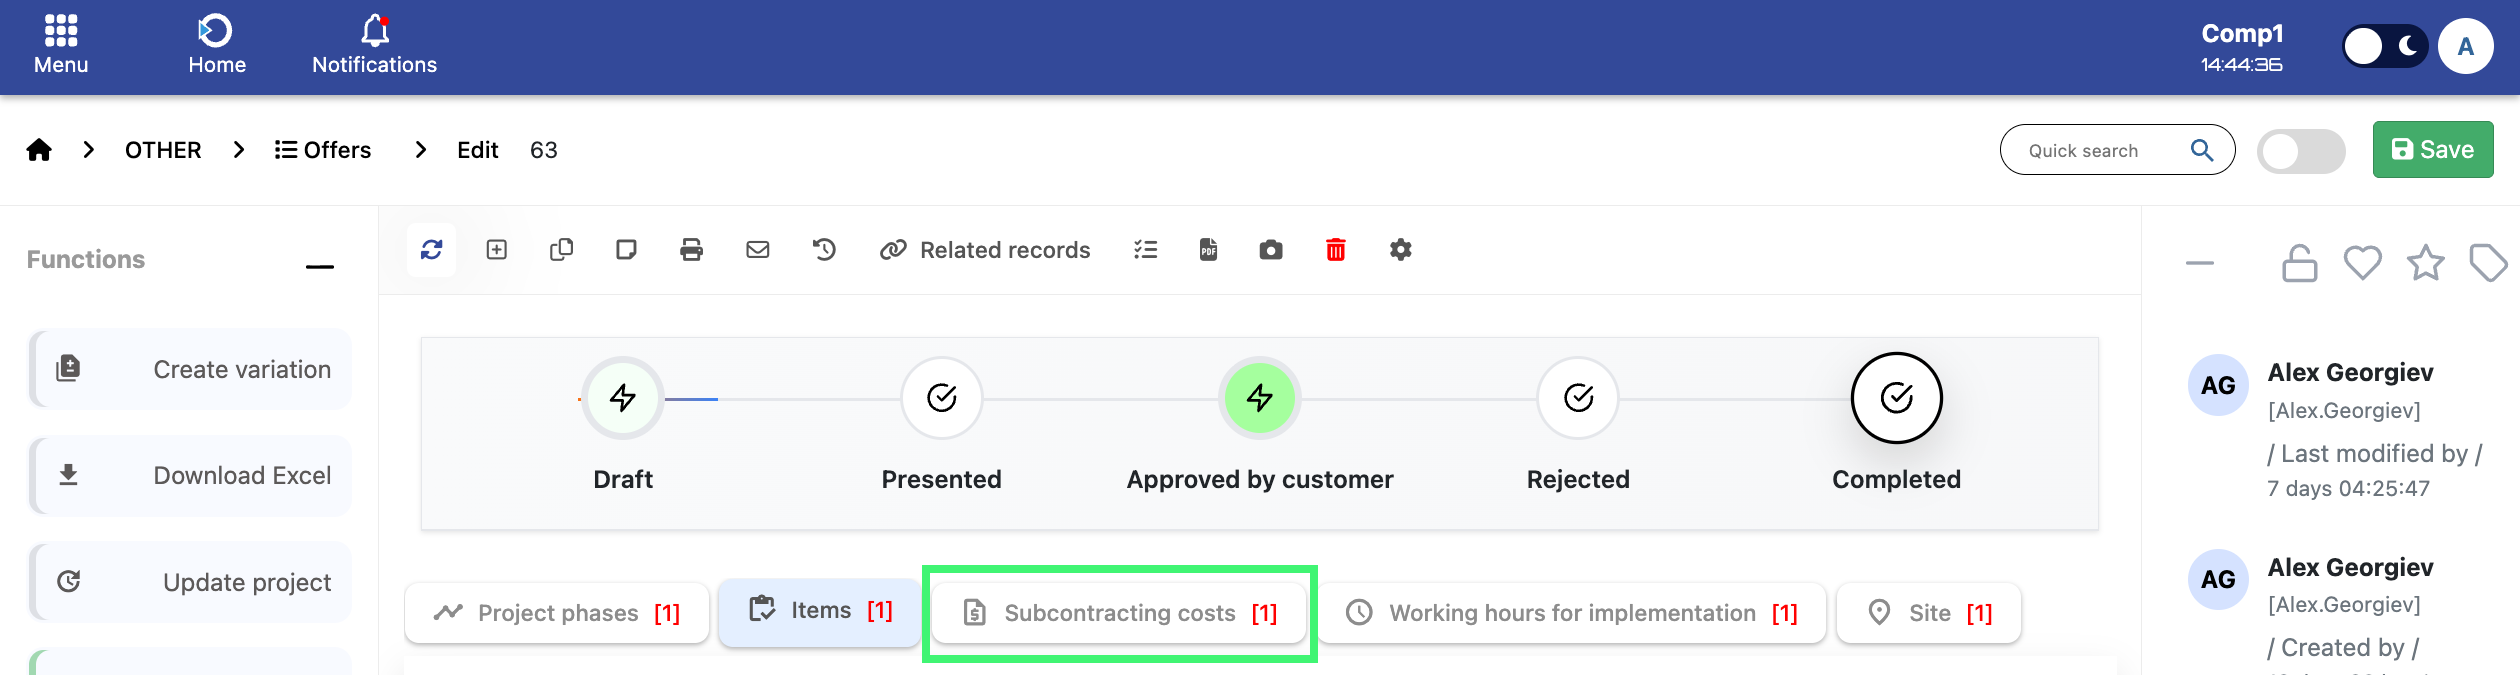
Location: Home screen > Offers > Subcontracting costs
Next, click on the Subcontracting Costs as shown above in the picture.
After opening the Subcontracting Costs submodule, click the Add button - the same way as in the Items submodule. This will open the subcontracting details form, as shown in the image below.
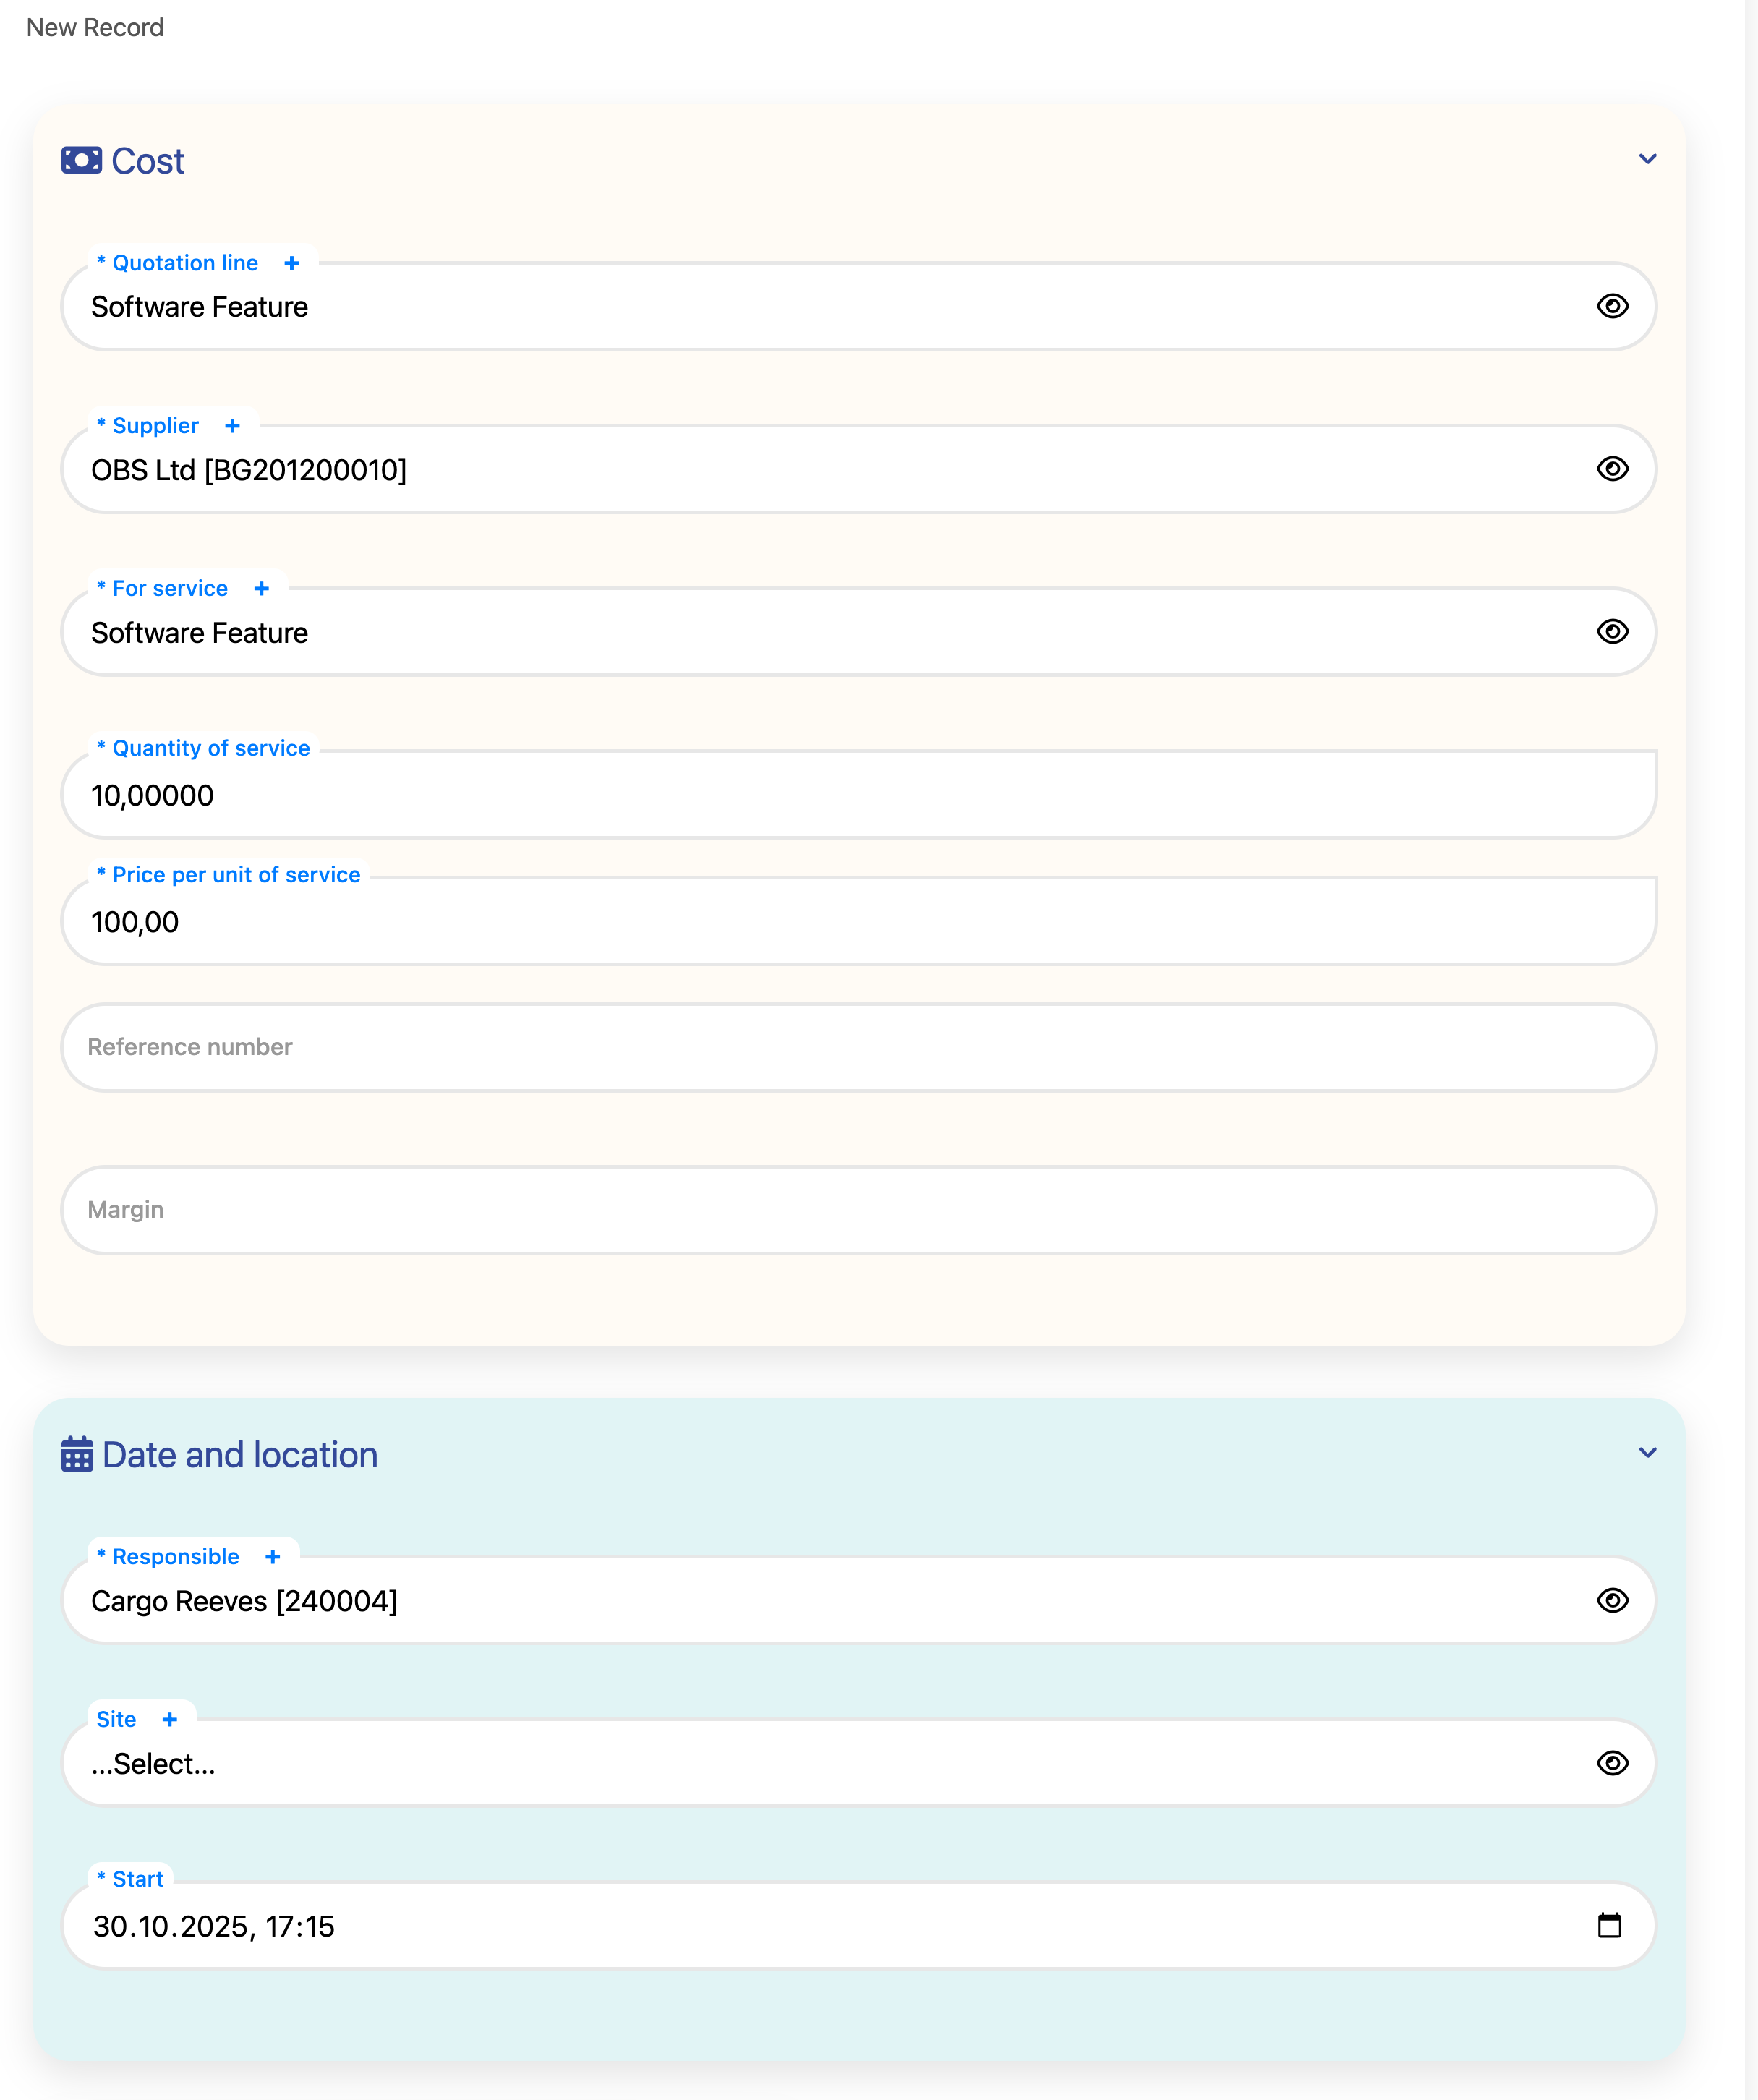
The image is showing: Subcontracting Costs, Date and Location form fields.
After filling in the subcontracting details, click the Add button.After adding the subcontracting costs entry, it will appear in the Subcontracting Costs Table, as shown in the image below.

Table view showing added subcontracting costs entries.
Working Hours for Implementation
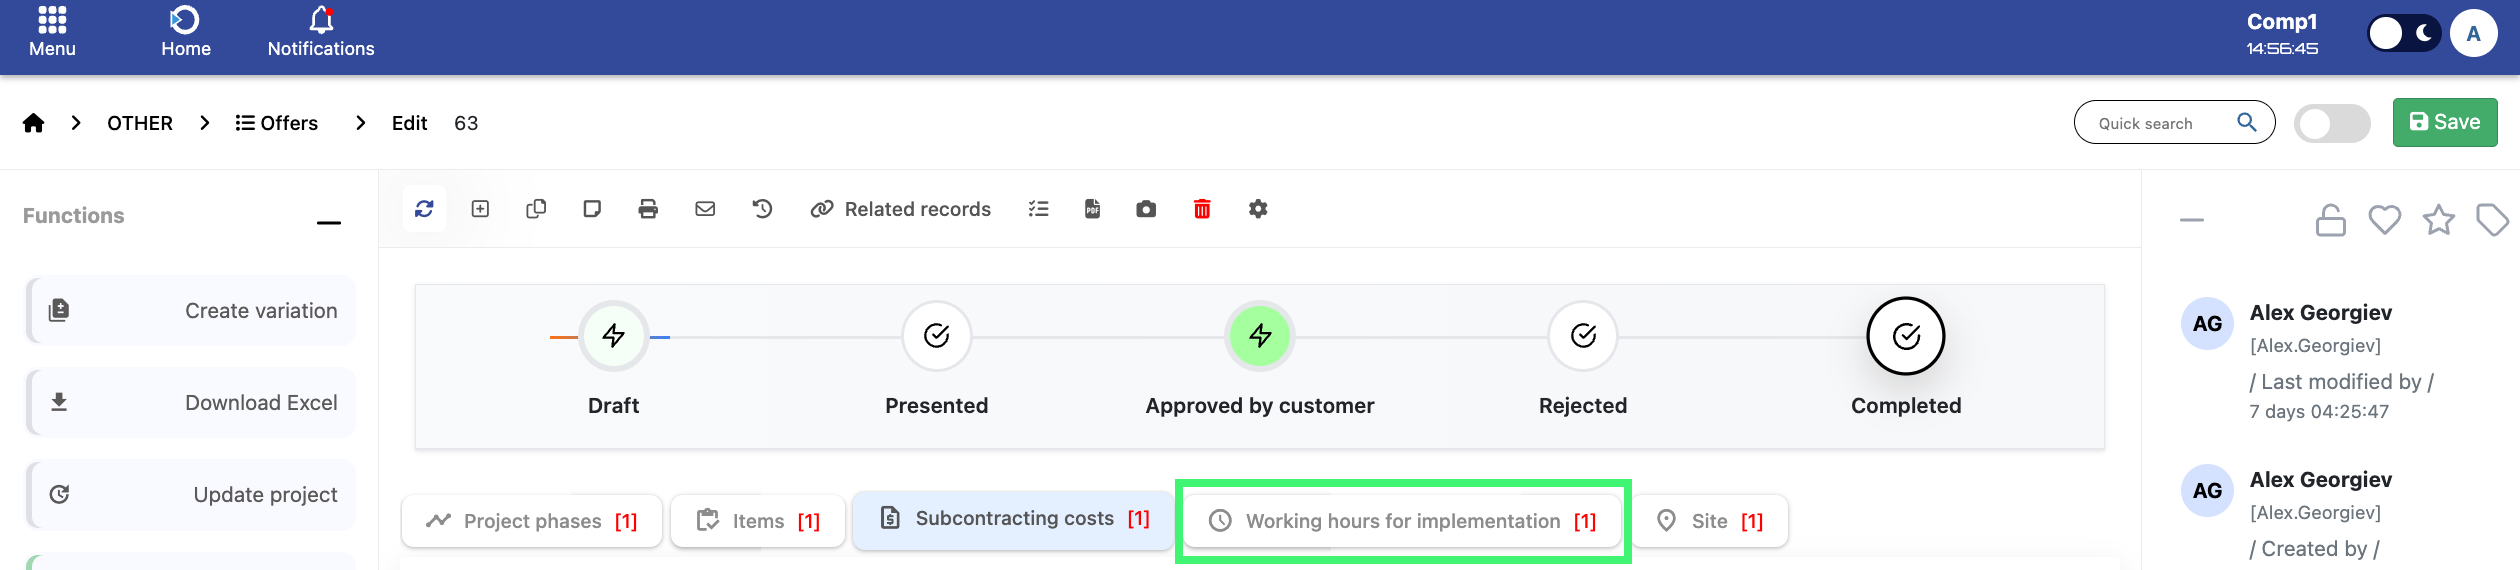
Location: Home screen > Offers > Working Hours for Implementation
Expense
- Hours for Implementation: Enter the number of hours required for the implementation.
- Service: Select the type of service from the dropdown menu.
Date and Location
- Responsible: Assign the employee or team member performing the work.
- Start / End: Define the start and end times of the work.
- Quotation Line: Link the entry to the relevant offer.
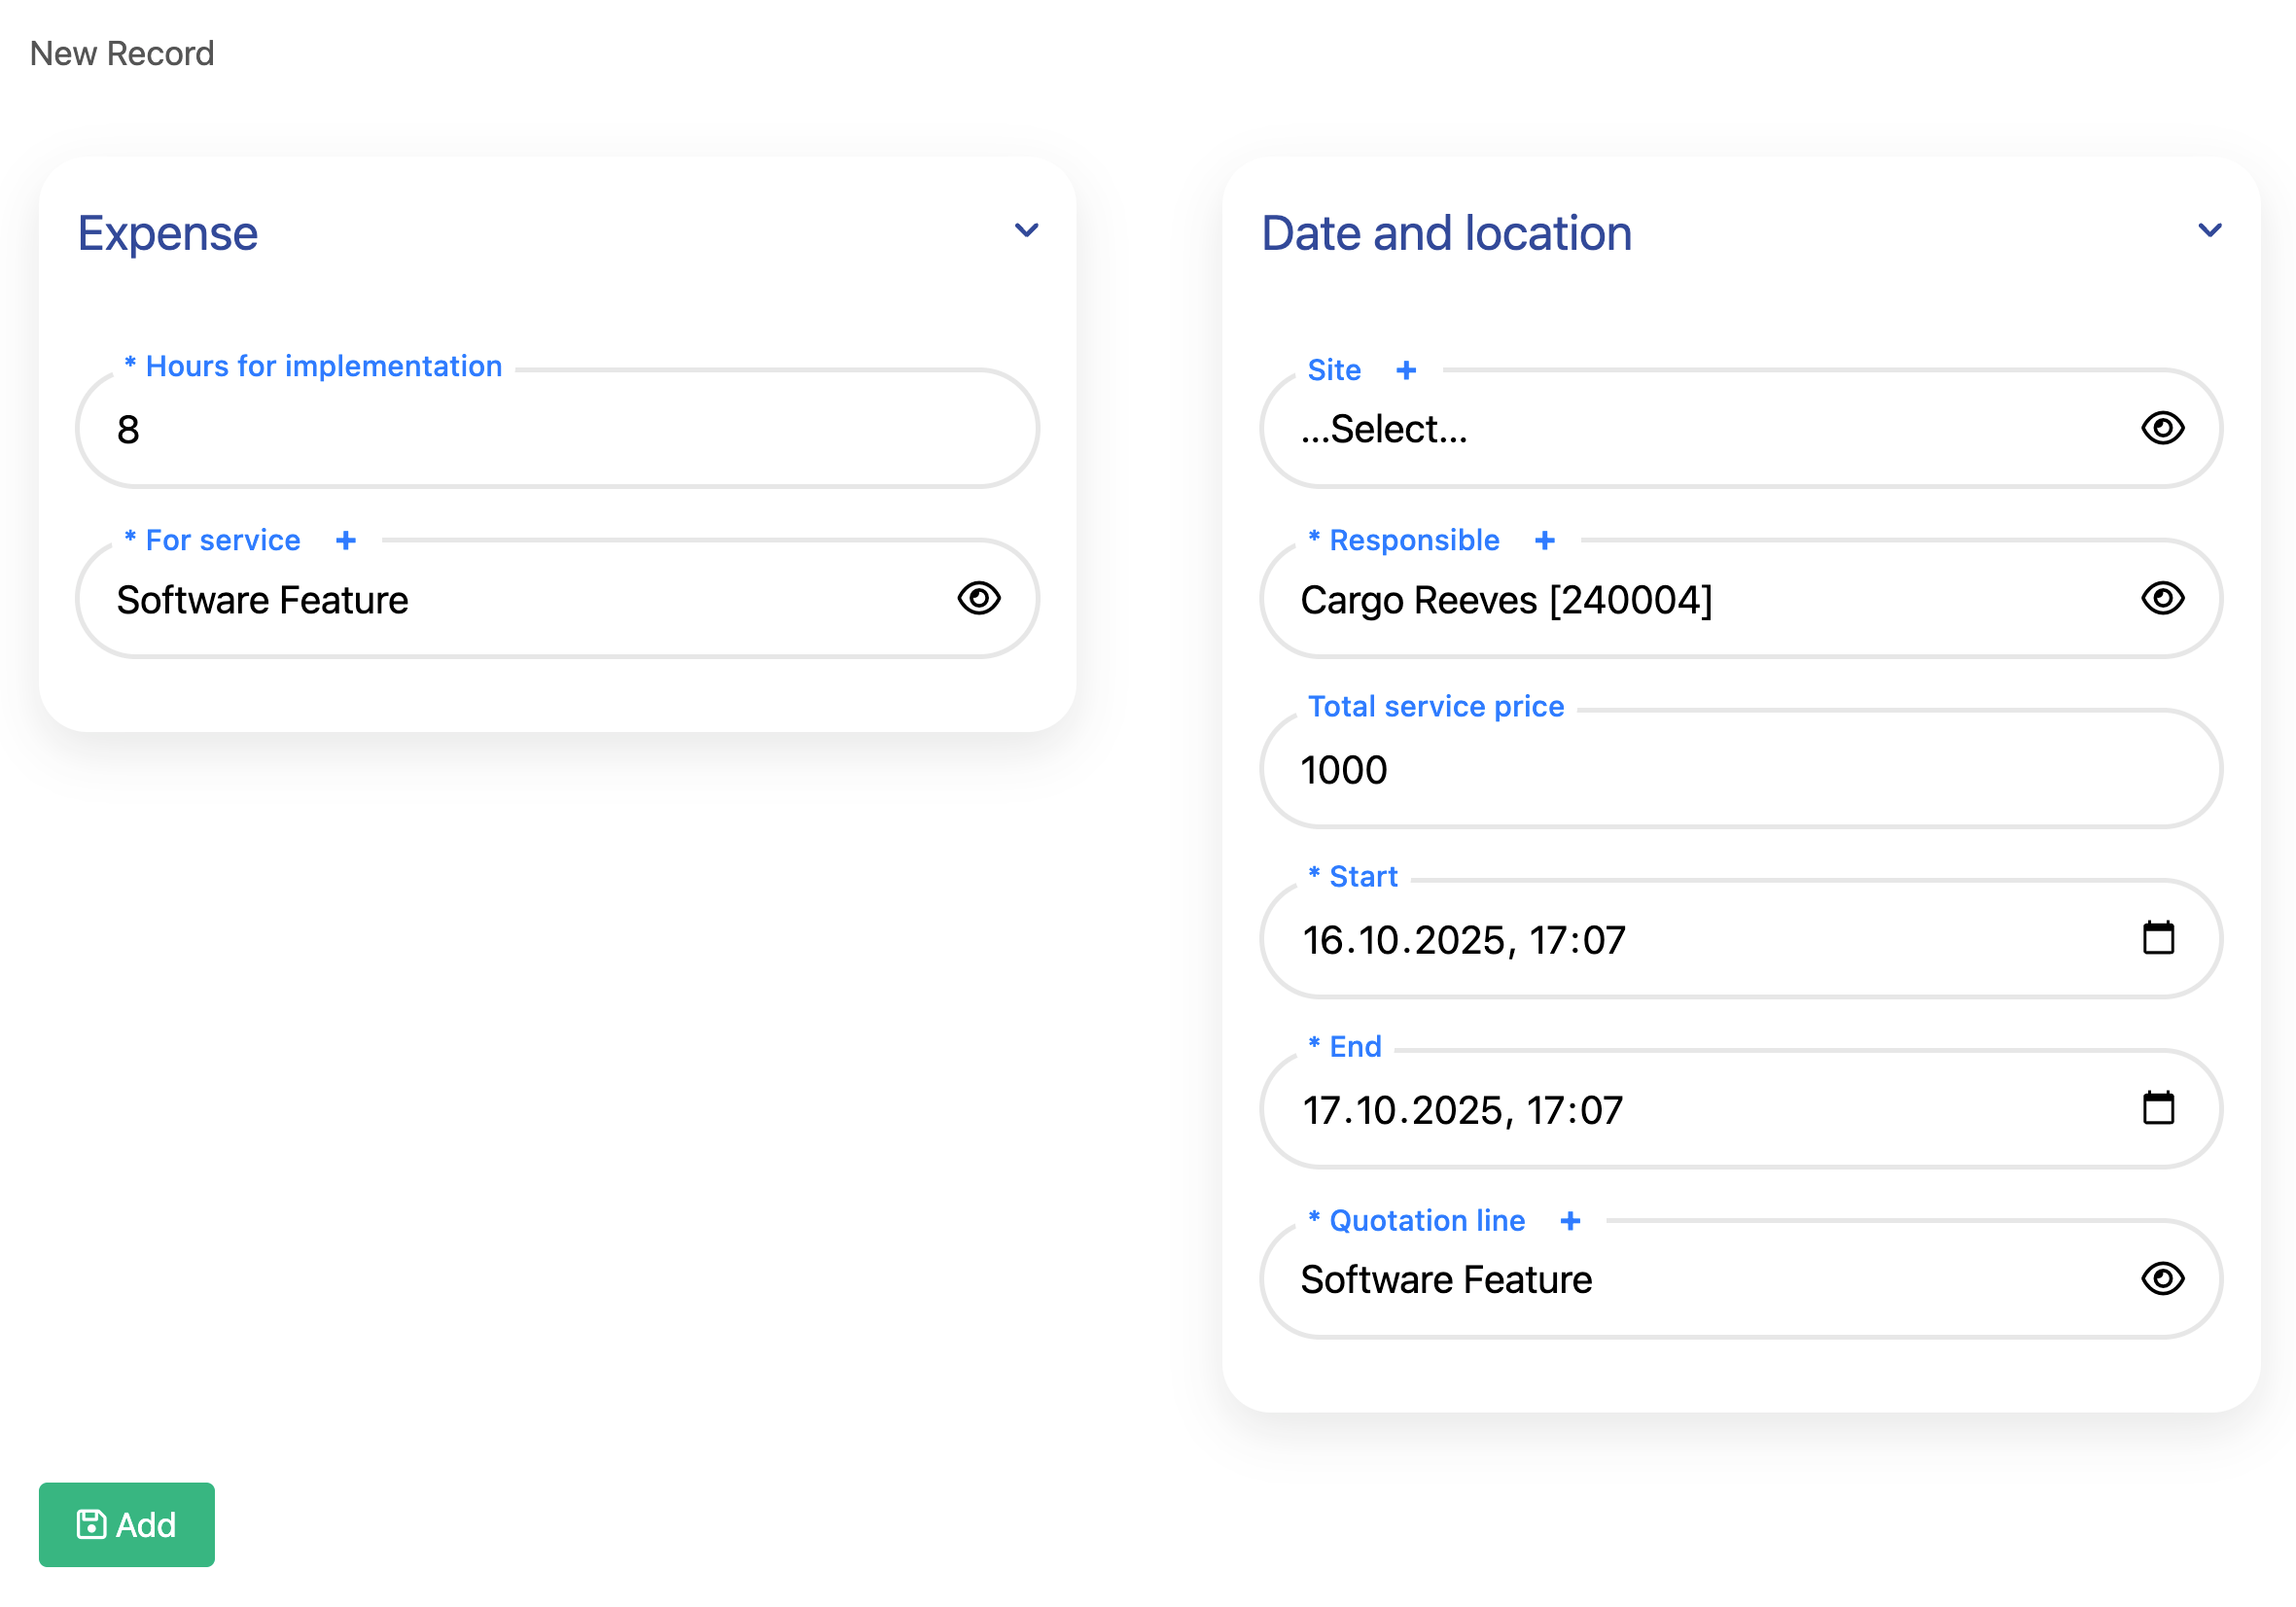
The image shows Working Hours for Implementation form with fields
After filling in the fields in the form, click the Add button.

This is entry with Working Hours Table
Site
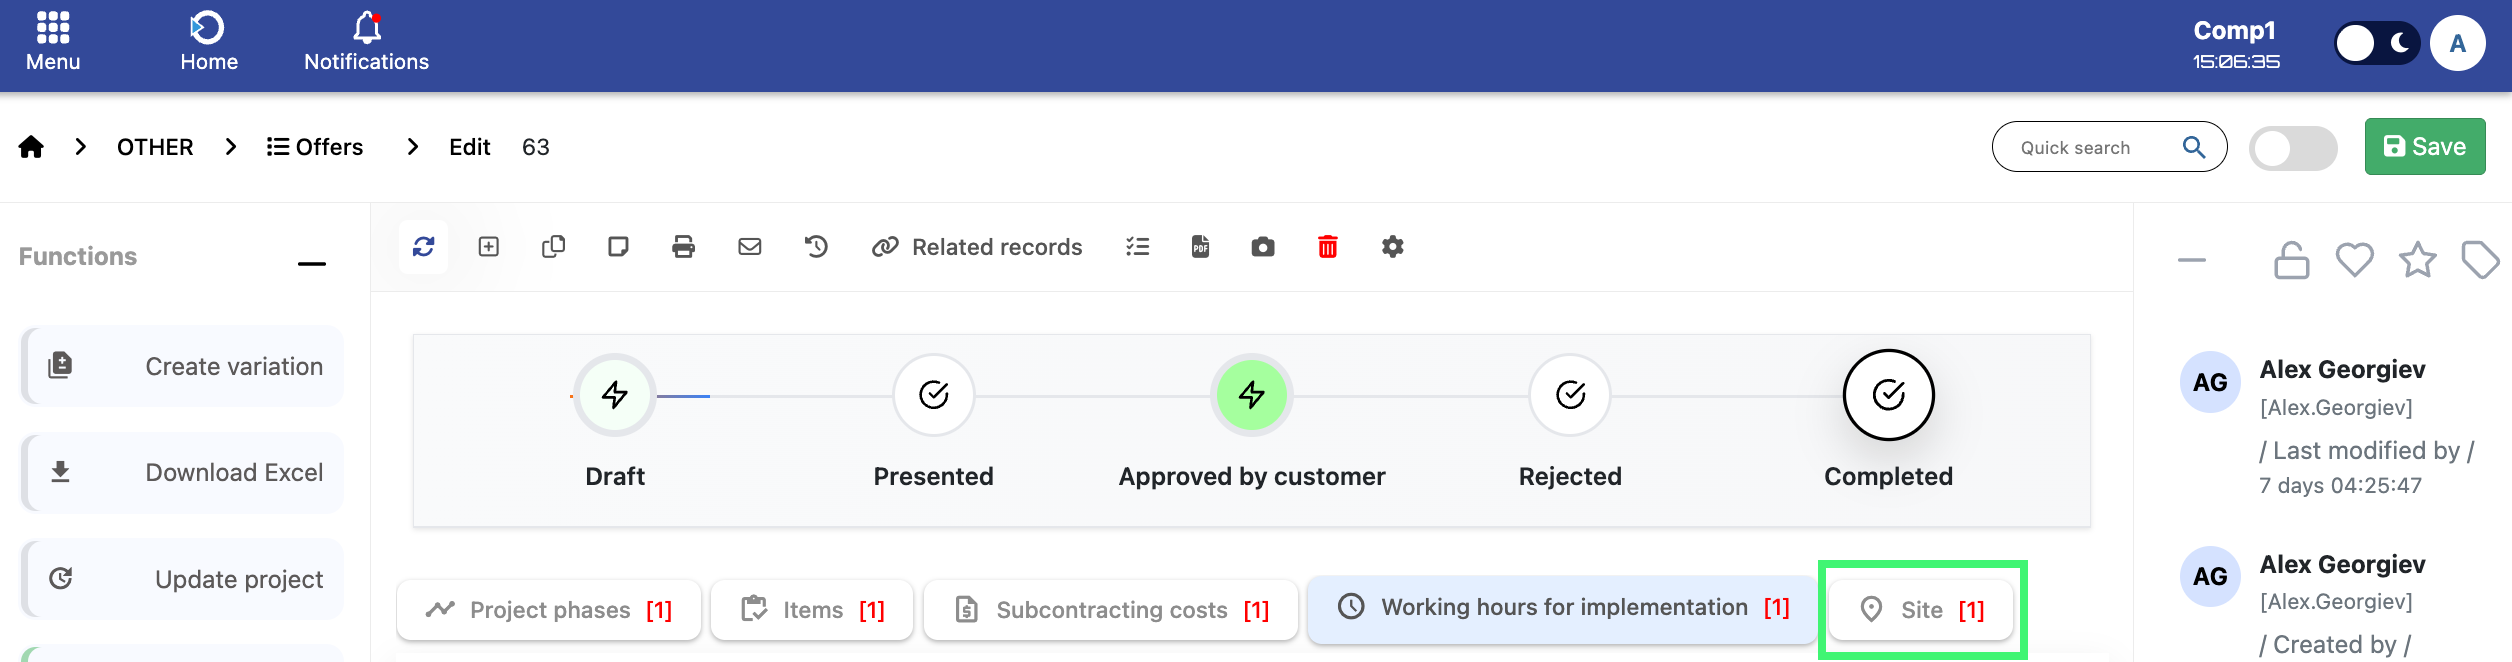
Location: Home screen > Offers > Site
After entering the Site submodule, you will see the interface with a single field.This site section is just an example which you see in the image.

This is the Site submodule field for entering site.
Once you fill in the field and click the Add button, the entry will appear in the Site Table.

The image is showing Completed Site Table saved entries.
Quotation Lifecycle
The diagram below illustrates the different stages a quotation goes through from creation to completion. Each stage defines a specific state and corresponding action within the project management process.

Location: Home screen > Offers
The stages of the quotation and their descriptions are as follows:
- Draft: The quotation is first created and saved in Draft mode. You can freely edit and review all details - items, prices, client information and notes - before sharing it with the customer. This stage allows full flexibility to make changes and prepare the offer internally.
- Presented: The quotation has been formally shared with the customer. At this stage, the offer is under review by the client and you are awaiting their feedback or decision. While the quotation is presented, no major structural changes should be made - you can still review details internally or create a variation if the customer requests modifications.
- Approved by Customer: When the customer approves the quotation, the system automatically creates a new Project.
- A project record is created and linked to the quotation.
- Project milestones are copied from the quotation’s phases.
- Initial project tasks are generated and assigned to the salesperson.
- The salesperson becomes the Project Manager by default.
- Rejected: If the customer declines the quotation, change its status to Rejected. This marks the quotation as inactive for workflow purposes but it remains editable. You can review or modify the quotation and if needed, present it again to the customer - for example, after adjusting prices or terms based on their feedback. This allows you to reuse the same quotation record instead of creating a new one from scratch.
- Completed: This status is used once the quotation has been fully executed and financially closed. Before marking a quotation as Completed, the system checks that at least one Invoice and one Expense are linked to it. If either document is missing, the system will not allow the status to change. Once both are present, the quotation can safely be marked as Completed, confirming that all financial and operational actions have been finalized.
Managing quotation statuses properly helps maintain a clear and traceable workflow. It ensures every quotation follows the same approval process and is linked correctly to its corresponding project, financial documents and final reports.
Generating and Printing Offers
You can use the Print menu, located in the toolbar of the offer page, as shown in the image below.
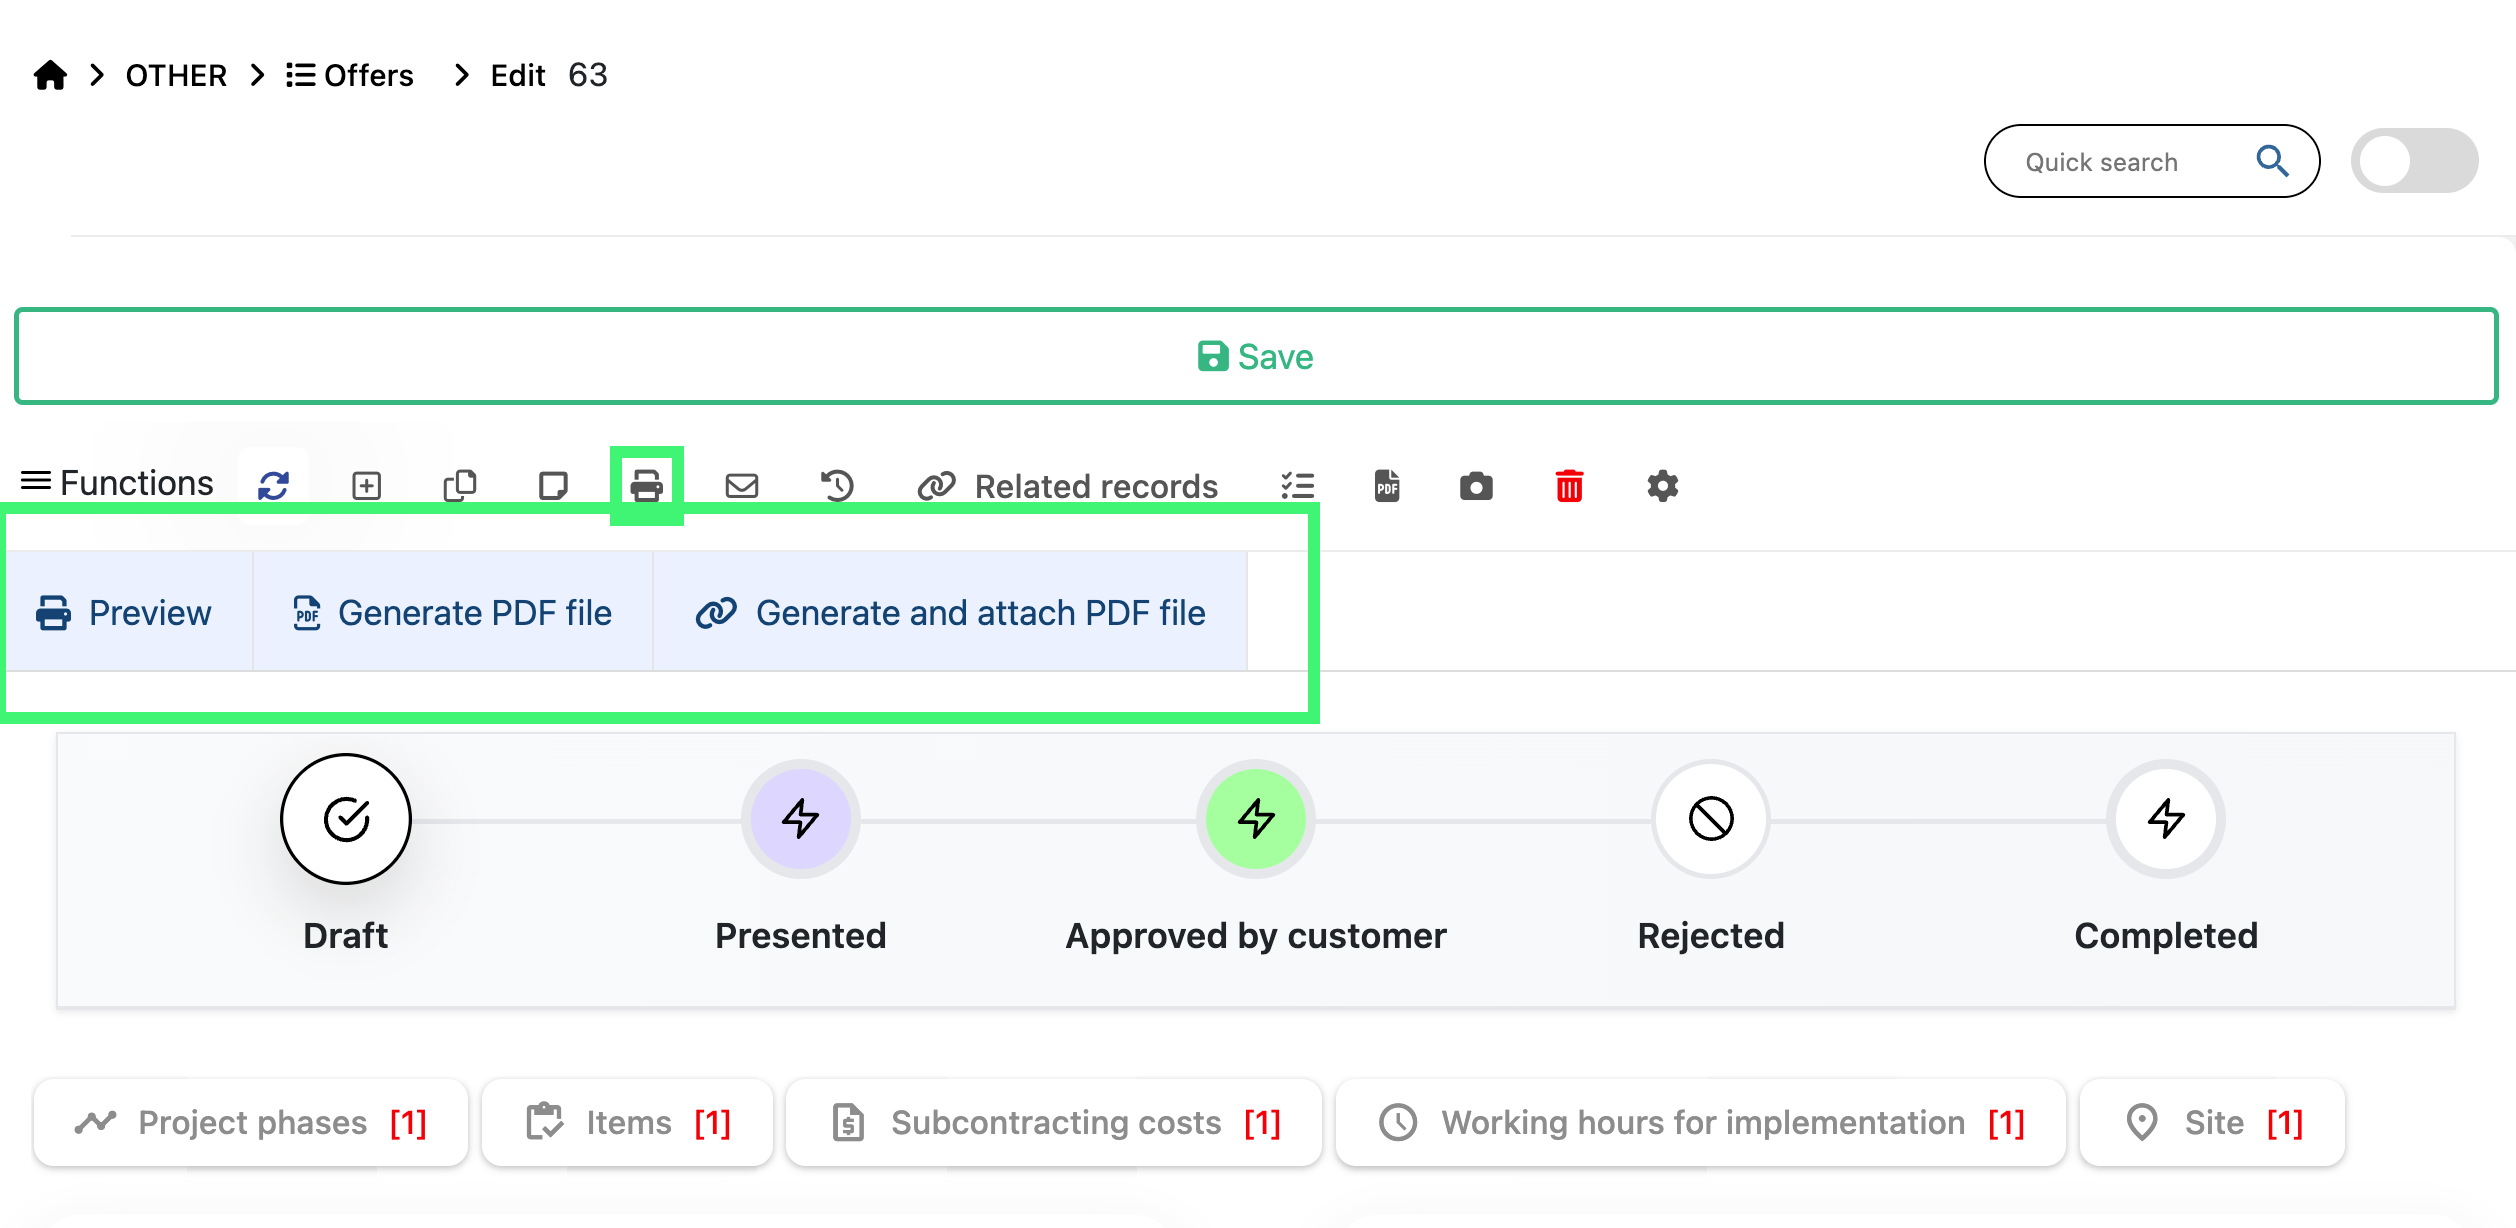
Location: Home screen > Offers > Print menu
When you click the Print button, you’ll see three available options:
- Preview: Displays a quick on-screen preview of the generated offer document. This option is useful for checking formatting, item details and pricing before finalizing.
- Generate PDF file: Creates a downloadable PDF version of the offer. You can save or send this file directly to the customer as part of your communication or proposal.
- Generate and attach PDF file: Generates a PDF document and automatically attaches it to the offer record in the system. This is ideal when you plan to send the offer for electronic signature (for example, through Evrotrust or another e-signature provider).
Using the Print menu options helps you manage your offers efficiently - whether you need a quick preview, a ready-to-send file, or a version attached for e-signature and record keeping.
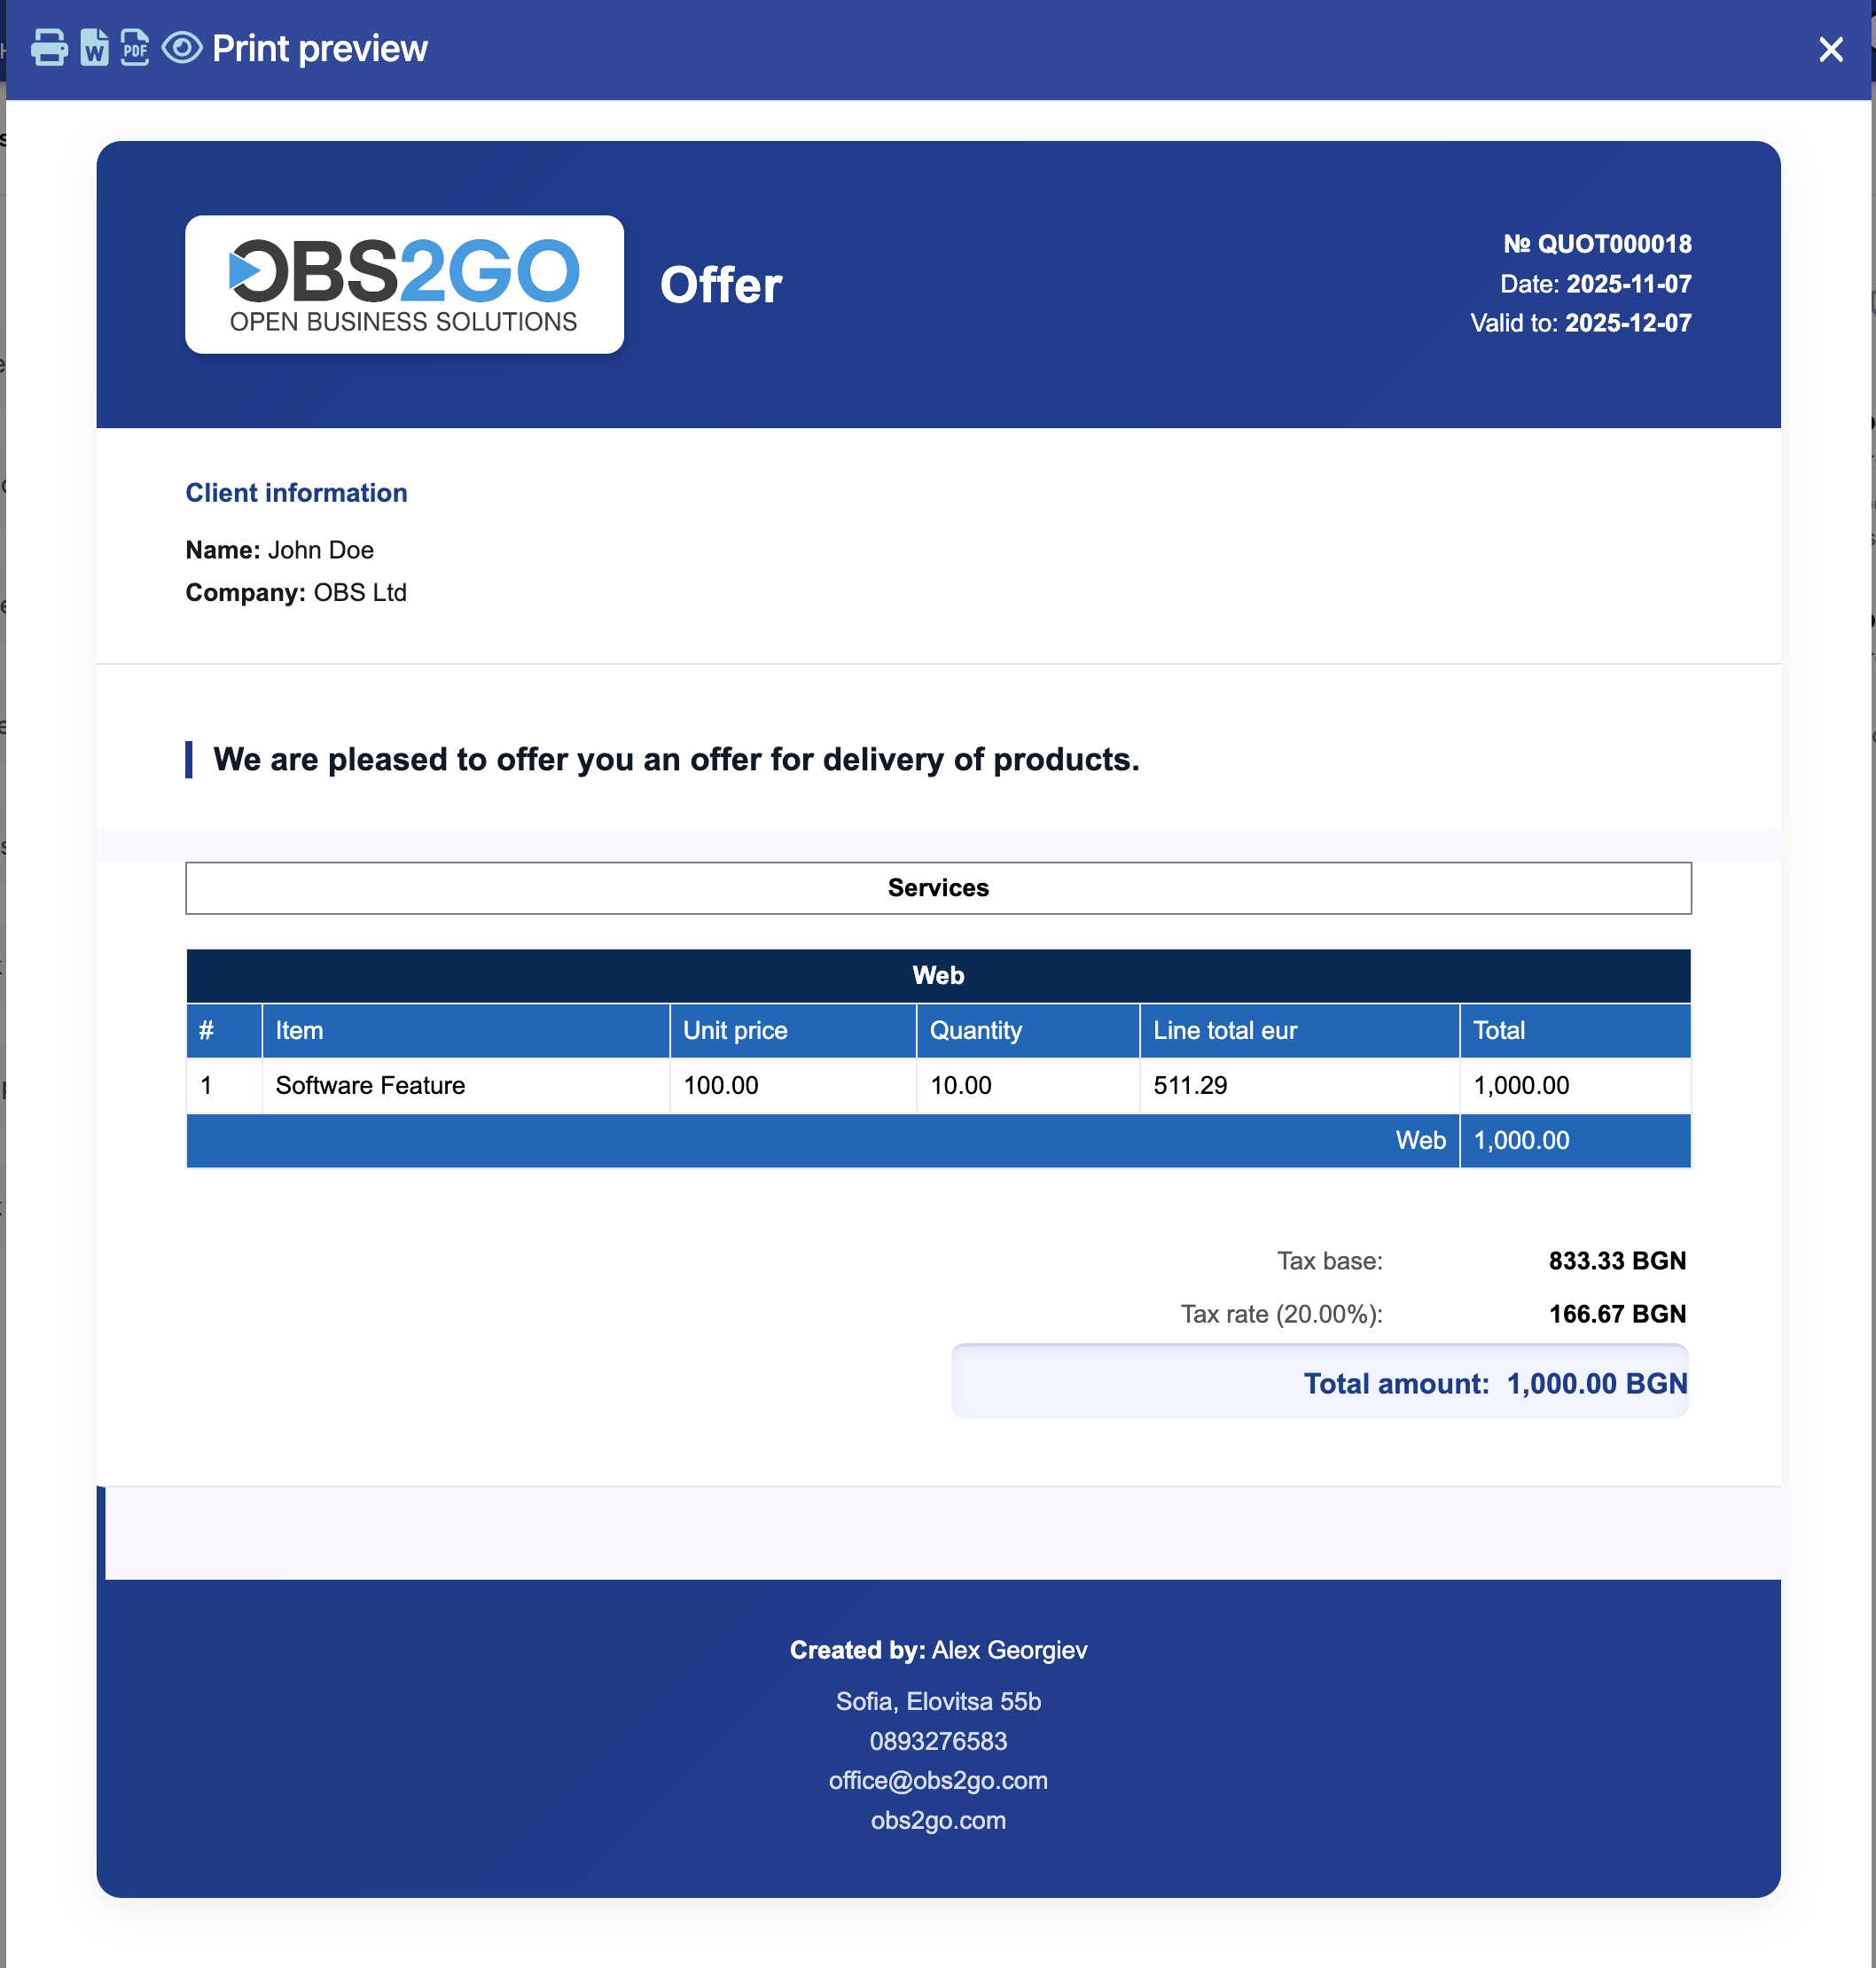
Example: Offer Preview
Location: Home screen > Offers > Print menu > Preview
Functions Menu
The Functions menu provides quick access to key actions and additional operations related to your offer. You can find it in the top toolbar of the offer page, as shown in the image below.
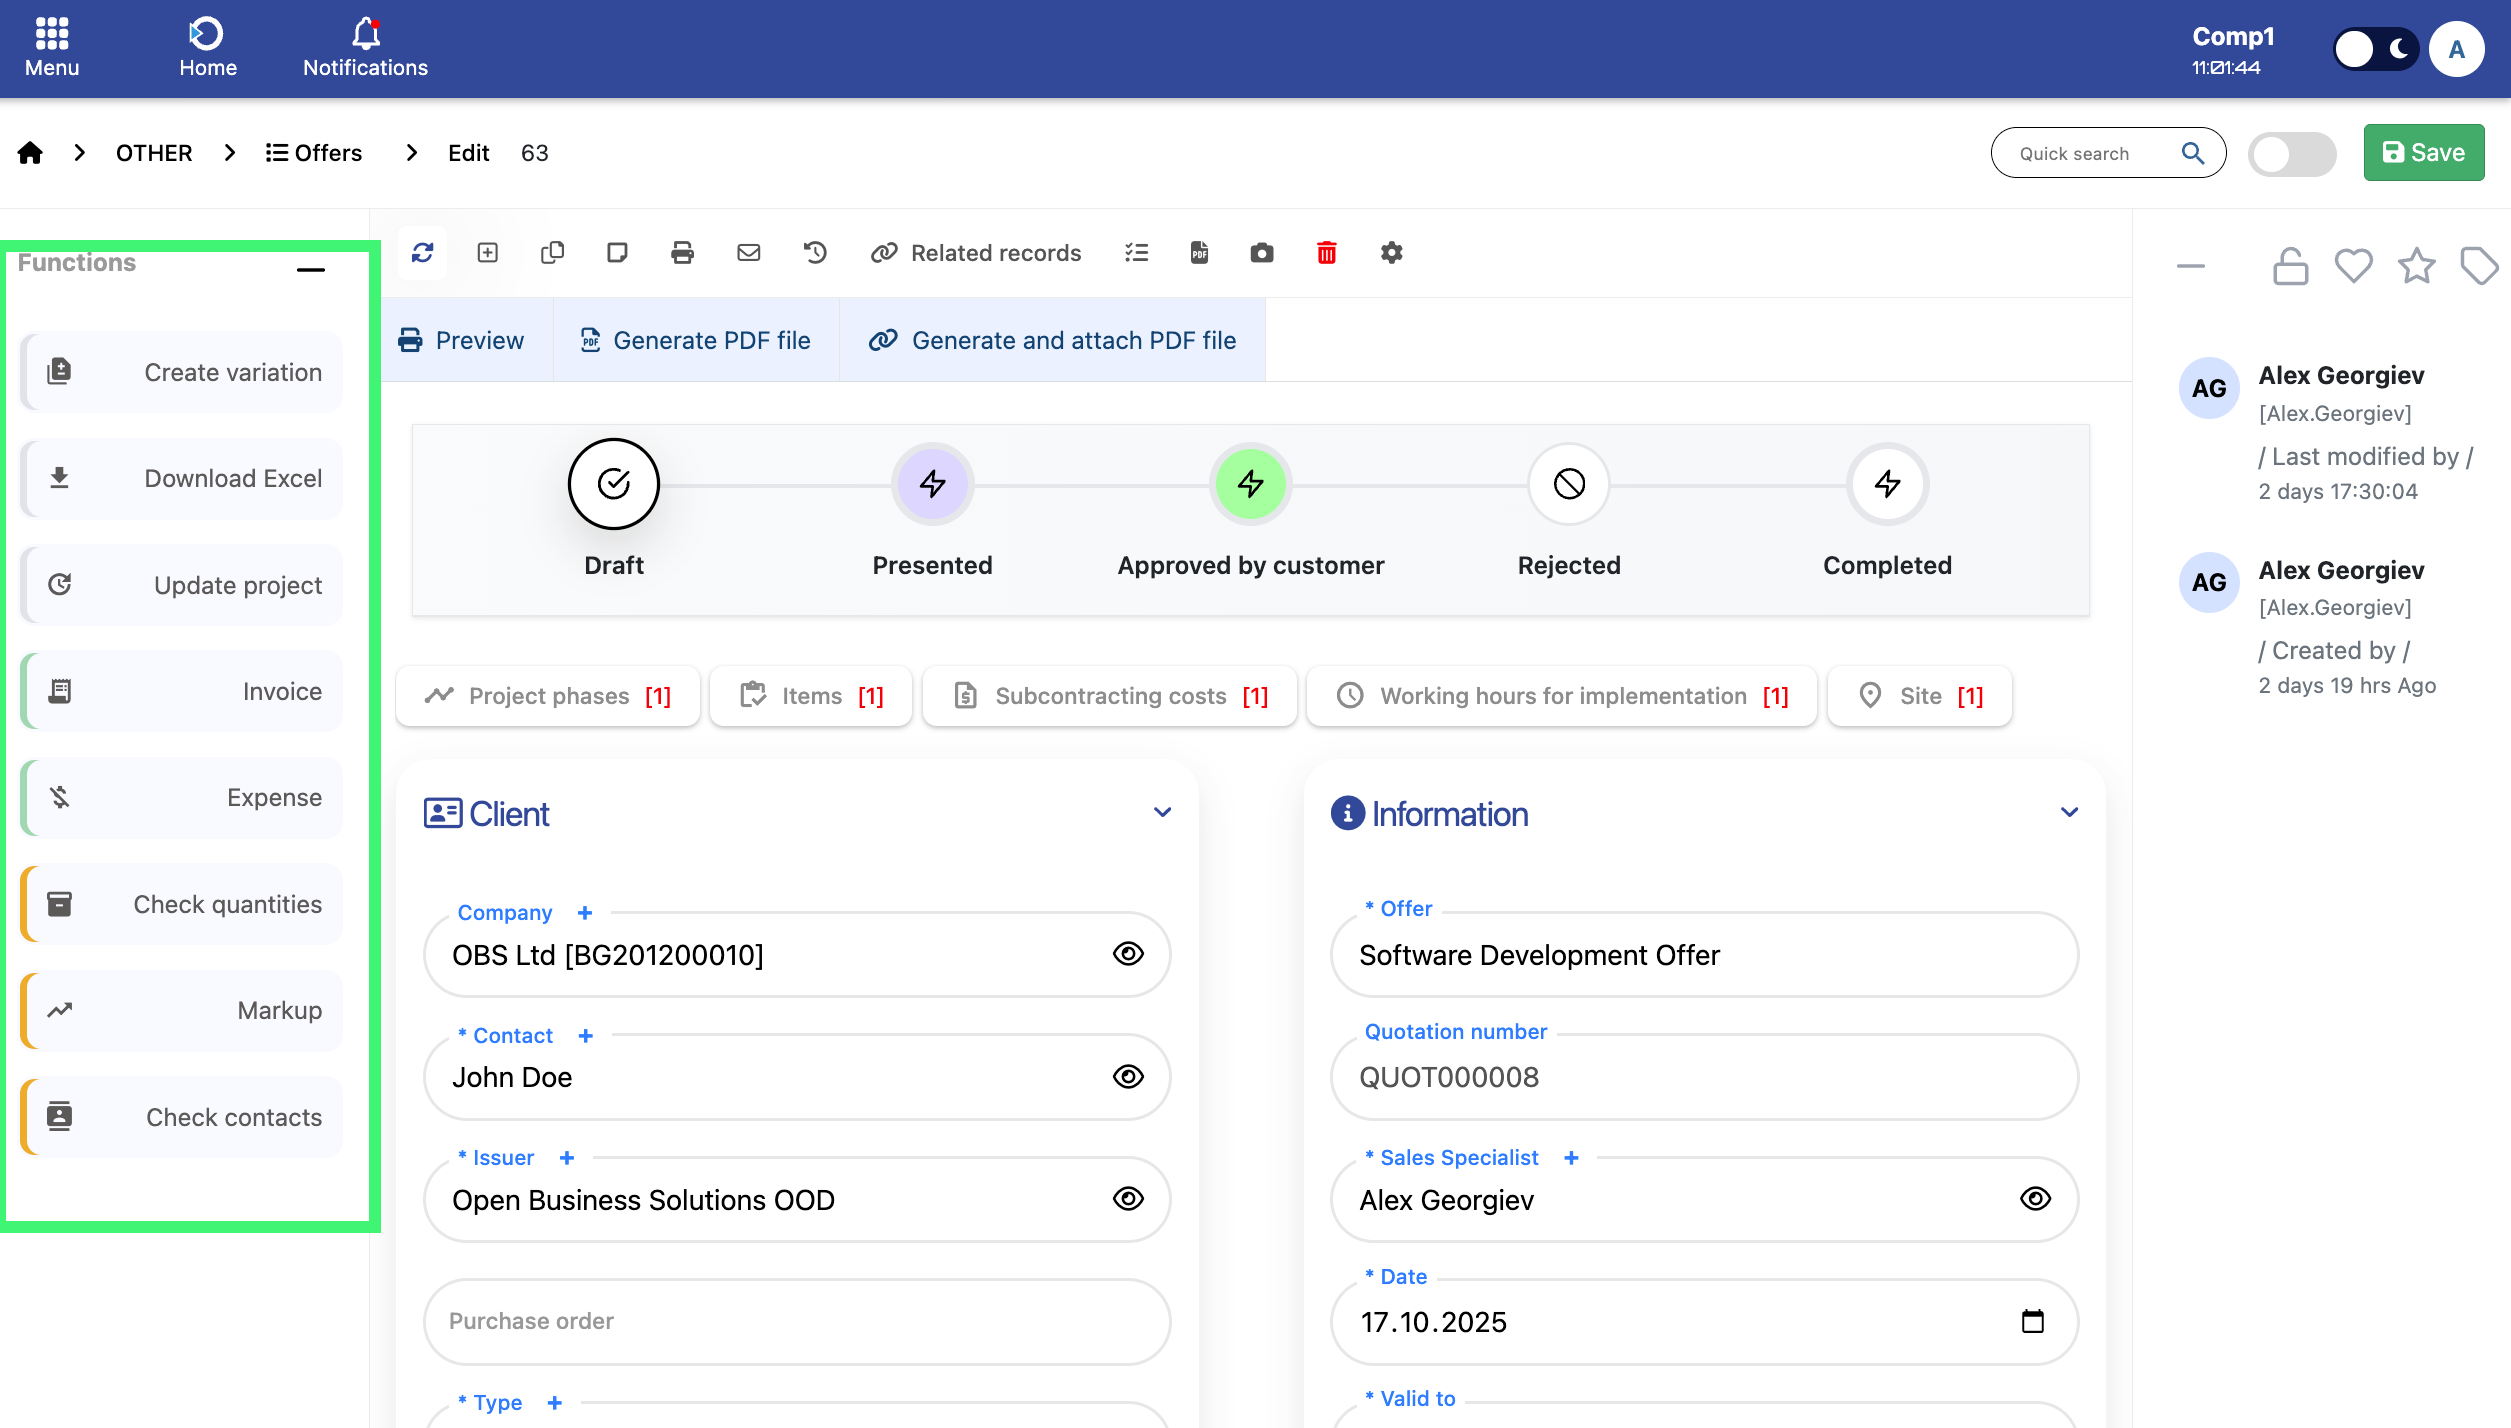
Location: Home screen > Offers > Functions
- Create Variation: Duplicates the selected quotation into a new version with all items, phases and details copied. The new quotation receives an incremented number (e.g., QUOT00008 → QUOT00008-01) for easy tracking and editing.
- Download Excel: Generates an Excel file with the full quotation - event and client details, itemized services, category totals and final summary in BGN and EUR.
- Update Project: Keeps a project synchronized with the latest changes made to its related quotation. Whenever the quotation’s structure – such as phases, services, products, or quantities – is modified, this function ensures that the linked project is automatically updated to reflect those changes. This function is intended for clients whose processes allow updates to the quotation even after the project has been created. In such cases, the project may already be active and in progress, but the quotation can still be adjusted according to new requirements or event developments.
- Create Invoice: Automatically generates a new invoice based on the selected quotation. The system copies all relevant client and pricing details, applies the correct tax and VAT configuration. A unique invoice number is generated automatically, ensuring proper financial sequencing and traceability. All related quotation items are included as summarized invoice lines and the new invoice is linked directly to the quotation for seamless financial tracking and reporting.
- New Expense: Opens a new expense form linked to the selected offer, allowing you to record and monitor all costs associated with the quotation.
- Check Quantities: Verifies item quantities in the selected quotation and compares them with available stock levels to ensure accurate and feasible offers.
- Check Markup: Provides a detailed profitability analysis for the selected quotation, showing each item’s selling price, internal and external costs, total profit and markup percentage. This ensures all offers maintain healthy margins before approval.
- Check Contacts: Validates that the quotation has all required contact details - including company name, contact person, position and email - ensuring complete and reliable client information before sending the offer.