HCM /
Human capital
/Administration
Administration
Data Configuration Filling in organizations, departments, branches, offices, positions, and employees
1. Open the respective module (our_companies , departments, branches, offices, positions, staff)
2. Create, update or delete data in the modules.
1. Open module "Users".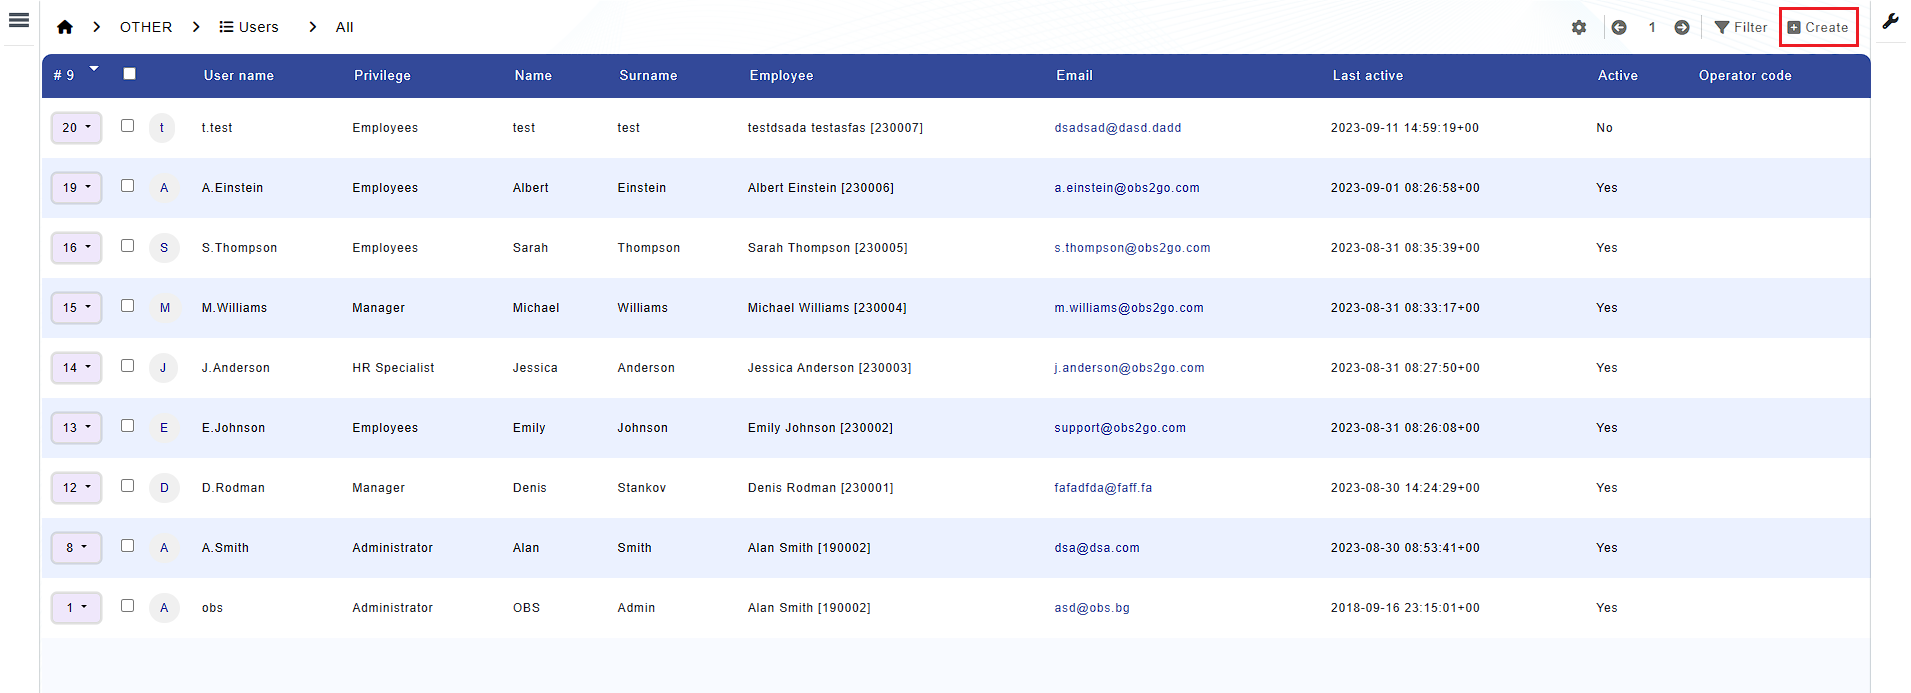
2. Create, update or delete a user.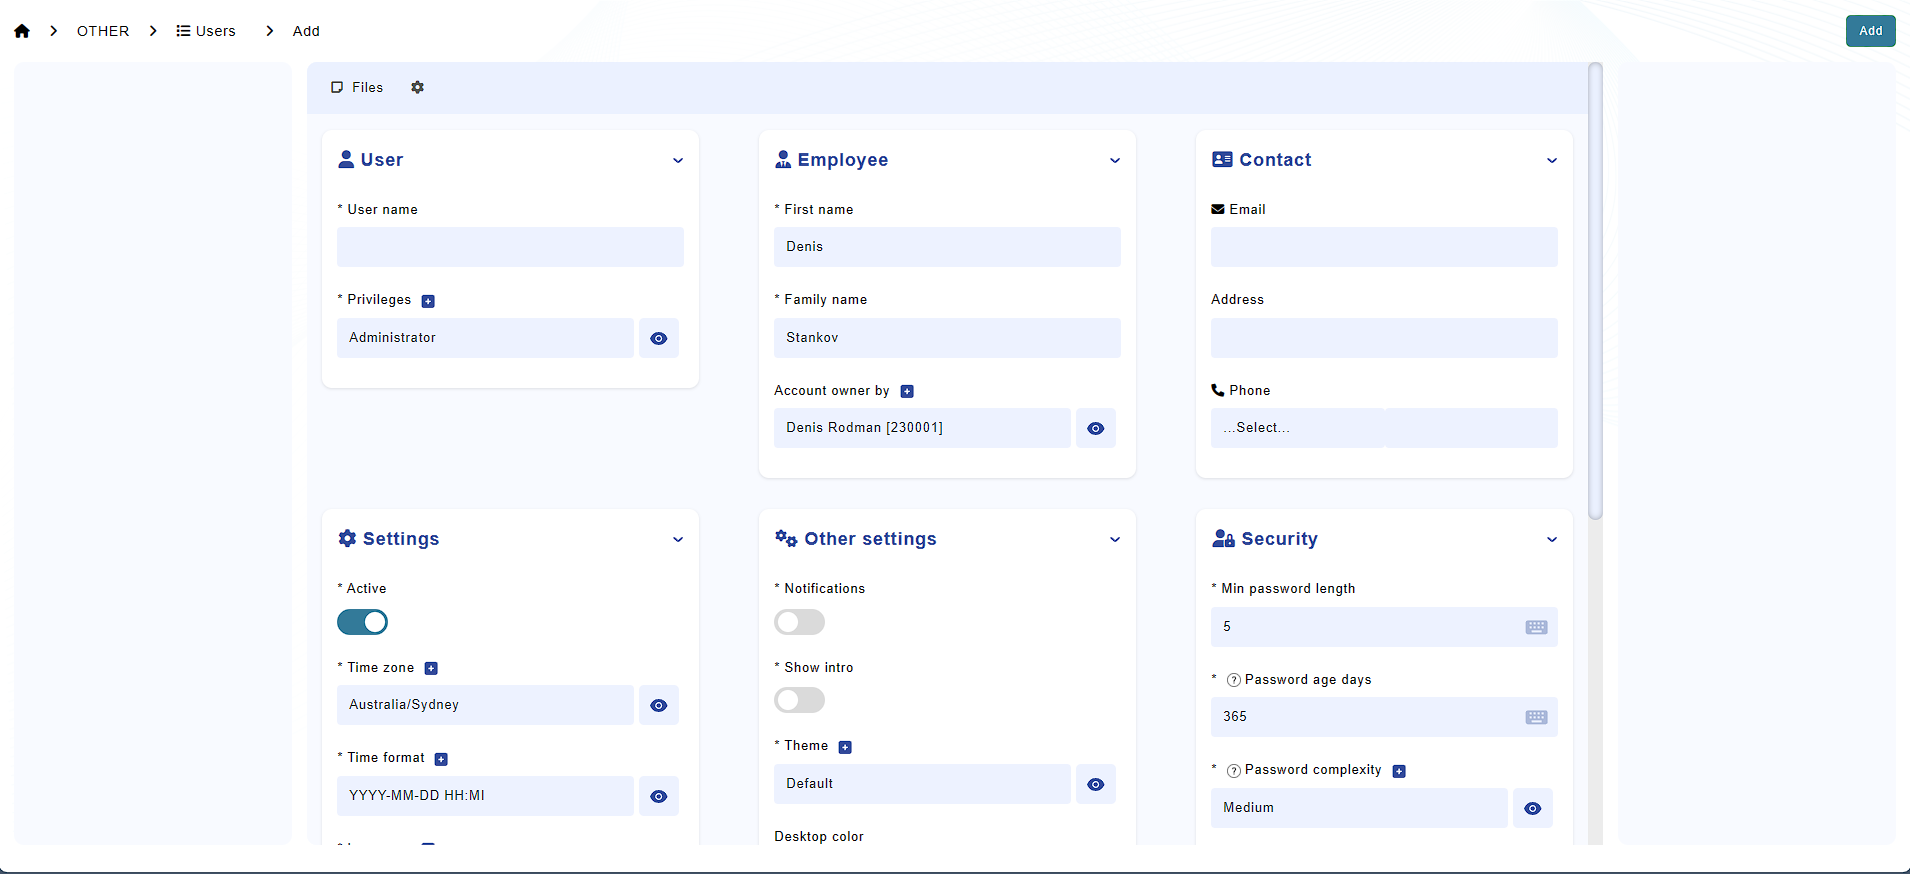
Introduction to Holiday Automation
OBS streamlines office holiday management globally through advanced automation, ensuring daily updates with relevant public holidays for each location.
Understanding Automation
Our system adds missing holidays based on local customs and regulations, designed to respect any administrative adjustments.
This balance of automation and flexibility ensures holiday schedules are accurate and customized.
Managing Automation
To modify the automated holiday management task, navigate to the Automated Tasks Module.
You can follow these steps:
1. Open the Control Panel.
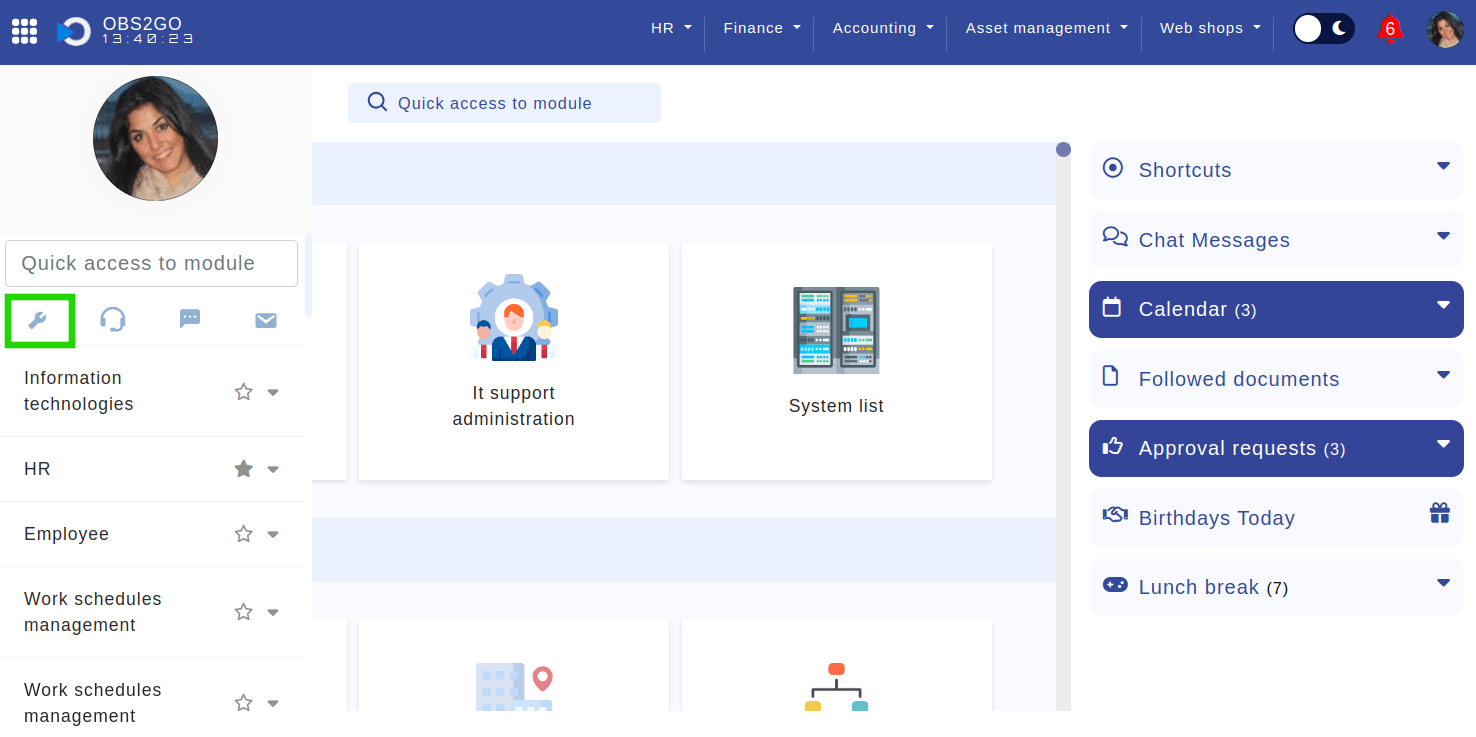
Location: Home > Left panel. Highlighted is the button that leads to the control panel.
2. Select "Admin Panel" and select "Automated Tasks".
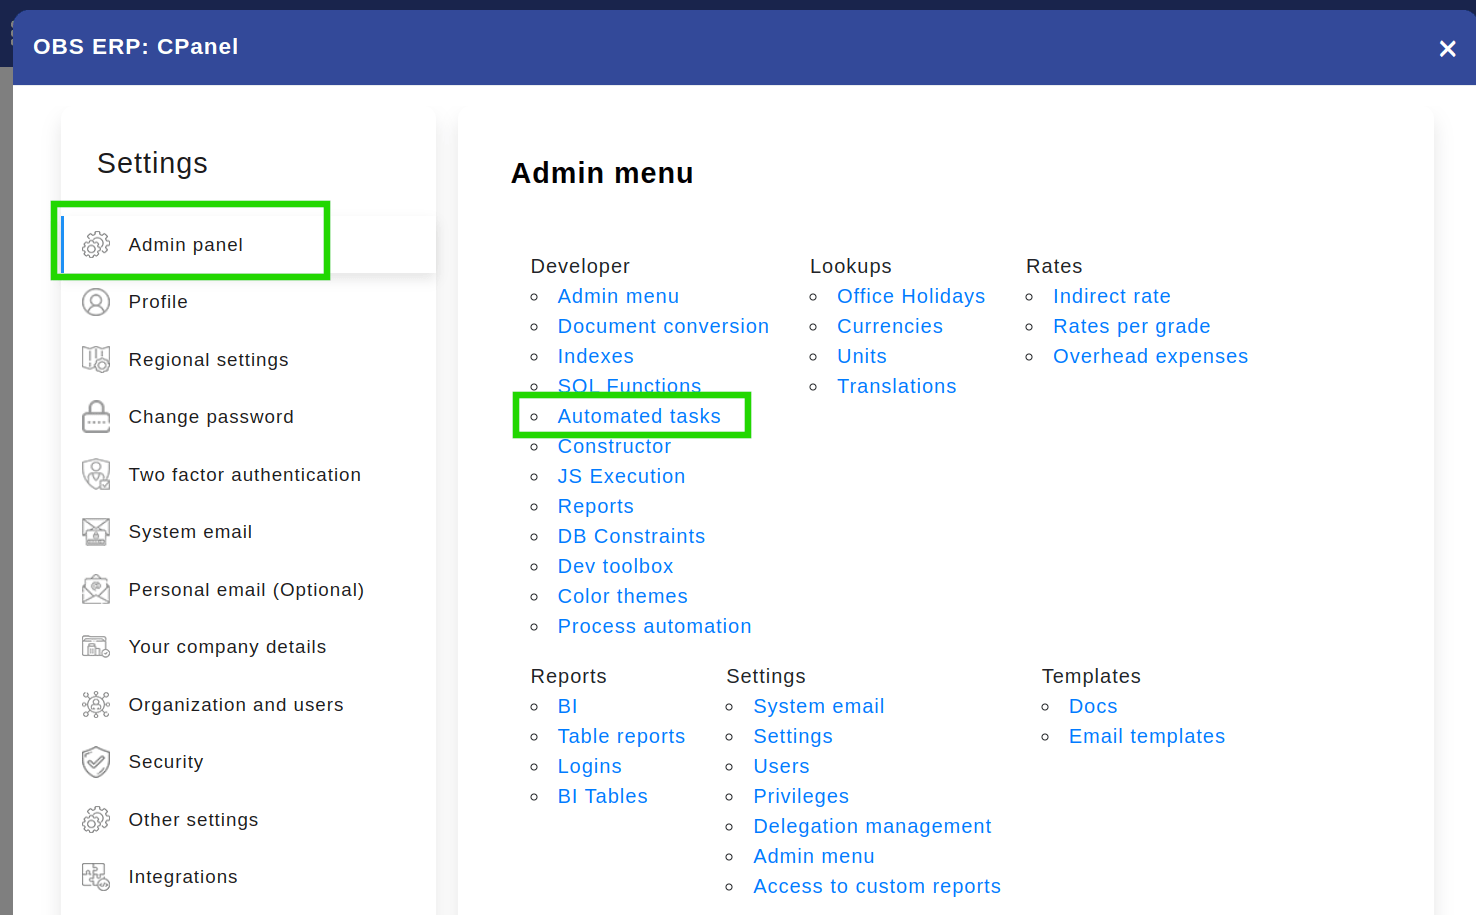
Location: Home > Control panel > Admin panel. Highlighted is section "Admin panel", and the button "Automated tasks" under section "Developer".
3. Find the Task by searching "Annual Holiday Synchronization Task" and click "Edit" to customize the task if needed.
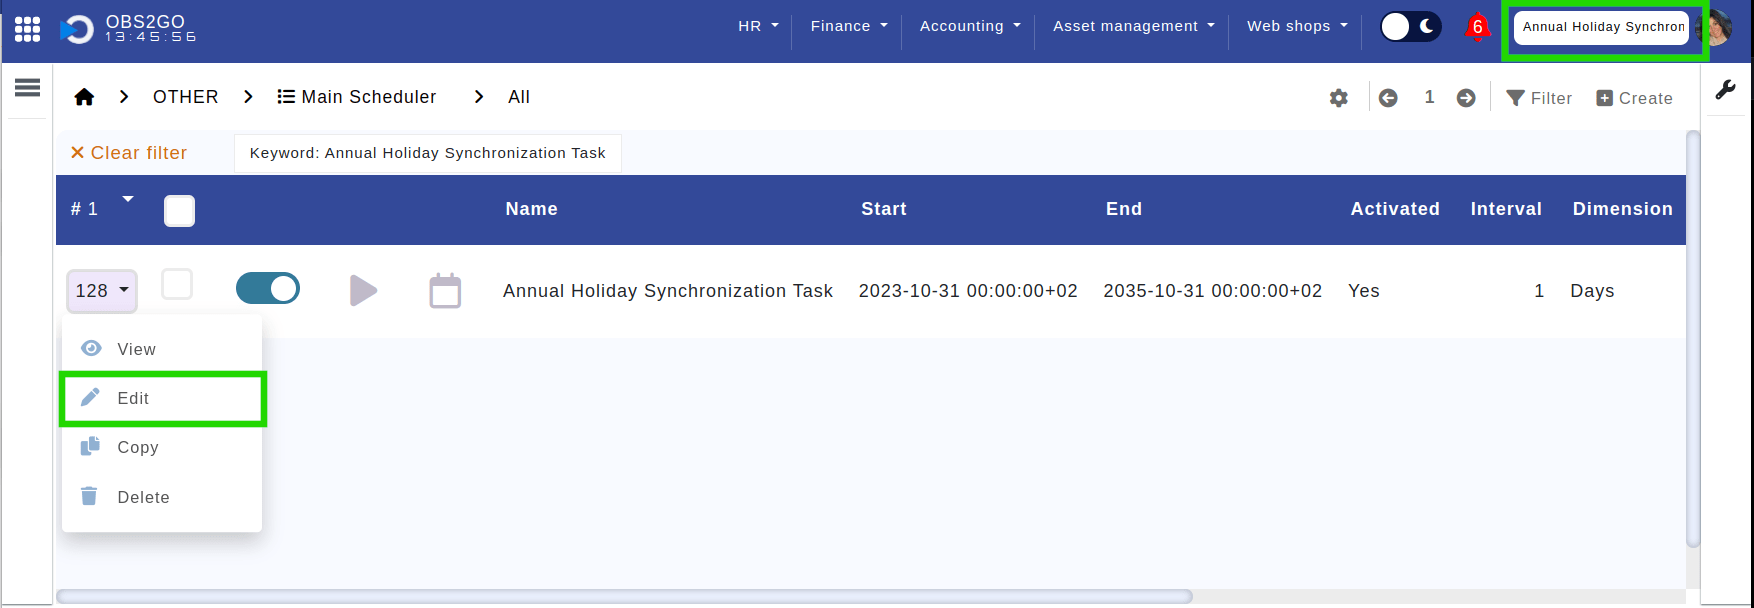
Location: Home > Control panel > Admin panel > Developer > Automated tasks. Highlighted are the "Quick Search" used to find the "Annual Holiday Synchronization Task", as well as the "Edit" button, indicating the option to modify the automated task.
4. Edit the automated task if necessary.
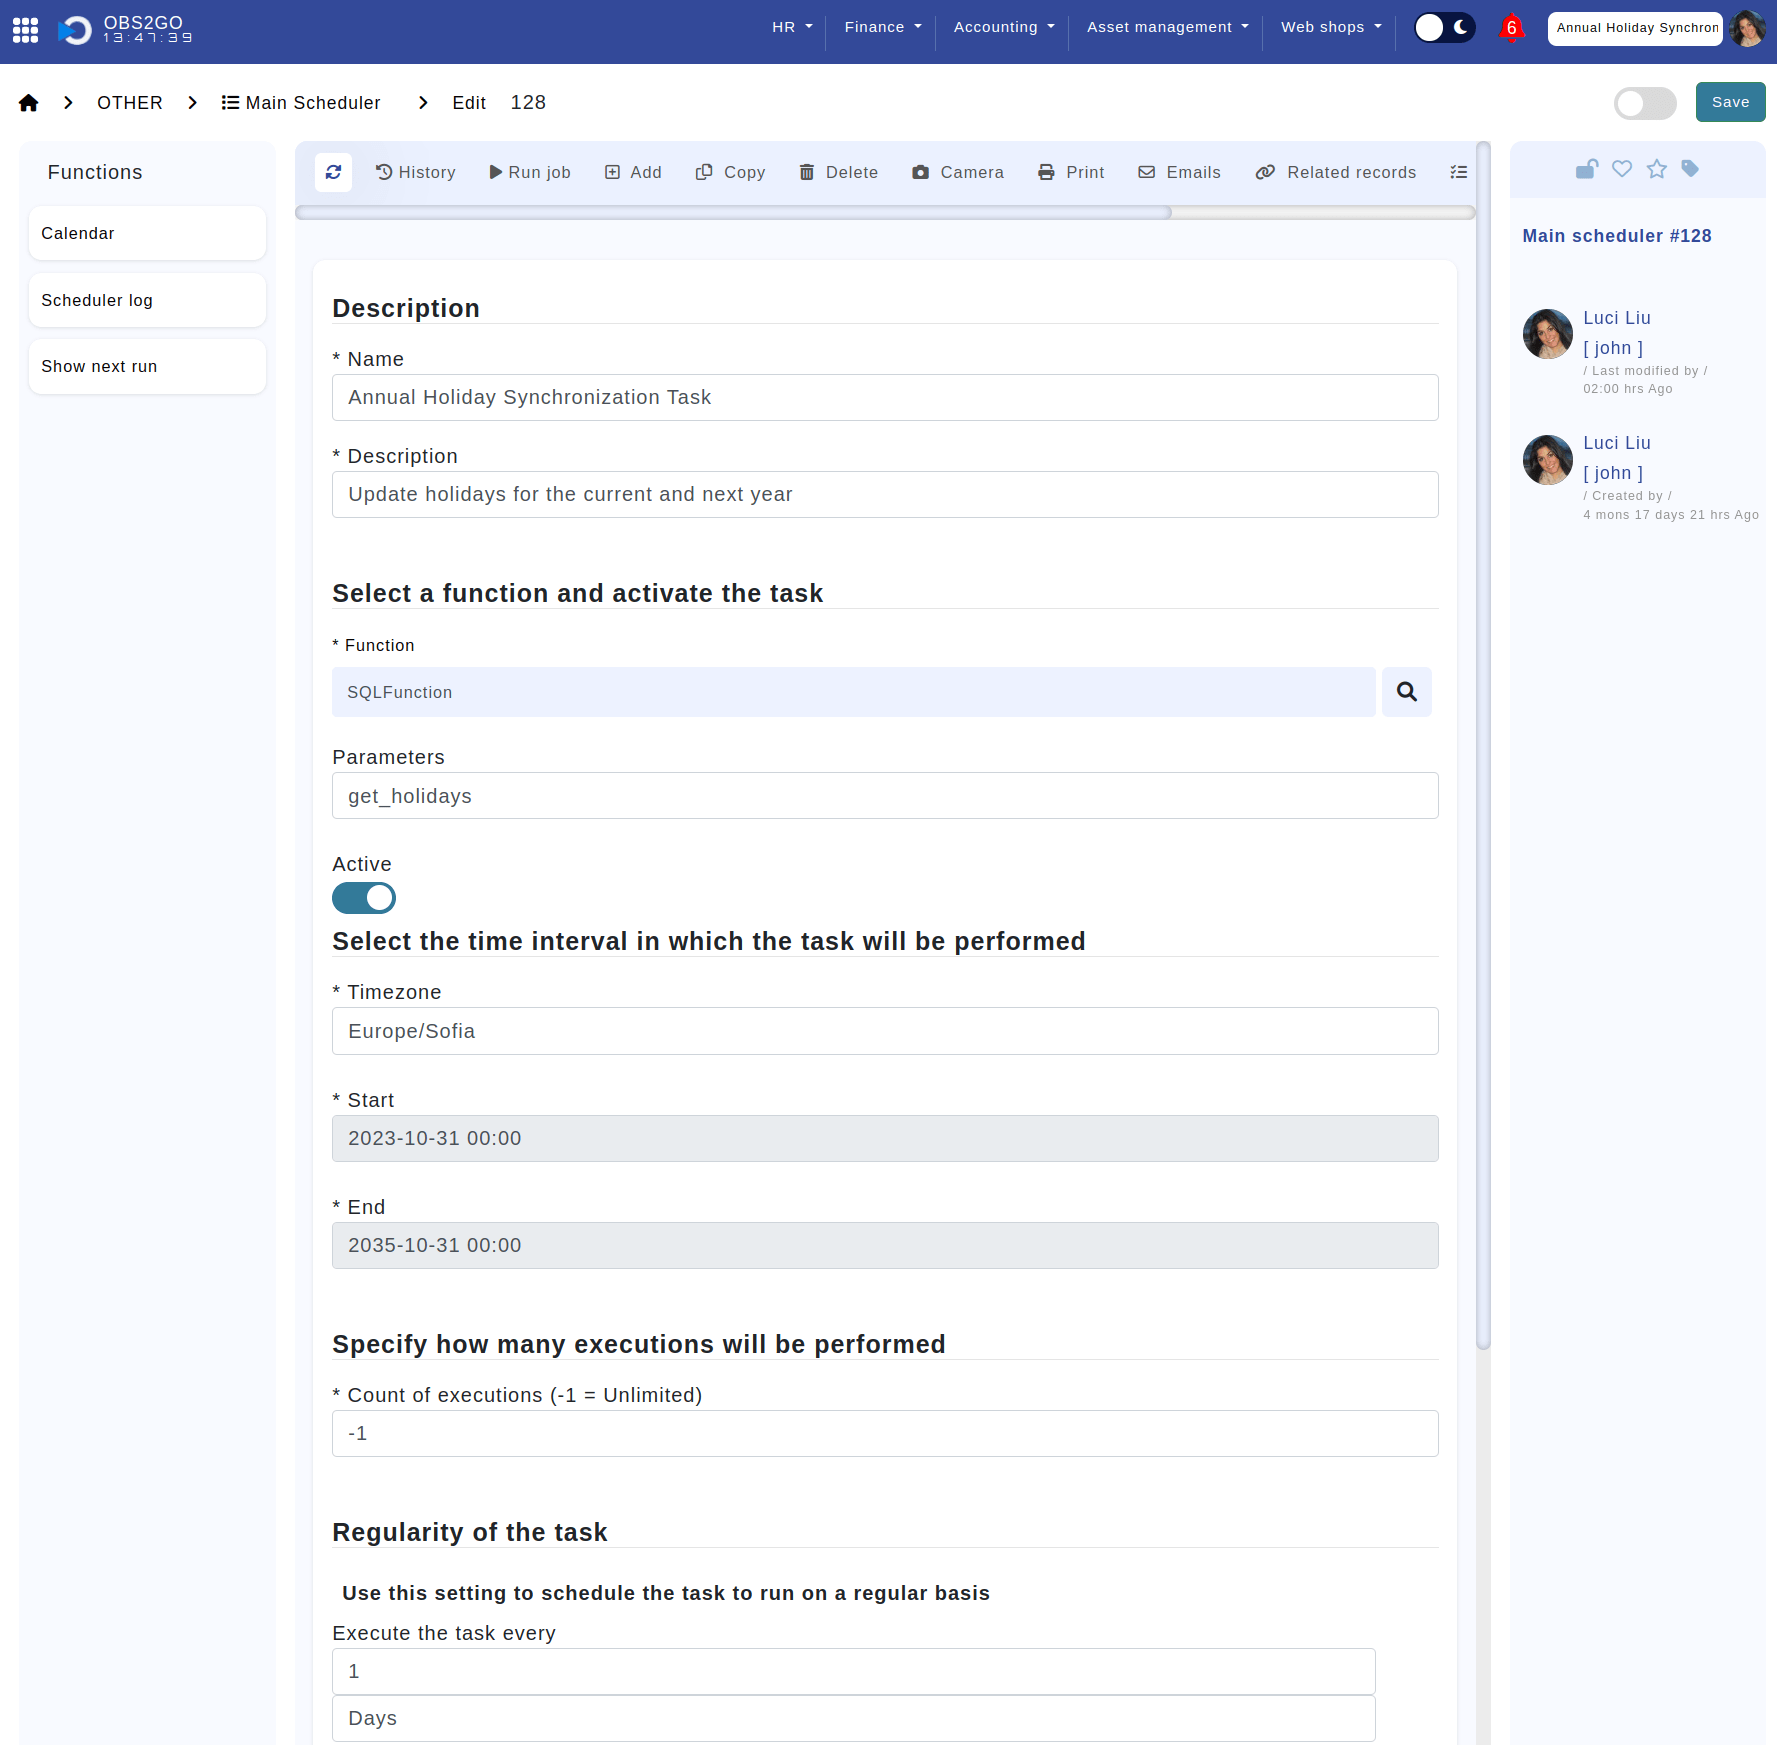
Location: Home > Control panel > Admin panel > Developer > Automated tasks > "Annual Holiday Synchronization Task".
Customizing Holiday Calendars
Managing office holidays effectively is essential for operational harmony across global and local levels.
Our system simplifies this process, providing tools to tailor holiday calendars to each office"s specific needs.
Here"s how to start:
1. Open the Control Panel
Location: Home > Left panel. Highlighted is the button that leads to the control panel.
2. Navigate to the Admin Panel and select "Office Holidays":
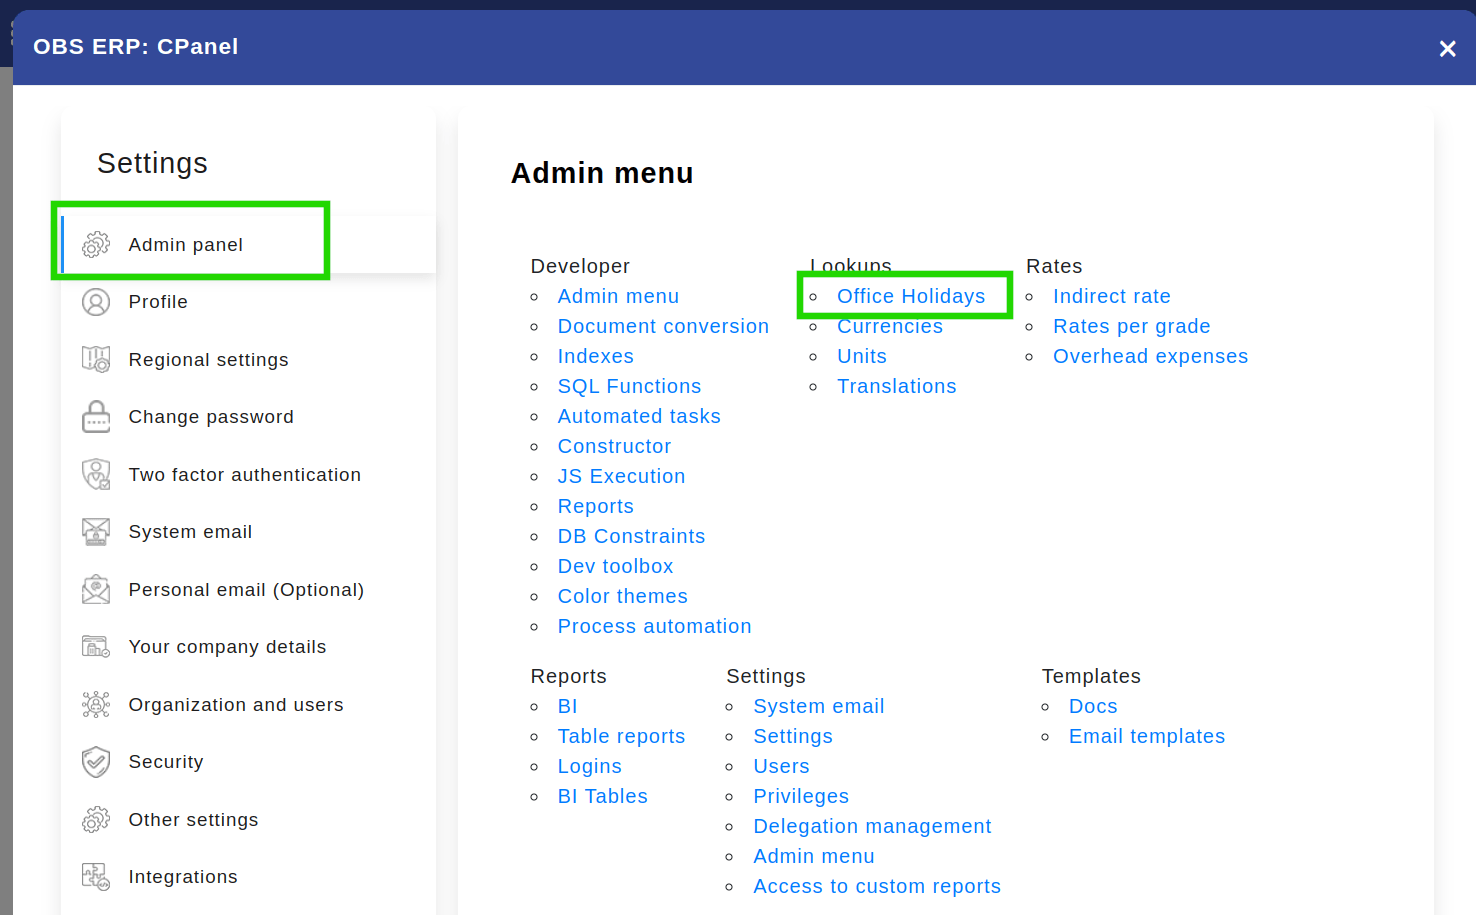
Location: Home > Control panel > Admin panel. Highlighted is section "Admin panel", and the button "Office Holidays" under section "Lookups".
3. Customizing the Calendar
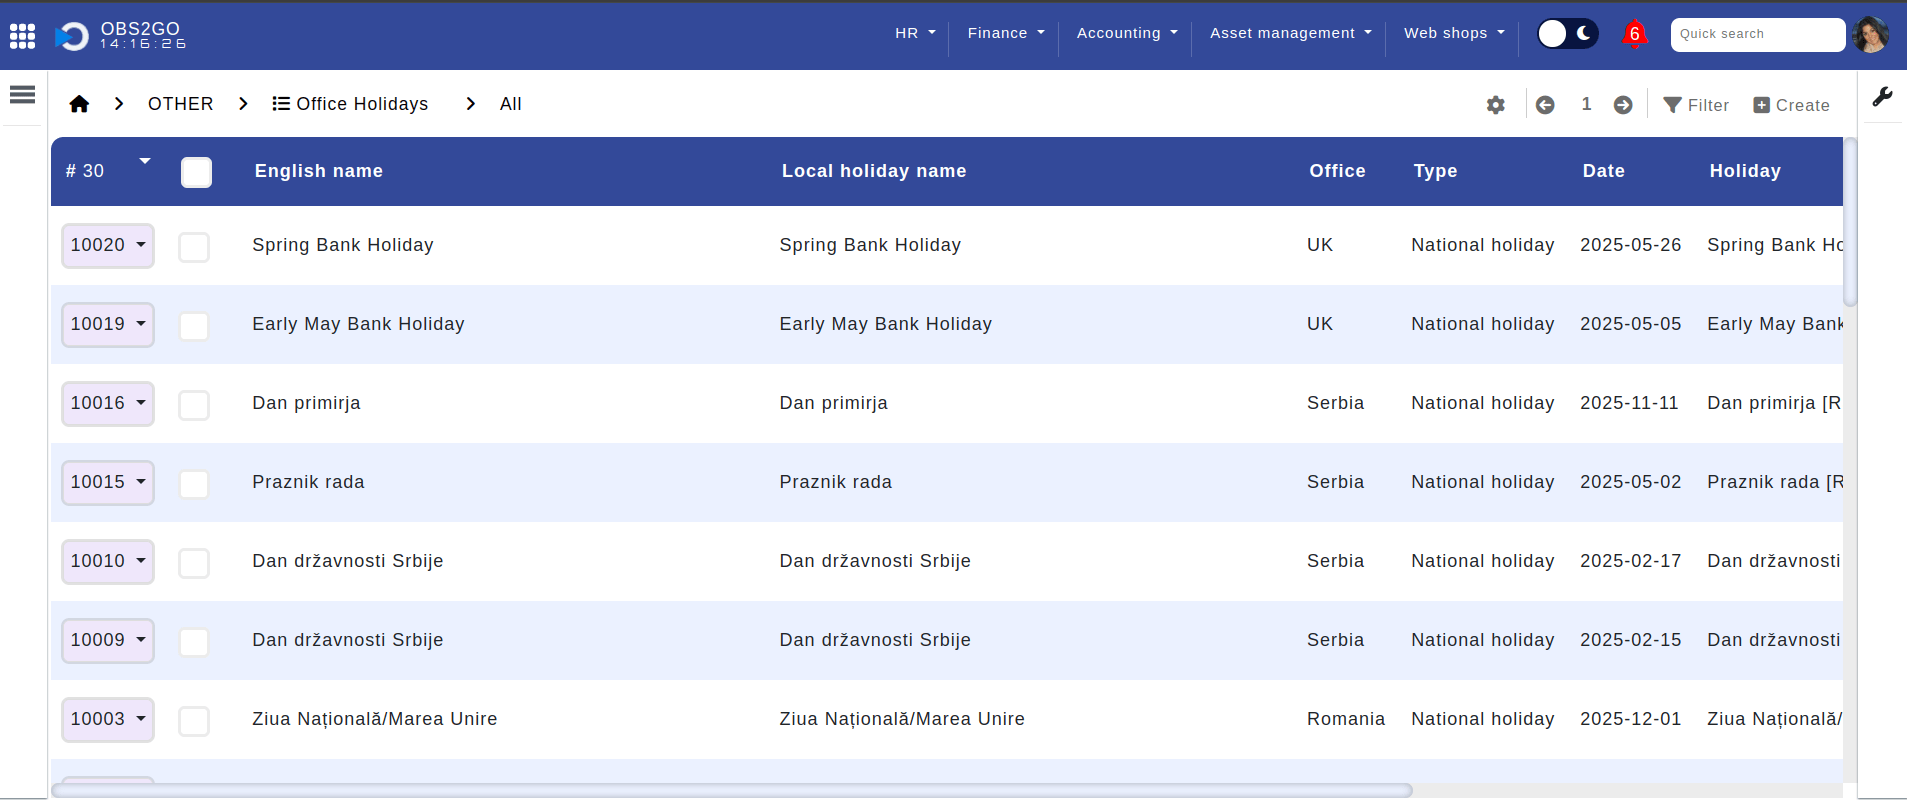
When you open the "Office Holidays" module, you"ll find a list of holidays. Each entry (record/row) in this list represents a specific holiday.
Location: Home > Control panel > Admin panel > Lookups > Office Holidays.
This setup makes managing holidays straightforward, as it displays all necessary details per holiday for each office. The records include several key fields:
| Field | Description |
|---|---|
| English Name | The commonly recognized name of the holiday in English. |
| Local Name | The name of the holiday as known locally. |
| Type | This indicates whether the day is a "National Holiday" or a "Working Day." A "Working Day" designation is used for those days that are officially recognized as working days during weekends or other non-standard working times for the specific country or office. |
| Office | Specifies the office location the holiday applies to. |
| Date | The exact date of the holiday. |
Explore the following customization options in this module:
| Feature | Description |
|---|---|
| Filtering by Office or Date | You can use the filter to locate holidays by office or date.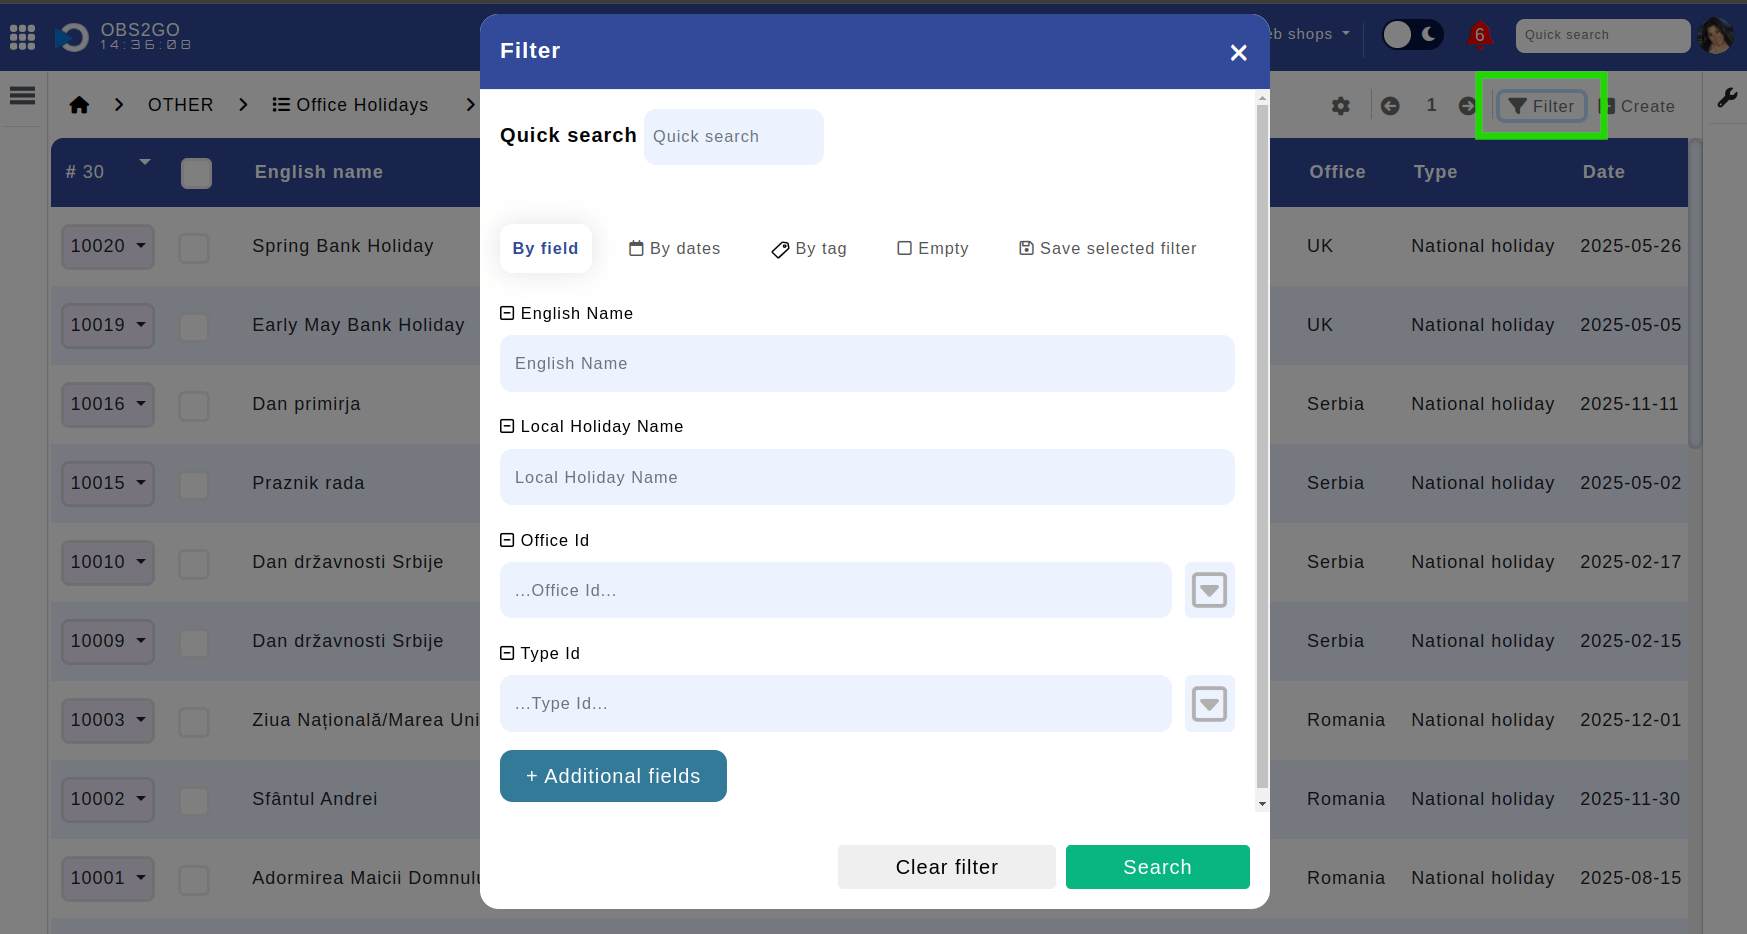 Location: Home > Control panel > Admin panel > Lookups > Office Holidays > Filter. Highlighted is button "Filter" that opens the filter menu. |
| Adding / Deleting Holidays | Adjust your holiday list using add/delete functions. Adding holidays To add a new holiday, click "Create". 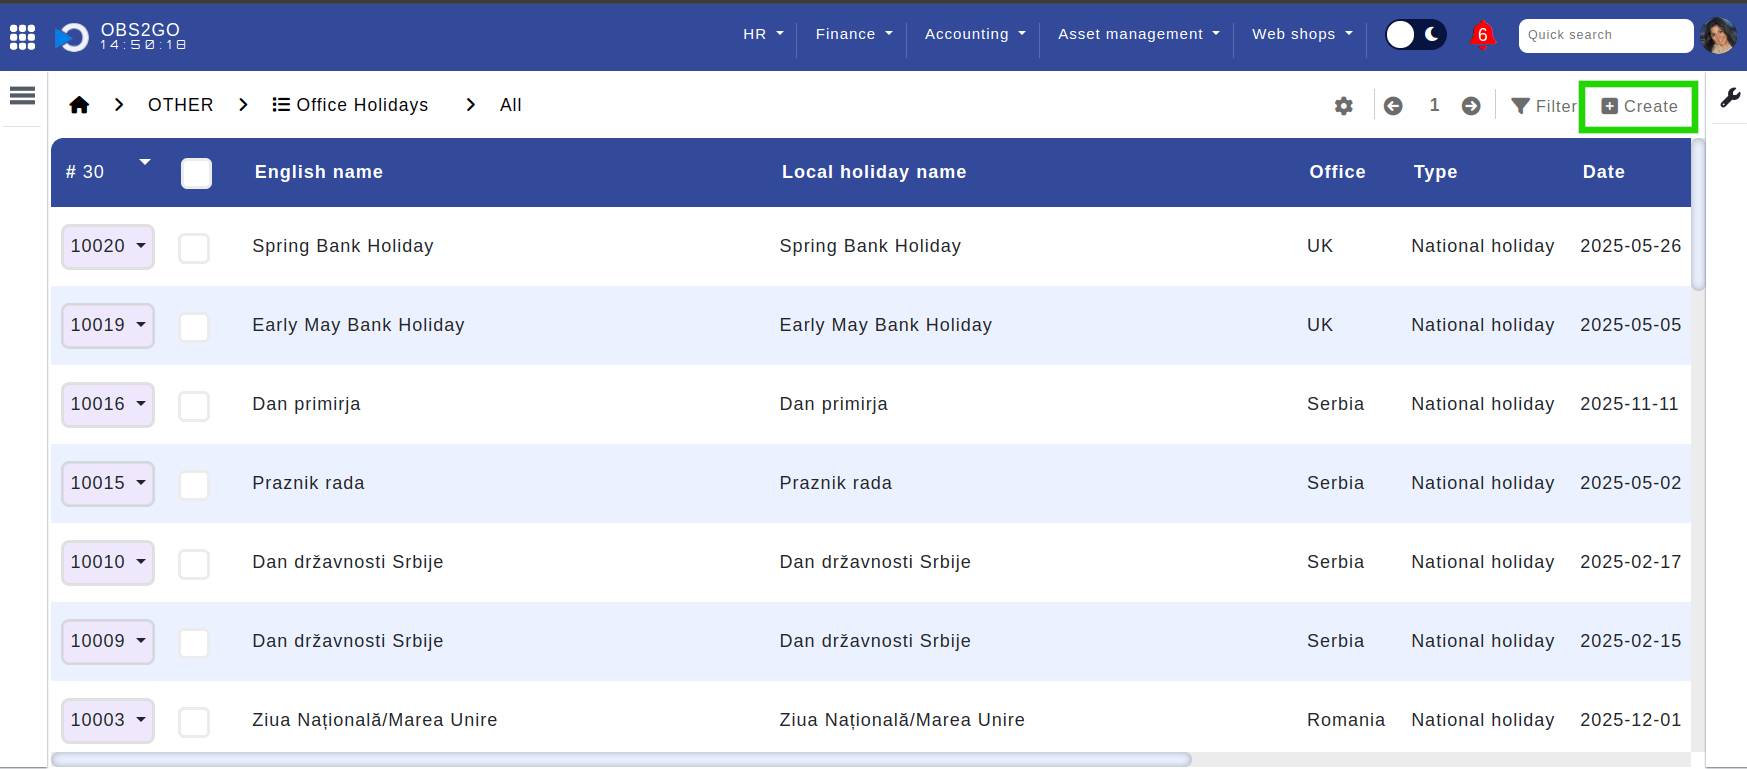 Location: Home > Control panel > Admin panel > Lookups > Office Holidays. Highlighted is the "Create" button, which opens the form for adding a new holiday. Next, fill in the required fields: English Name, Local Name, Office, Type, and Date. Finalize by clicking "Add". 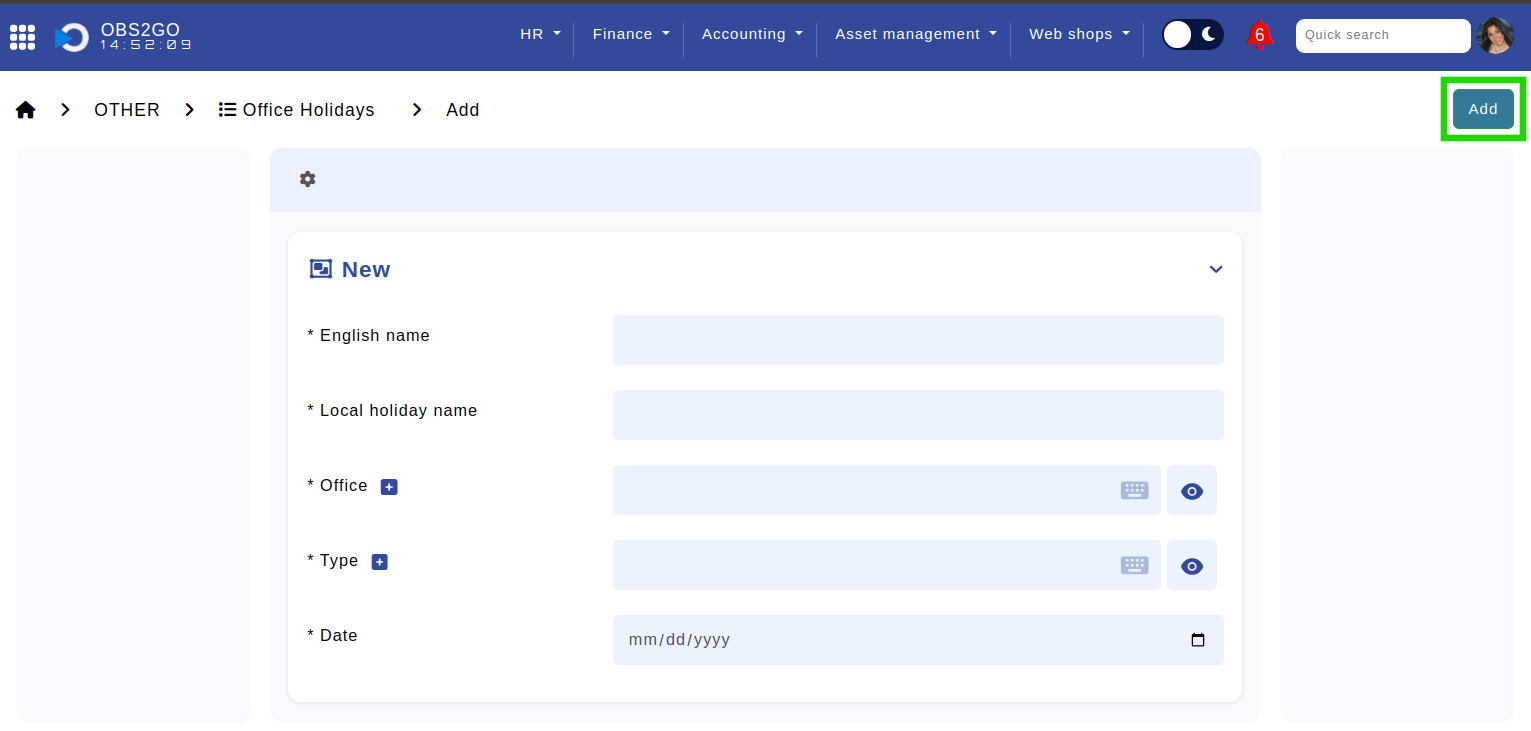 Location: Home > Control panel > Admin panel > Lookups > Office Holidays. Highlighted is the "Add" button, which finalizes the creation of the holiday. Deleting holidays To remove a holiday, simply select the holiday by clicking on its ID and then choose "Delete". 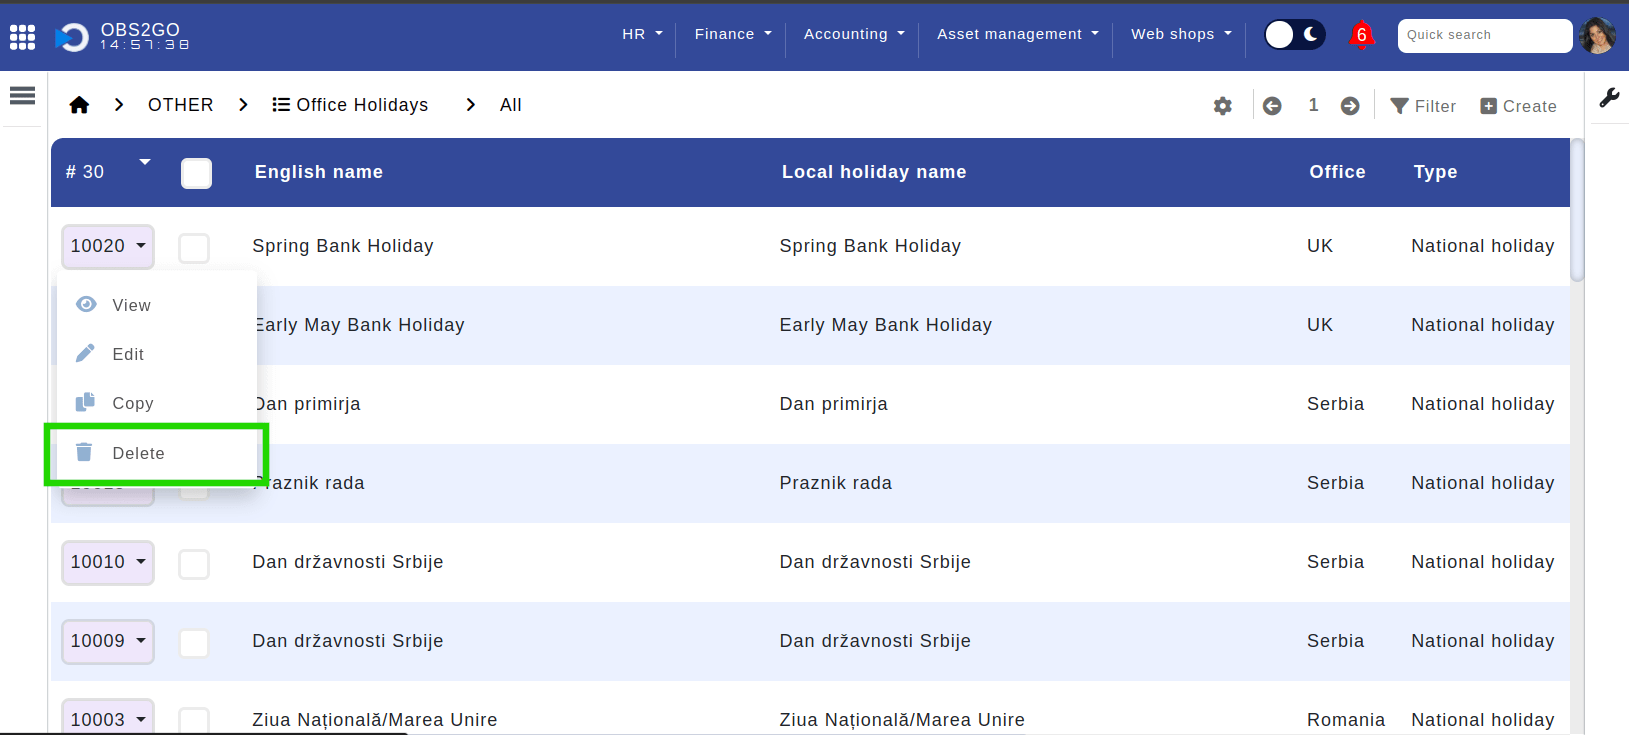 Location: Home > Control panel > Admin panel > Lookups > Office Holidays. Highlighted is the "Delete" button, used to remove the selected holiday. You also have the option to select multiple holidays and delete them in one action. 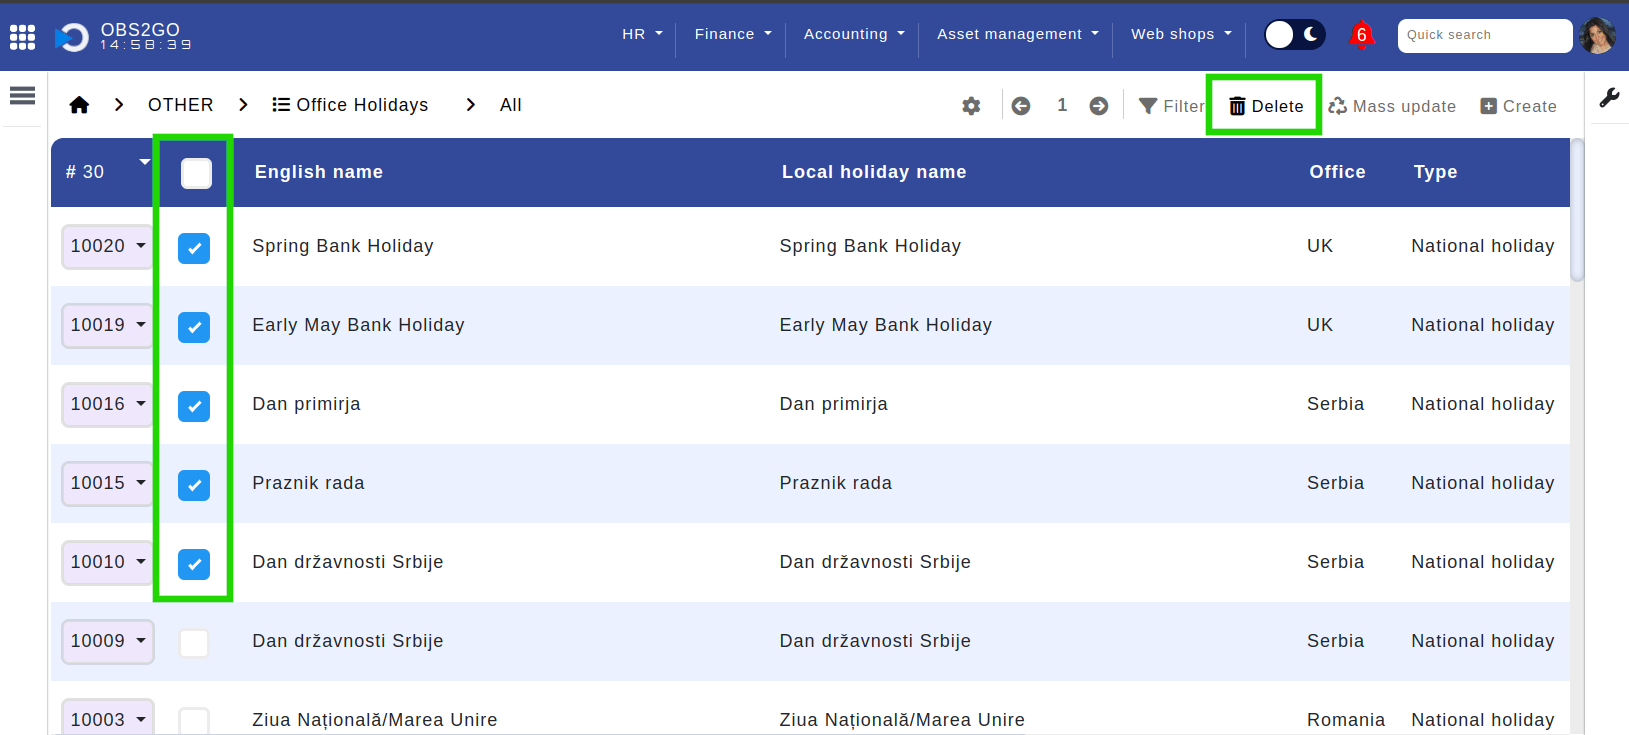 Location: Home > Control panel > Admin panel > Lookups > Office Holidays. Highlighted is the "Delete" button, used to remove the selected holiday. |
| Bulk Importing Holidays | To manage holidays across multiple offices or update holiday lists in bulk, follow these steps for Excel import: 1. Navigate to the left panel. 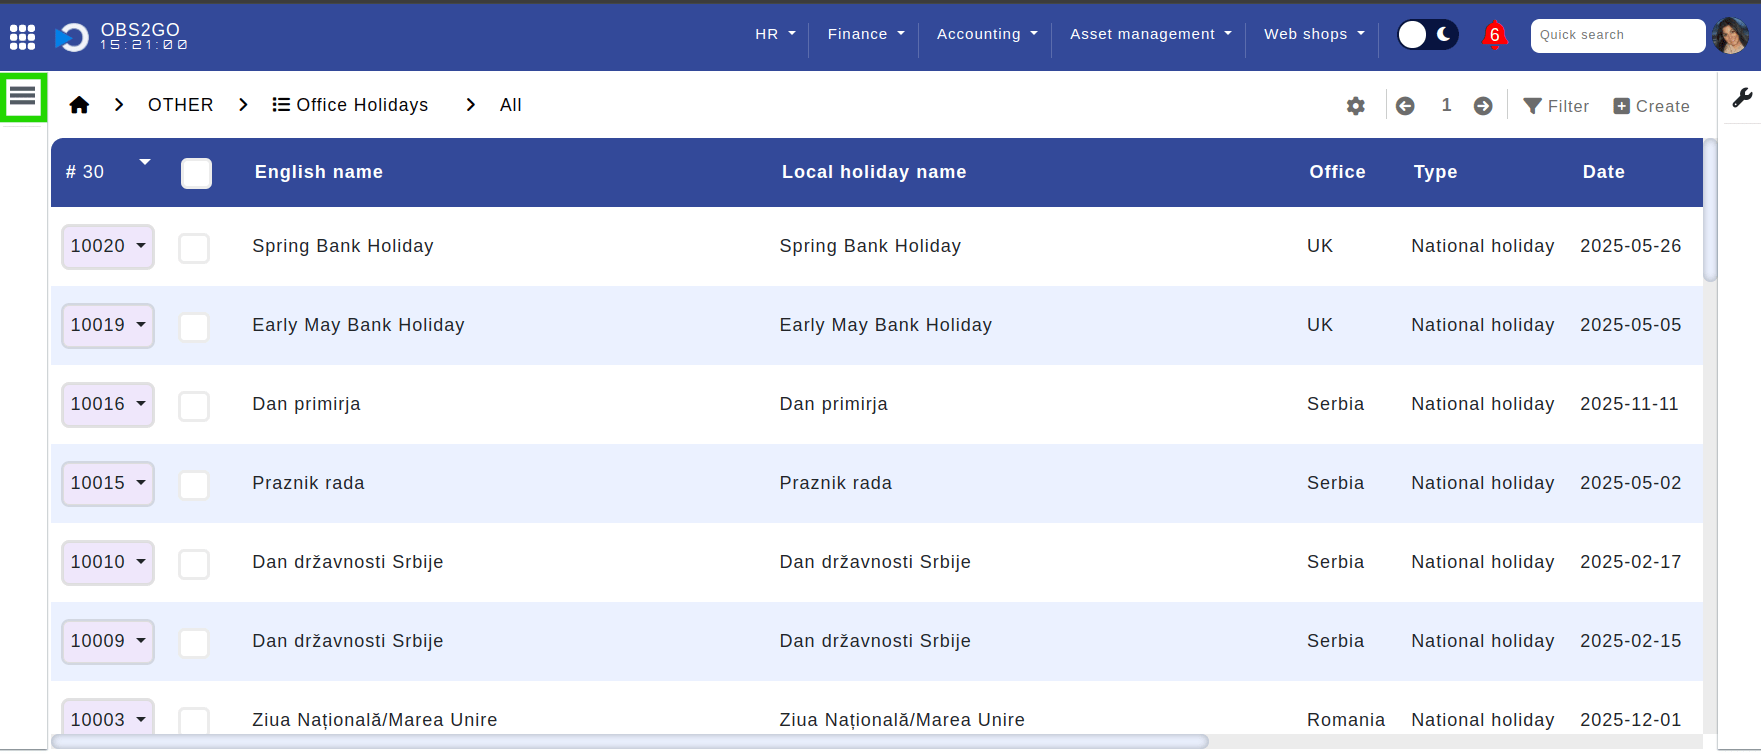 Location: Home > Control panel > Admin panel > Lookups > Office Holidays. Highlighted is the three-line icon, which, when clicked, opens the left panel. 2. Select Data > "Import XLSX" to access the import feature. 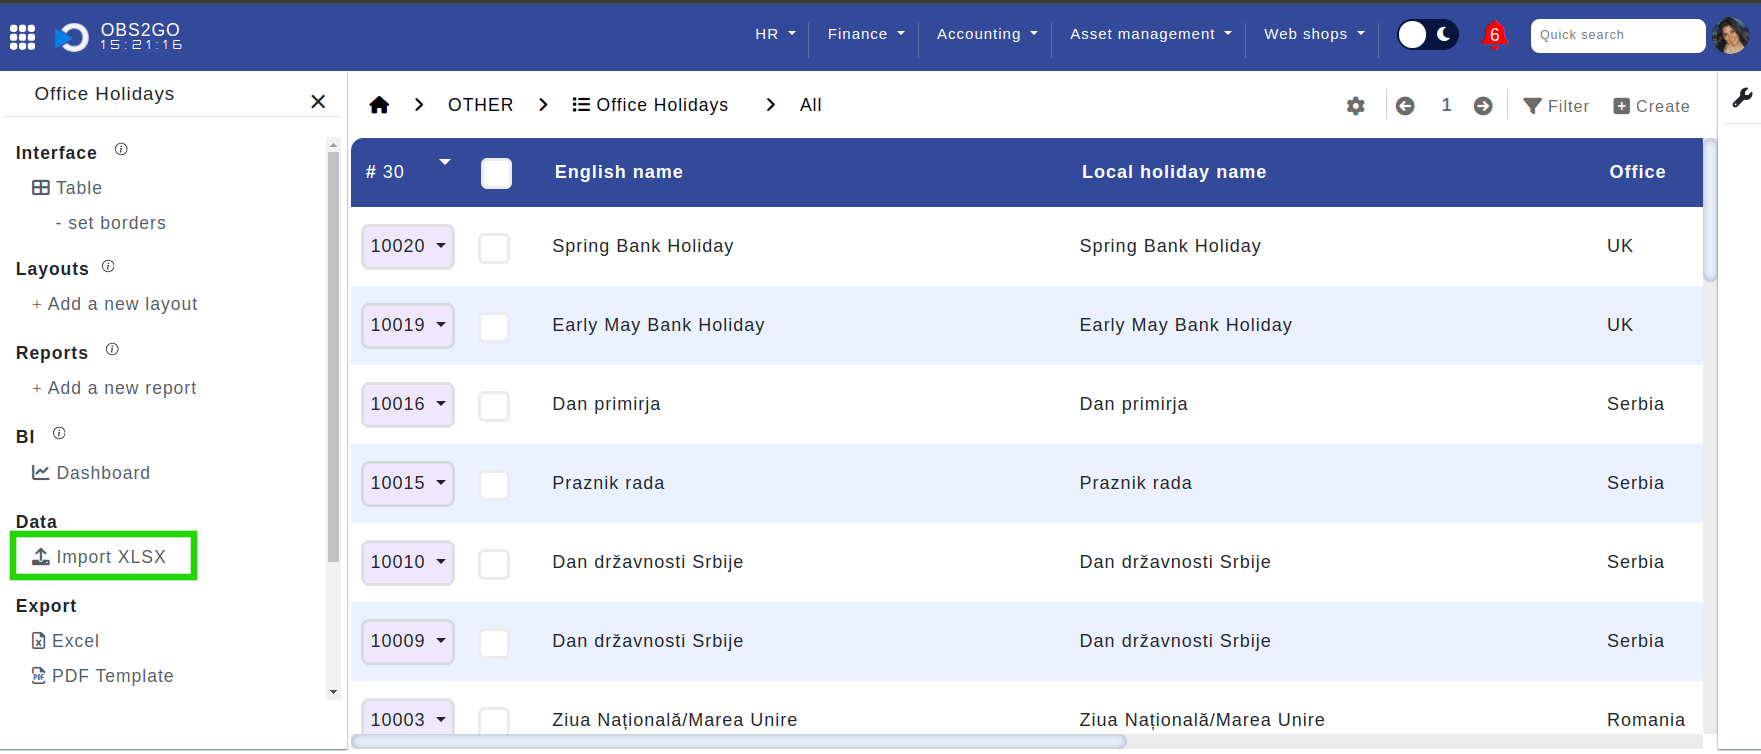 Location: Home > Control panel > Admin panel > Lookups > Office Holidays > Left panel. Highlighted is the "Import XLSX" option which on click opens the import data feature. 3. Download the provided template and fill it with the holiday information you need to add or update. 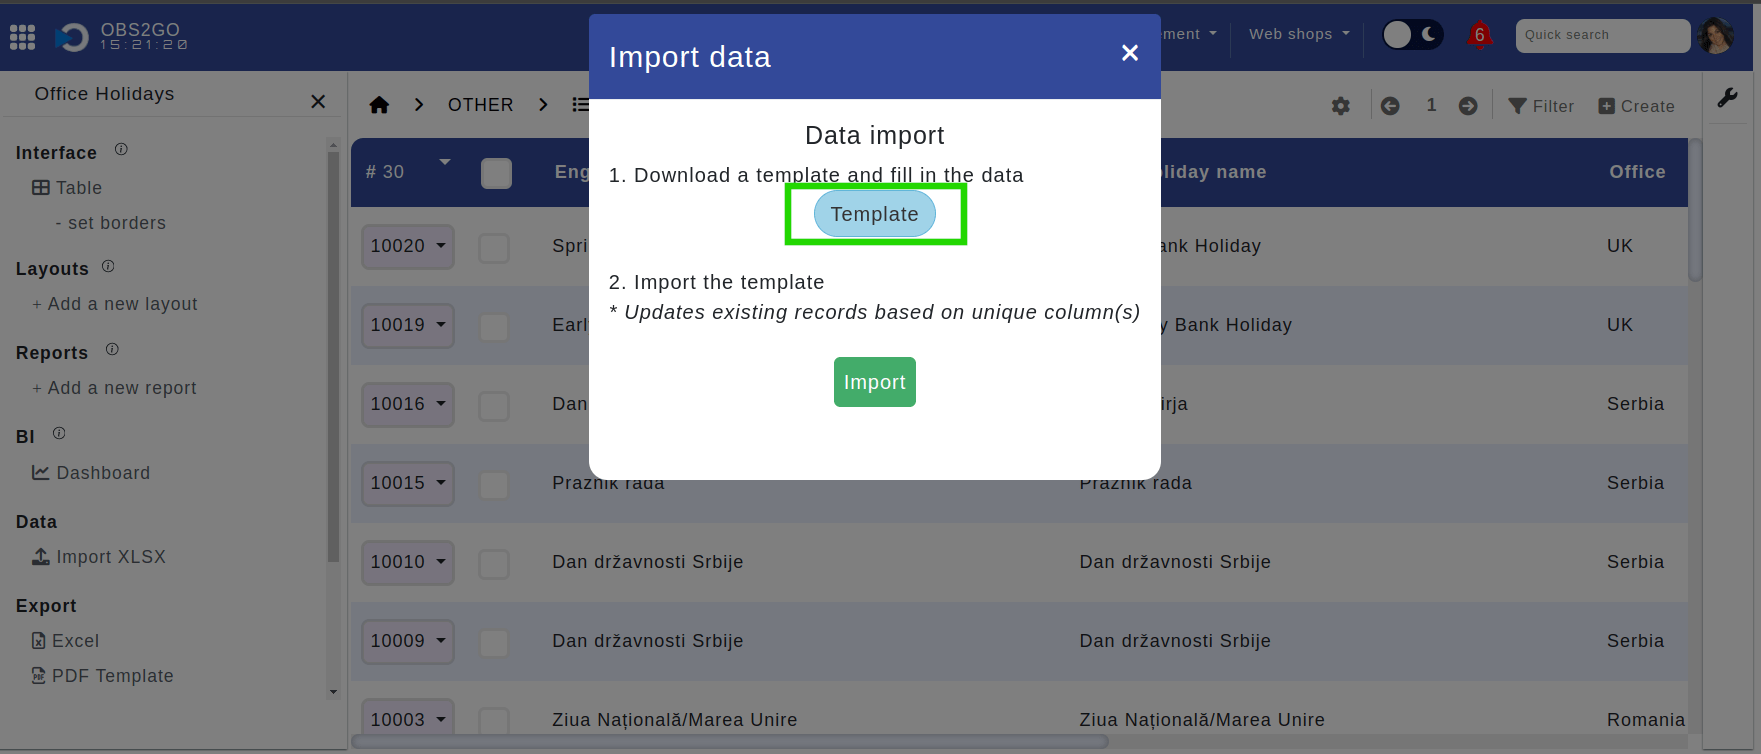 Location: Home > Control panel > Admin panel > Lookups > Office Holidays > Import Data. Highlighted is the "Template" button, which initiates the template download upon clicking.  Location: Excel. The image demonstrates a successful case of bulk-importing holidays. Note: Columns "G" and "H" should be left blank. 4. Once your Excel sheet is complete, import it back into the system to apply the updates. 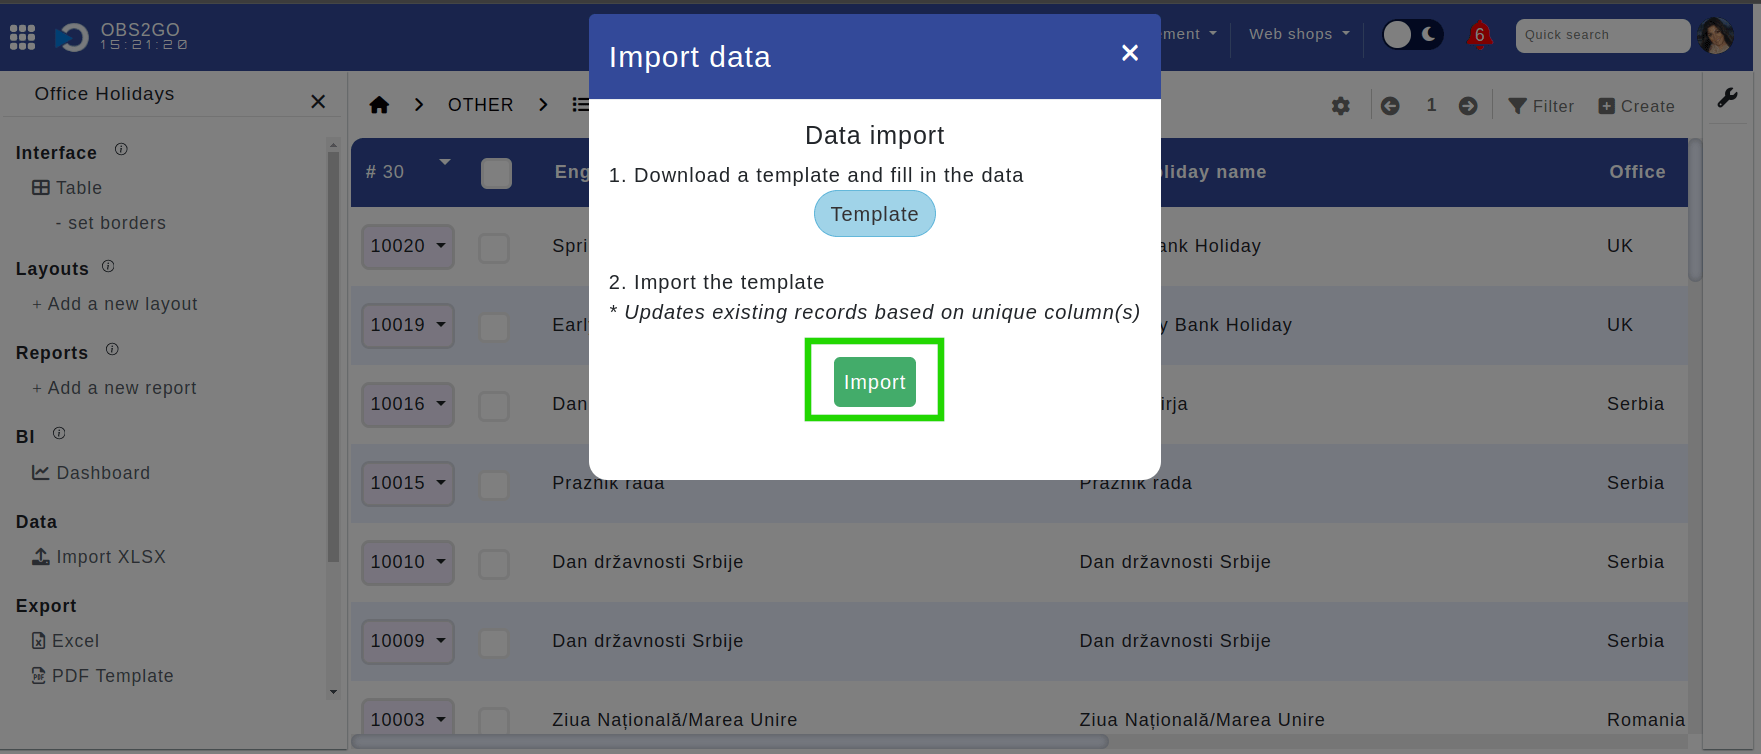 Location: Home > Control panel > Admin panel > Lookups > Office Holidays > Import Data. Highlighted is the "Import" button, which upon clicking opens your device's library to select the Excel file for import into the system. Upon a successful import, you"ll see a "Import successful" notification.  Location: Home > Control panel > Admin panel > Lookups > Office Holidays > Import Data. Highlighted is the "Import successful" message, signifying the successful completion of the operation. This process simplifies large-scale holiday management, allowing for quick and organized adjustments to your holiday calendars. |
By following these structured steps, administrators can efficiently manage and customize holiday calendars, ensuring they meet the unique requirements of each office.
This process not only saves time but also enhances operational efficiency by keeping holiday schedules accurate and up-to-date.
1. Open the respective module.
2. Open all records for the respective module.
3. Click the "Navigation menu" at the top-left corner, then click "Import XLSX"
This will open a pop-up window where you can download the template..
After downloading the template and filling it, next step is to import it back into the module by doing the same steps as downloading the "template", but this time you will need to click "Import" button.
text
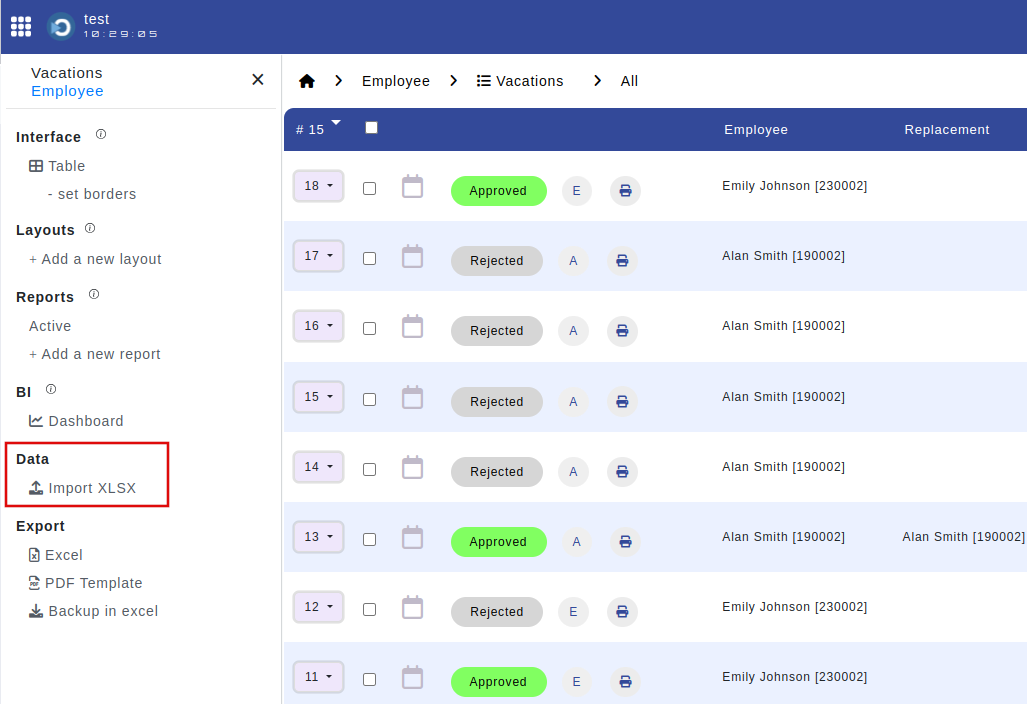
Importing absence requests (paid/unpaid/maternity/paternity) for current year (Data import in vacations)
1. Open module "Vacations"
2. Clicking Vacations at the top-left to open all the vacations
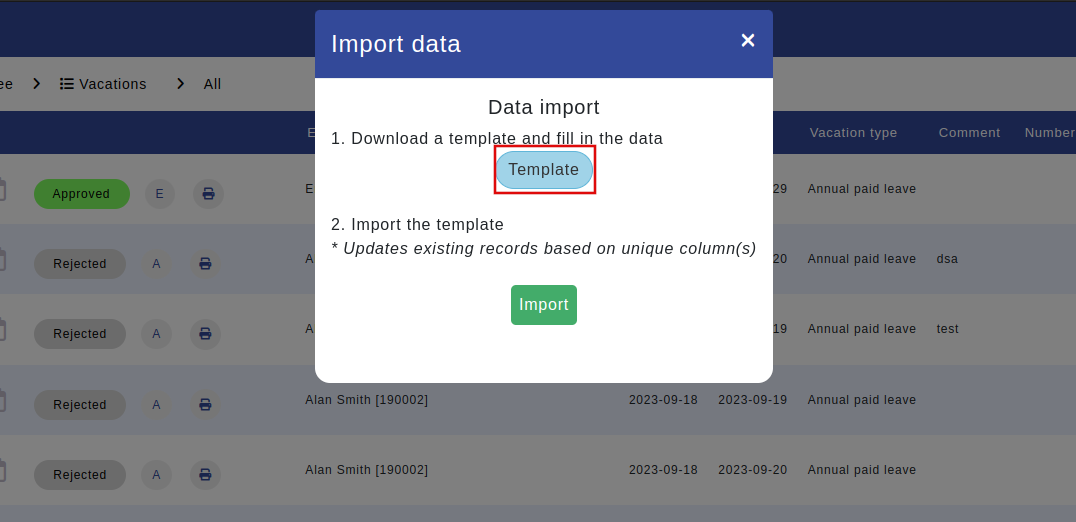
3. Click the "Navigation menu" at the top-left corner, then click "Import XLSX"
This will open a pop-up window where you can download the template..
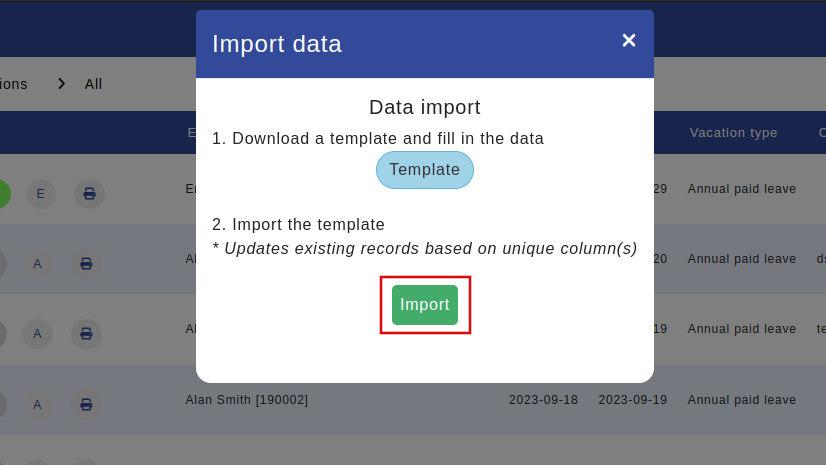
After downloading the template and filling it, next step is to import it back into vacations by doing the same steps as downloading the "template", but this time you will need to click "Import" button.
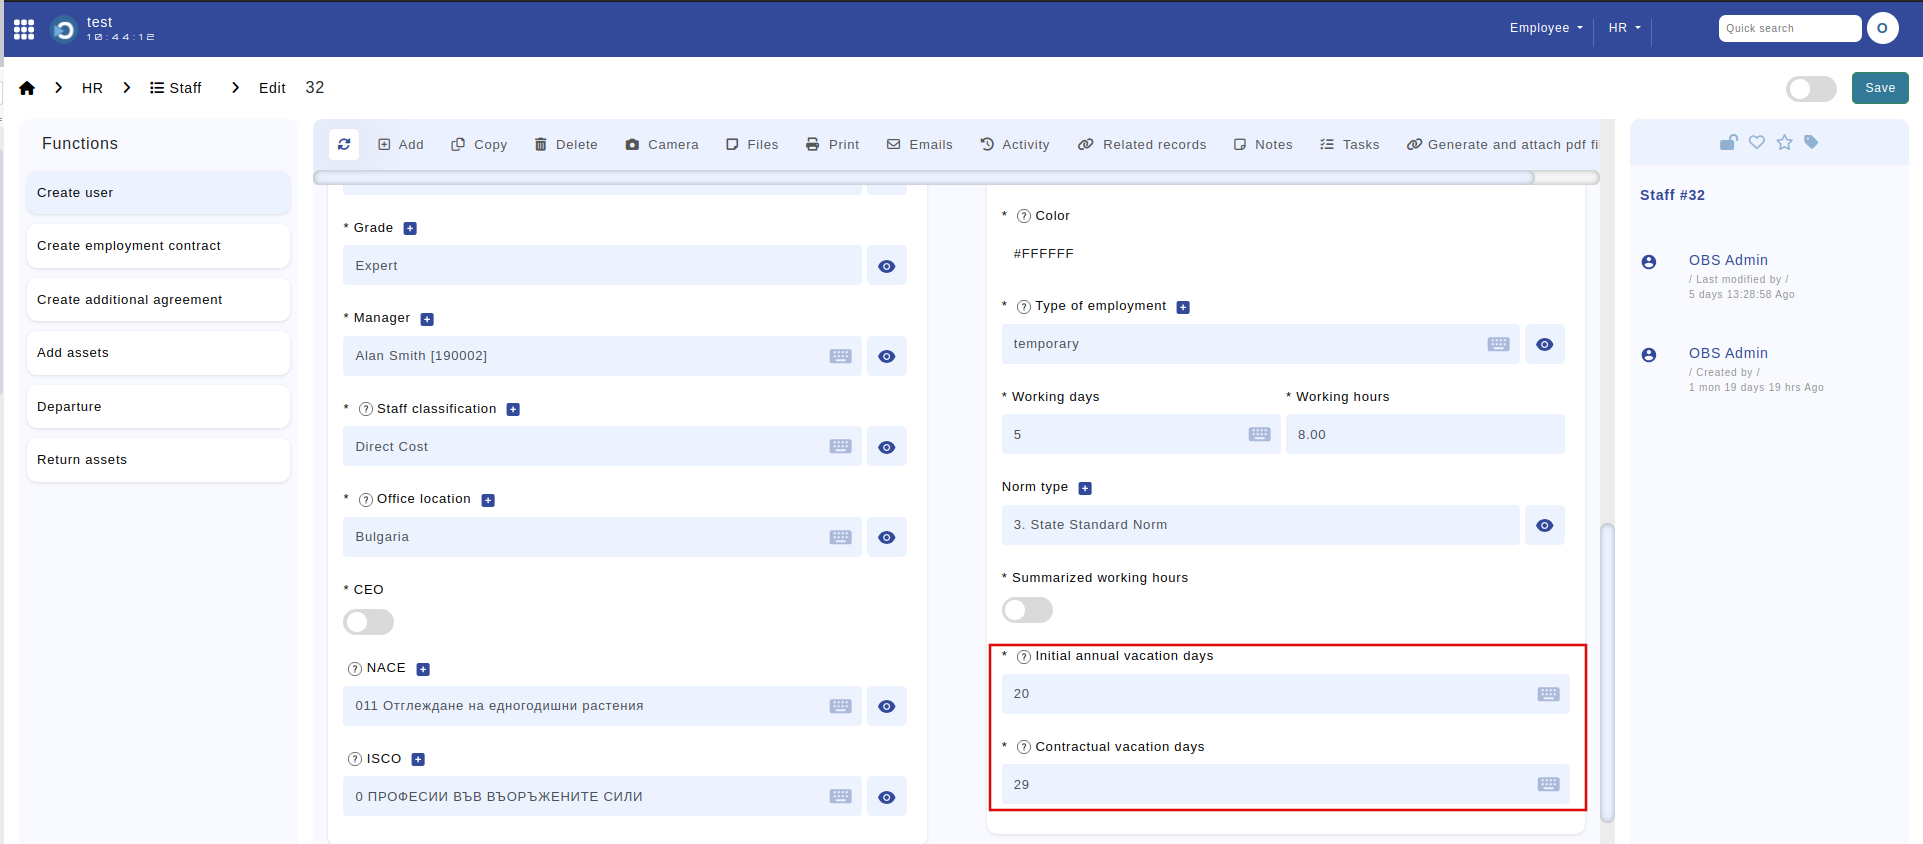
1. Open module "Staff"
2. Click on the respective"s staff number and choose "Edit"
3. Scroll down to "Initial annual vacation days" and "Contractual vacation days" to update their info.
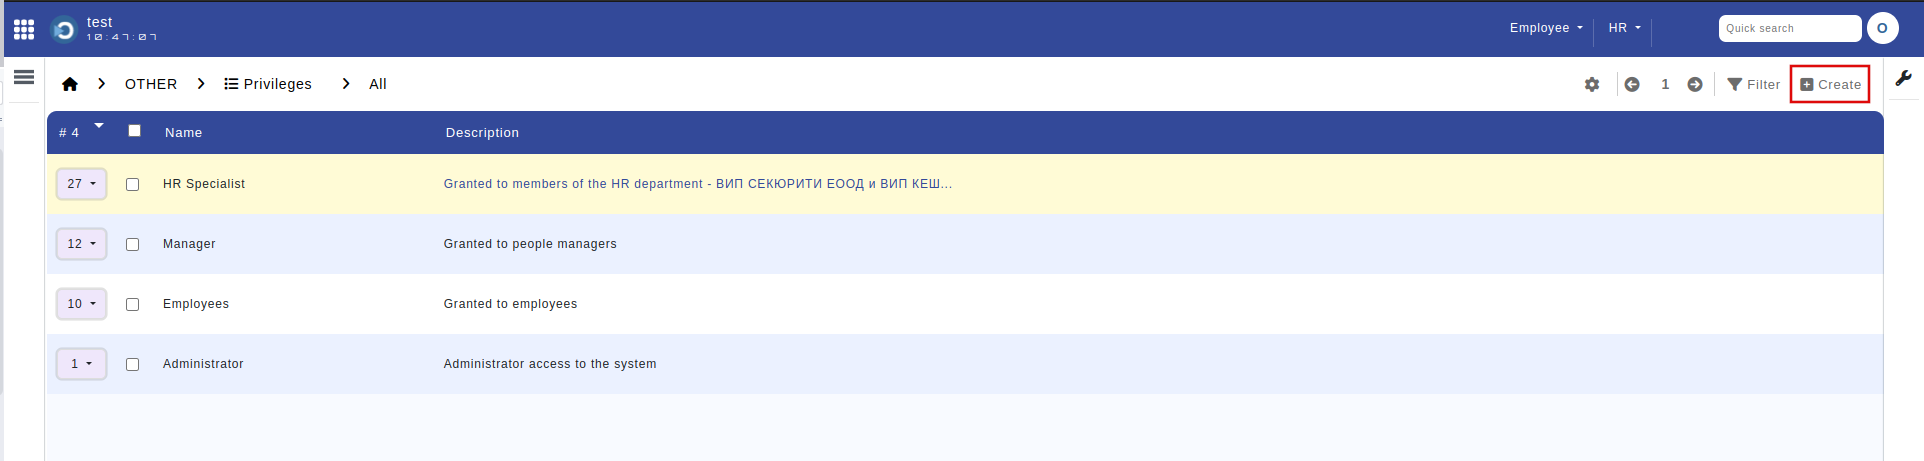
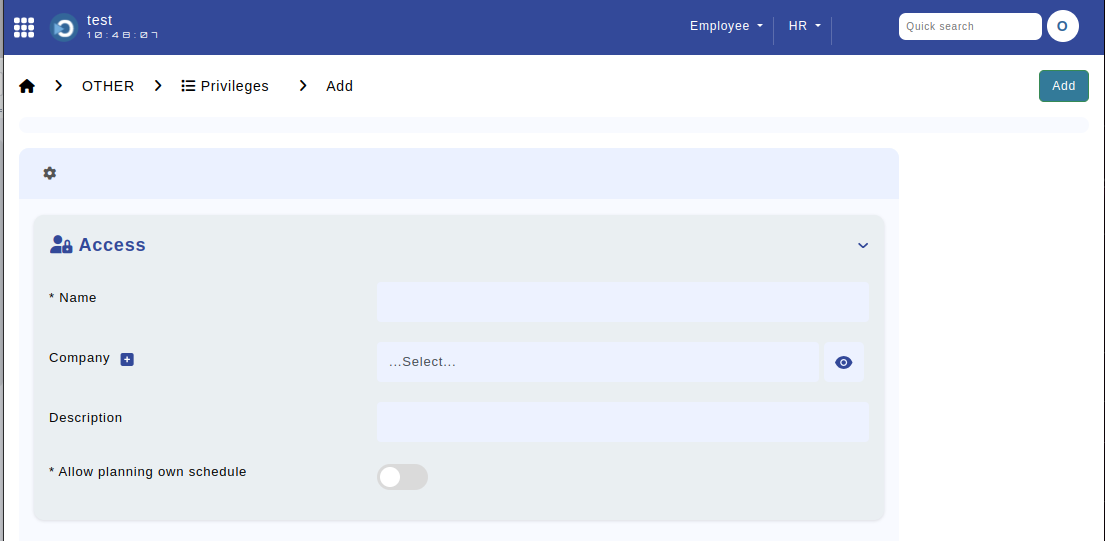
1. Open module "Privileges"
2. Create, update or delete existing privileges.
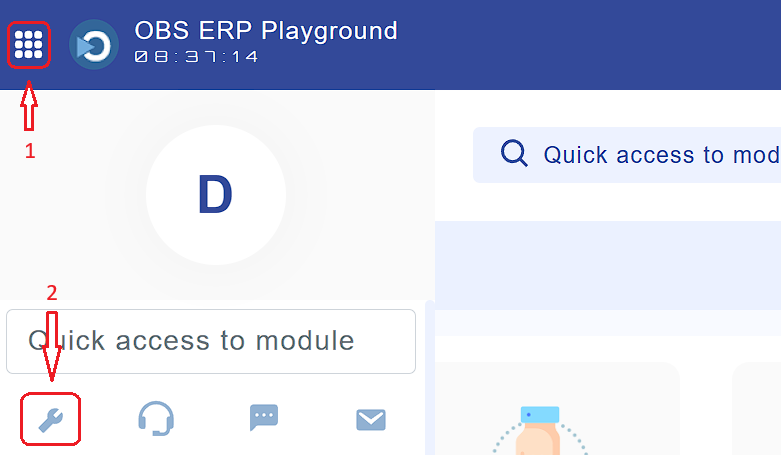
1. Open "Control panel at the top-left corner and click on the "wrench" icon.
2. Then click on "System email" to set up it.
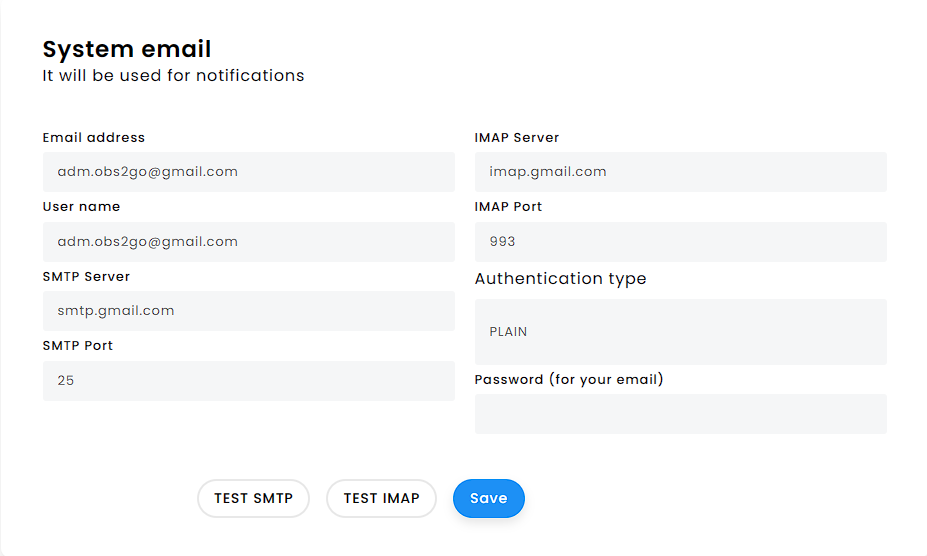
3. After filling the fields click on "Test SMTP" and "Test IMAP" to see if everything is alright and click "Save"
1. Open module "Vacation types"
2. You can create, update or delete certain vacation
Creating a "Vacation type" can be done by clicking "Create" then filling the fields.
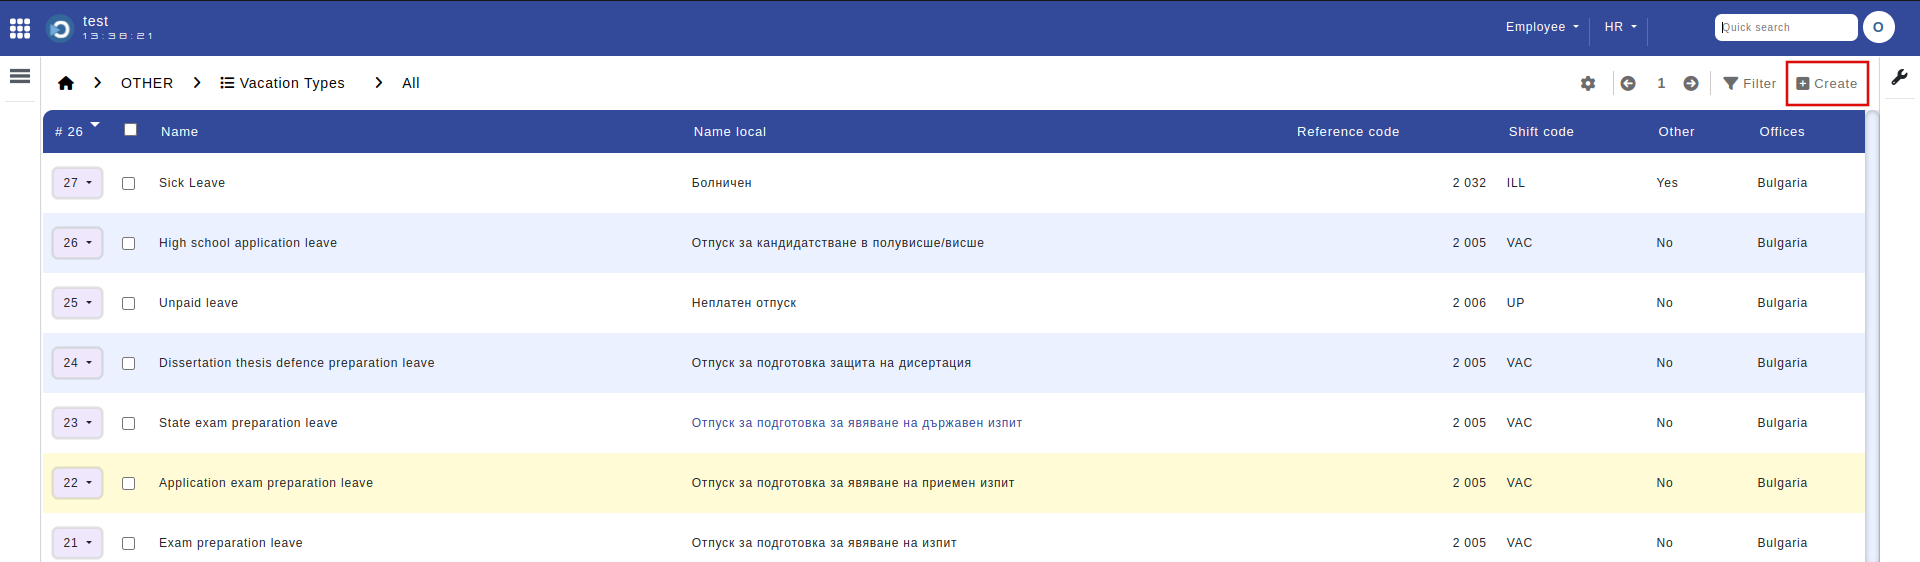
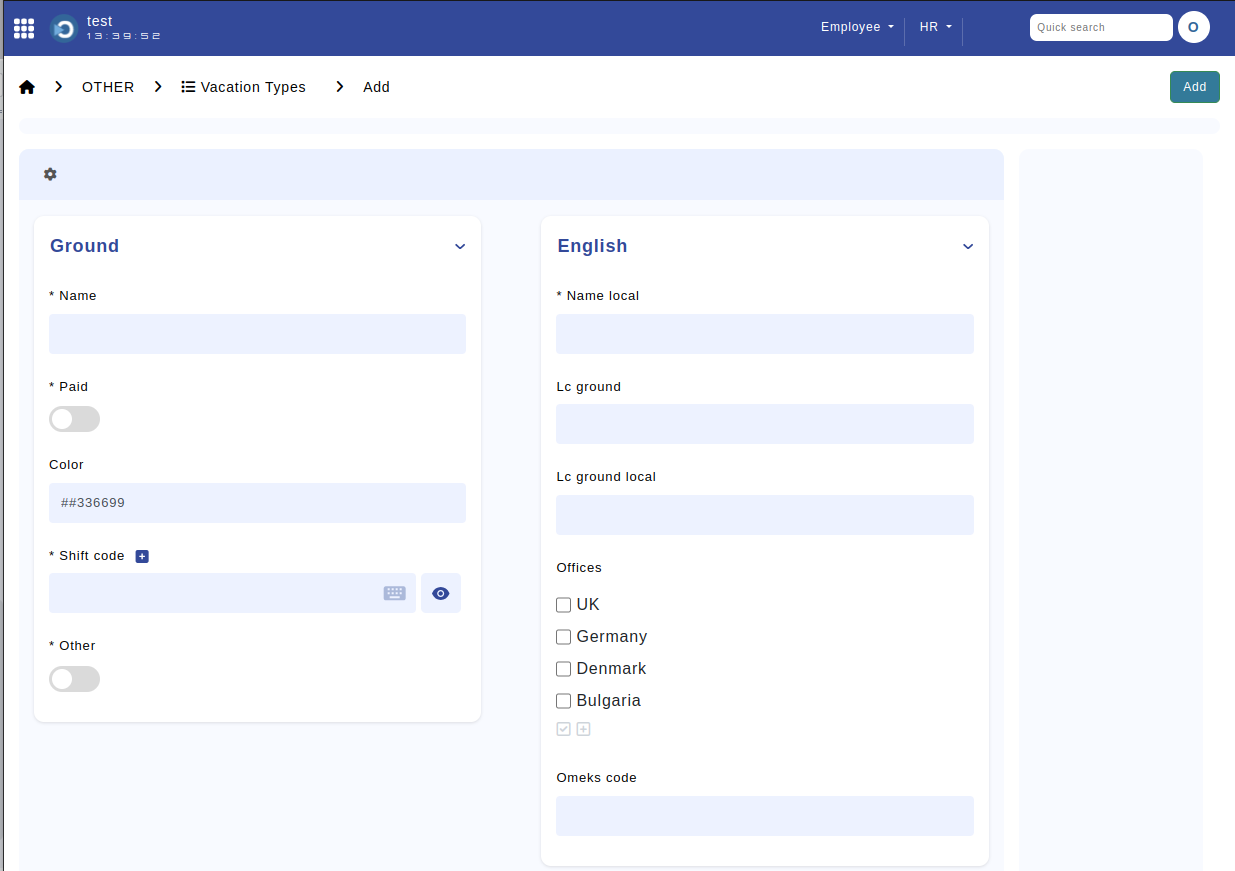
Updating or deleting a vacation can be done by clicking the respective number of the vacation next to its name and clicking "Edit" or "Delete".
Video Iinstructions:
1. Open respective module
2. Click the "wrench" icon at the top-right corner.
3. Click "Manage permission" to change permissions for users.
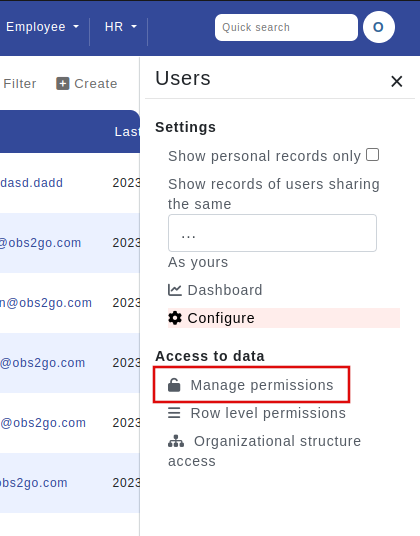
This will open a pop-up that will give you the option for changing permission
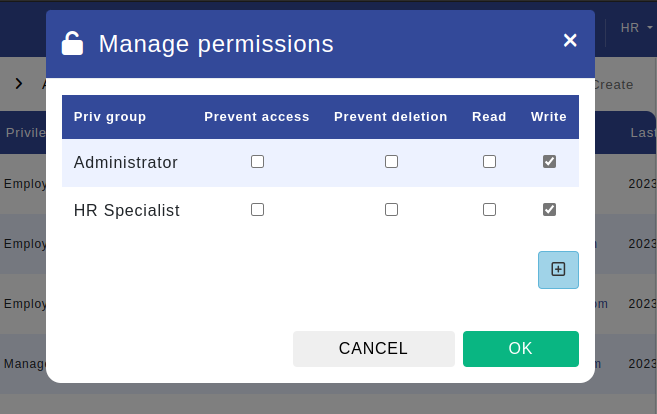
Prevent access - Prevents access to the certain module
Prevent deletion - Prevents deletion from the certain privilege
Read - Can only read the module
Write - Can write in the module
By clicking the "+" button you can add more privileges to the module and edit their access.
Manage row level permissions and organisational structure


