Human capital
/Additional Agreements
Additional Agreements
Additional agreements are legal agreements that are essential to formalize the relationship between an employer and an employee. Our system streamlines the creation of these agreements by providing two efficient methods. This section will guide you through each method.
1. Open the Additional Agreements Module
Begin by accessing the Additional Agreements Module directly from the home screen or by searching it in the search bar. Once there, initiate the process by creating a new record.

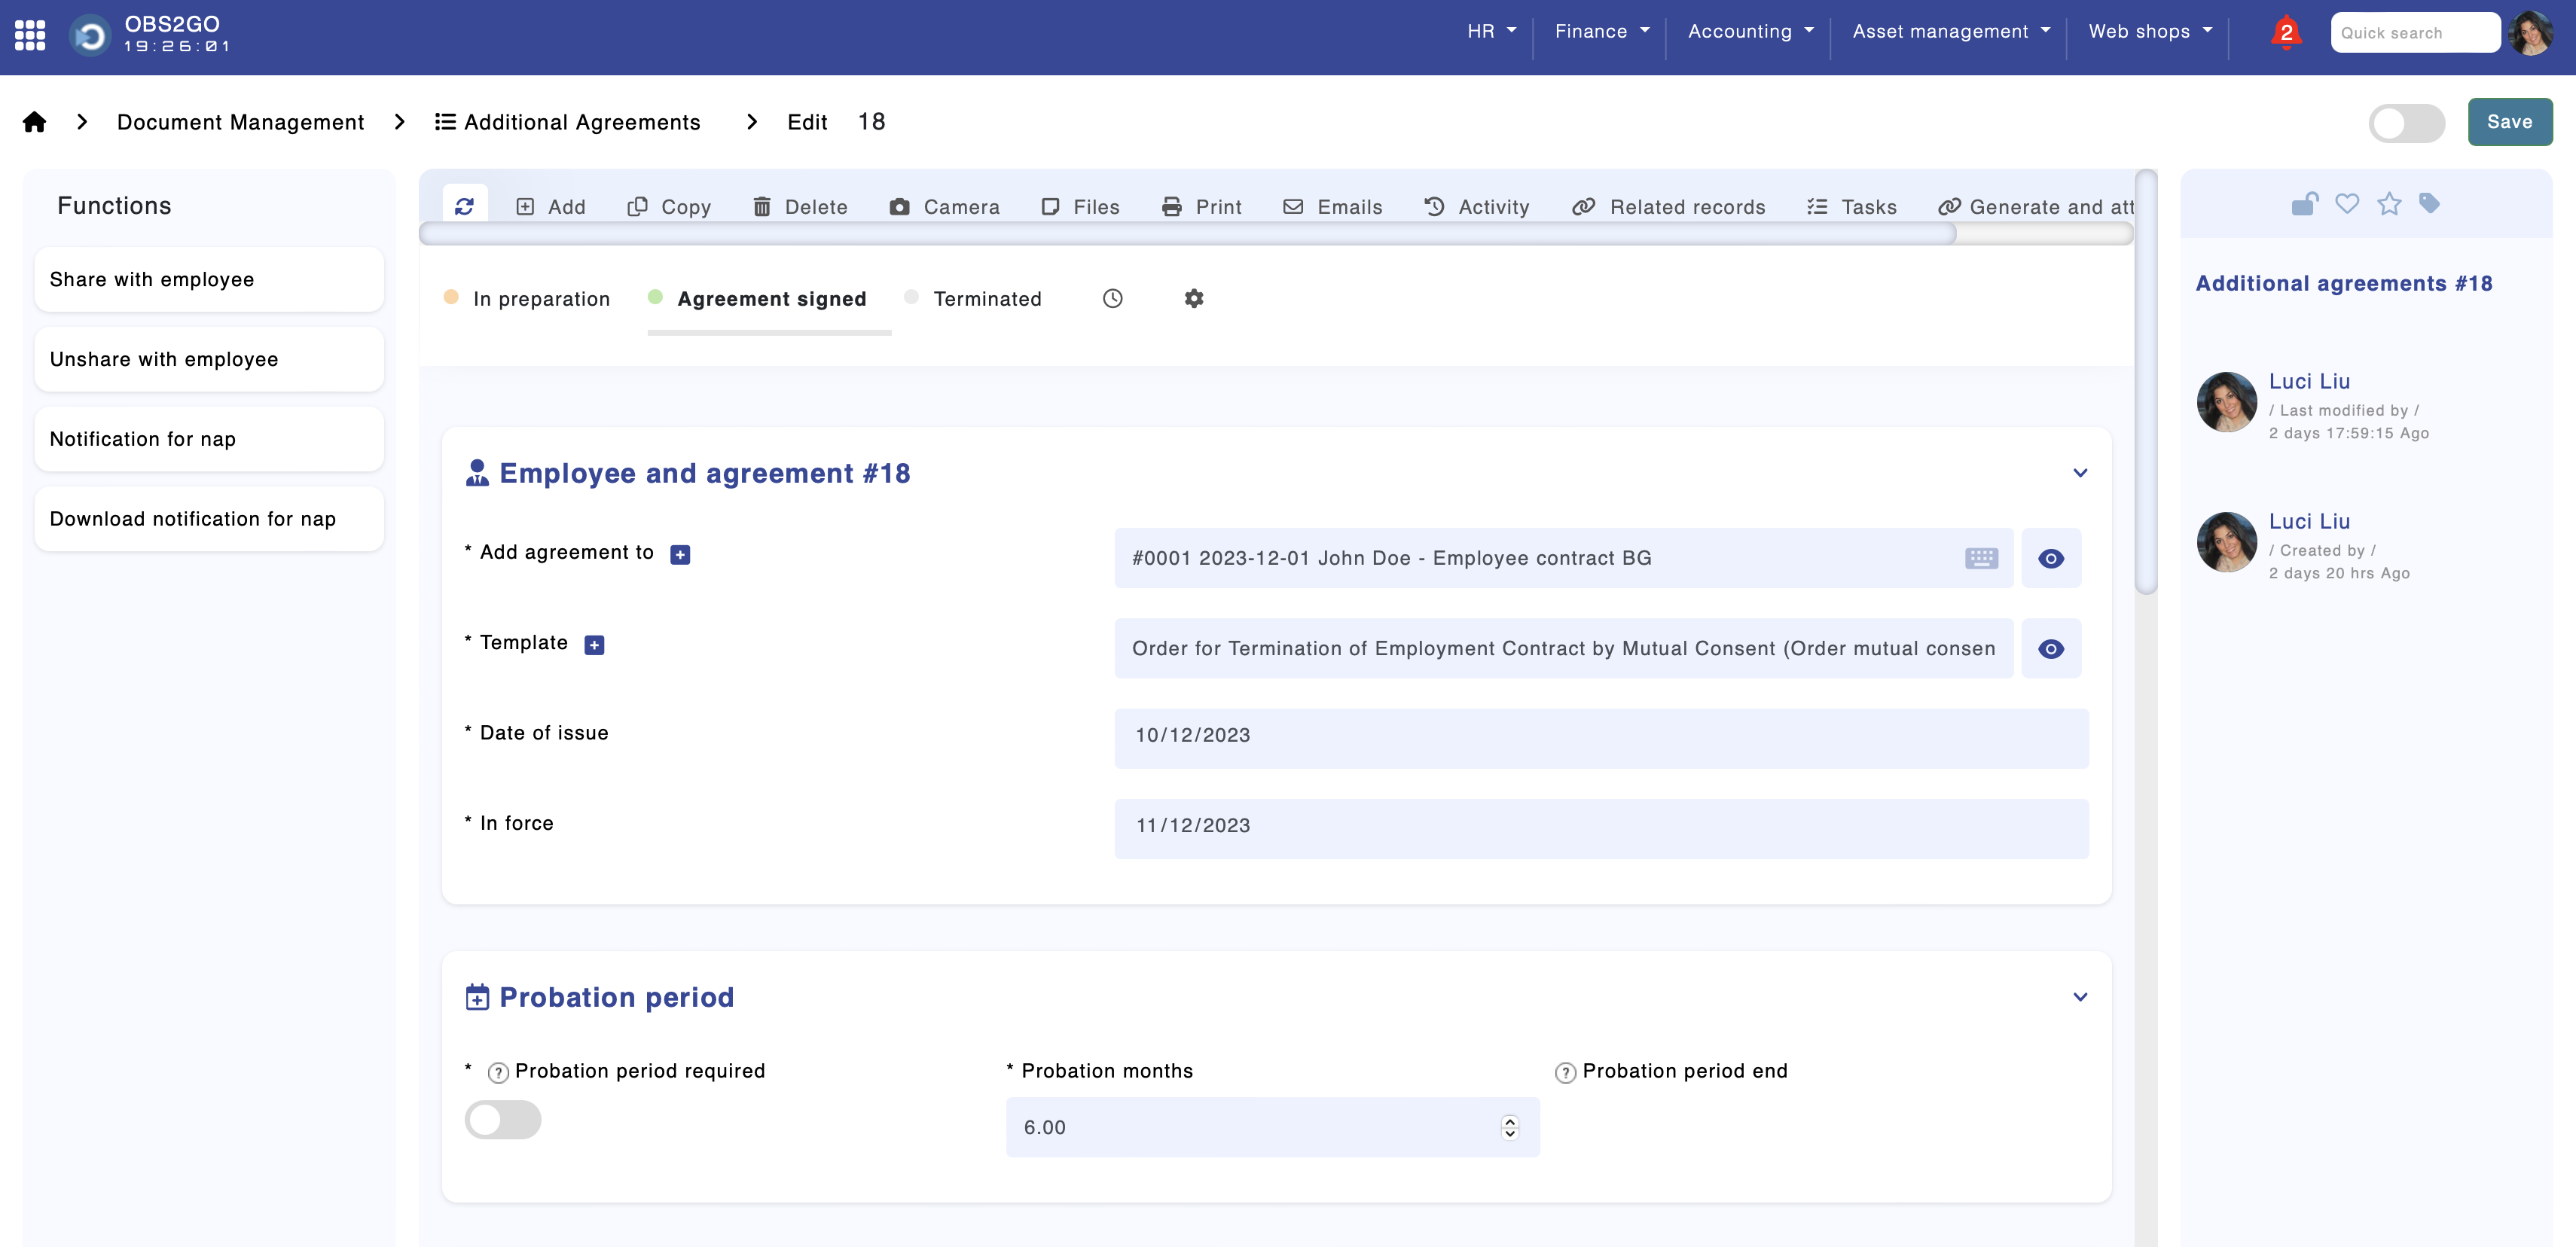
3. Fill in Agreement Details
In this module, locate the option to select an agreement from a dropdown list, available through a search by name or ID.
After selecting the agreement you need to fill the mandatory fields ( 'Template', 'Date of issue', 'In Force' and 'Contract justification'). When selecting template this will automatically generate its corresponding blank.
Module 'Additional Agreements'
4. Save the Agreement
Before finalizing, thoroughly review all entered information for accuracy and completeness. Once you are certain that all details are correct, save the agreement by clicking "Add". This action will officially create an additional agreement within the system.
Printing and Exporting Contracts for Signatures
Generating PDF Templates:
1. Choosing a Template: Start by selecting an appropriate template from the "Template" dropdown menu. OBS provides a variety of templates tailored for each module.
2. Customizing Contract Content: After selecting your template, the text will appear in the "Text" area within the "Contents" section. Here, you can personalize the contract without altering the original template. (Important: For changes to the base templates, a separate process is required. Additional details: OBS Document Templates Guide)
3. Options for Printing: Once you've saved your modifications, select 'Print' to explore three choices:
- Preview: For a quick review of the text.
- Generate PDF File: To create a PDF file.
- Generate and Attach PDF File: This generates a PDF and attaches it under the "Files" tab.
Handling the Generated File
Depending on your business processes, you can:
- Generate the PDF, attach it, and then send it for electronic signature.
- Generate the PDF outside the system, attach it to the contract record, and send it for electronic signature.
- Generate and physically sign the PDF outside the system, then attach and potentially send it again for digital signature from the employer.
Sending Files for Signature
1. File Preparation: Ensure the file to be signed is in PDF format. Other data formats cannot be submitted for electronic signature.
2. Sending for Signature: Navigate to the desired file, then choose either "Request Signature" or "Request Signature from CEO". This will send the document for signing.
3. Tracking Signatures: Once signed, a new file (marked "SIGNED") returns to the system. You can then send this file for further signatures as required, ending up with three files - the original, one signed by the employee, and one signed by both employee and CEO.
Tracking Changes and Agreements
All changes and activities related to a agreement are recorded under the "Activity" tab. Additionally, all related records from other modules linked to the contract can be found in the "Related Records" section.
Quick Setup in Settings
1. Navigate: Go to Control Panel > Admin Menu > Settings.
2. Locate Setting: Find "Evrotrust - the email address to receive confirmations on signed documents. Comma separated" (Key: "evrotrust_signature_confirmation").
3. Enter Email(s): Input the email address(es) to receive notifications of Evrotrust-signed documents. Separate multiple emails with commas.
4. Save: Ensure to save your changes for immediate effect.
Setting Up Notifications
- Centralized Automation Task Scheduler: The system provides the capability to establish personalized notifications for every module. These can be arranged and tailored within the 'Main Scheduler' (Automated Tasks) section, enabling you to configure a range of alerts and reminders to suit your specific requirements. For further details, visit: OBS Notifications Guide.
Sharing Documents with Employees
- Share/Unshare Functionality: Within the employment contract module, you have the option to share or unshare attached files with the employee.
- Employee Profile Access: Once a document is shared using the "Share with employee" button, it becomes visible in the employee's profile, allowing them direct access to the document.
- Email Notifications: Along with document sharing, an email notification is automatically sent to the employee, informing them that a document has been shared with them. This feature helps in keeping the employee informed and engaged with the process.
In the 'Additional Agreements' module, you can modify a staff member's existing record by changing their department, position, and salary, or by terminating their contract.
Module 'Additional Agreements'
Updating an Existing Staff Contract:
1. Scroll down until you locate 'Transfer From' and 'Transfer To'. In these sections, you can update a staff member's parameters, including their department, position, manager, etc., to reflect new assignments.
2. Once an 'Additional Agreement' is marked as 'Agreement Signed', all recent changes to the staff member's contract will be automatically updated in their existing profile within the 'Staff' module.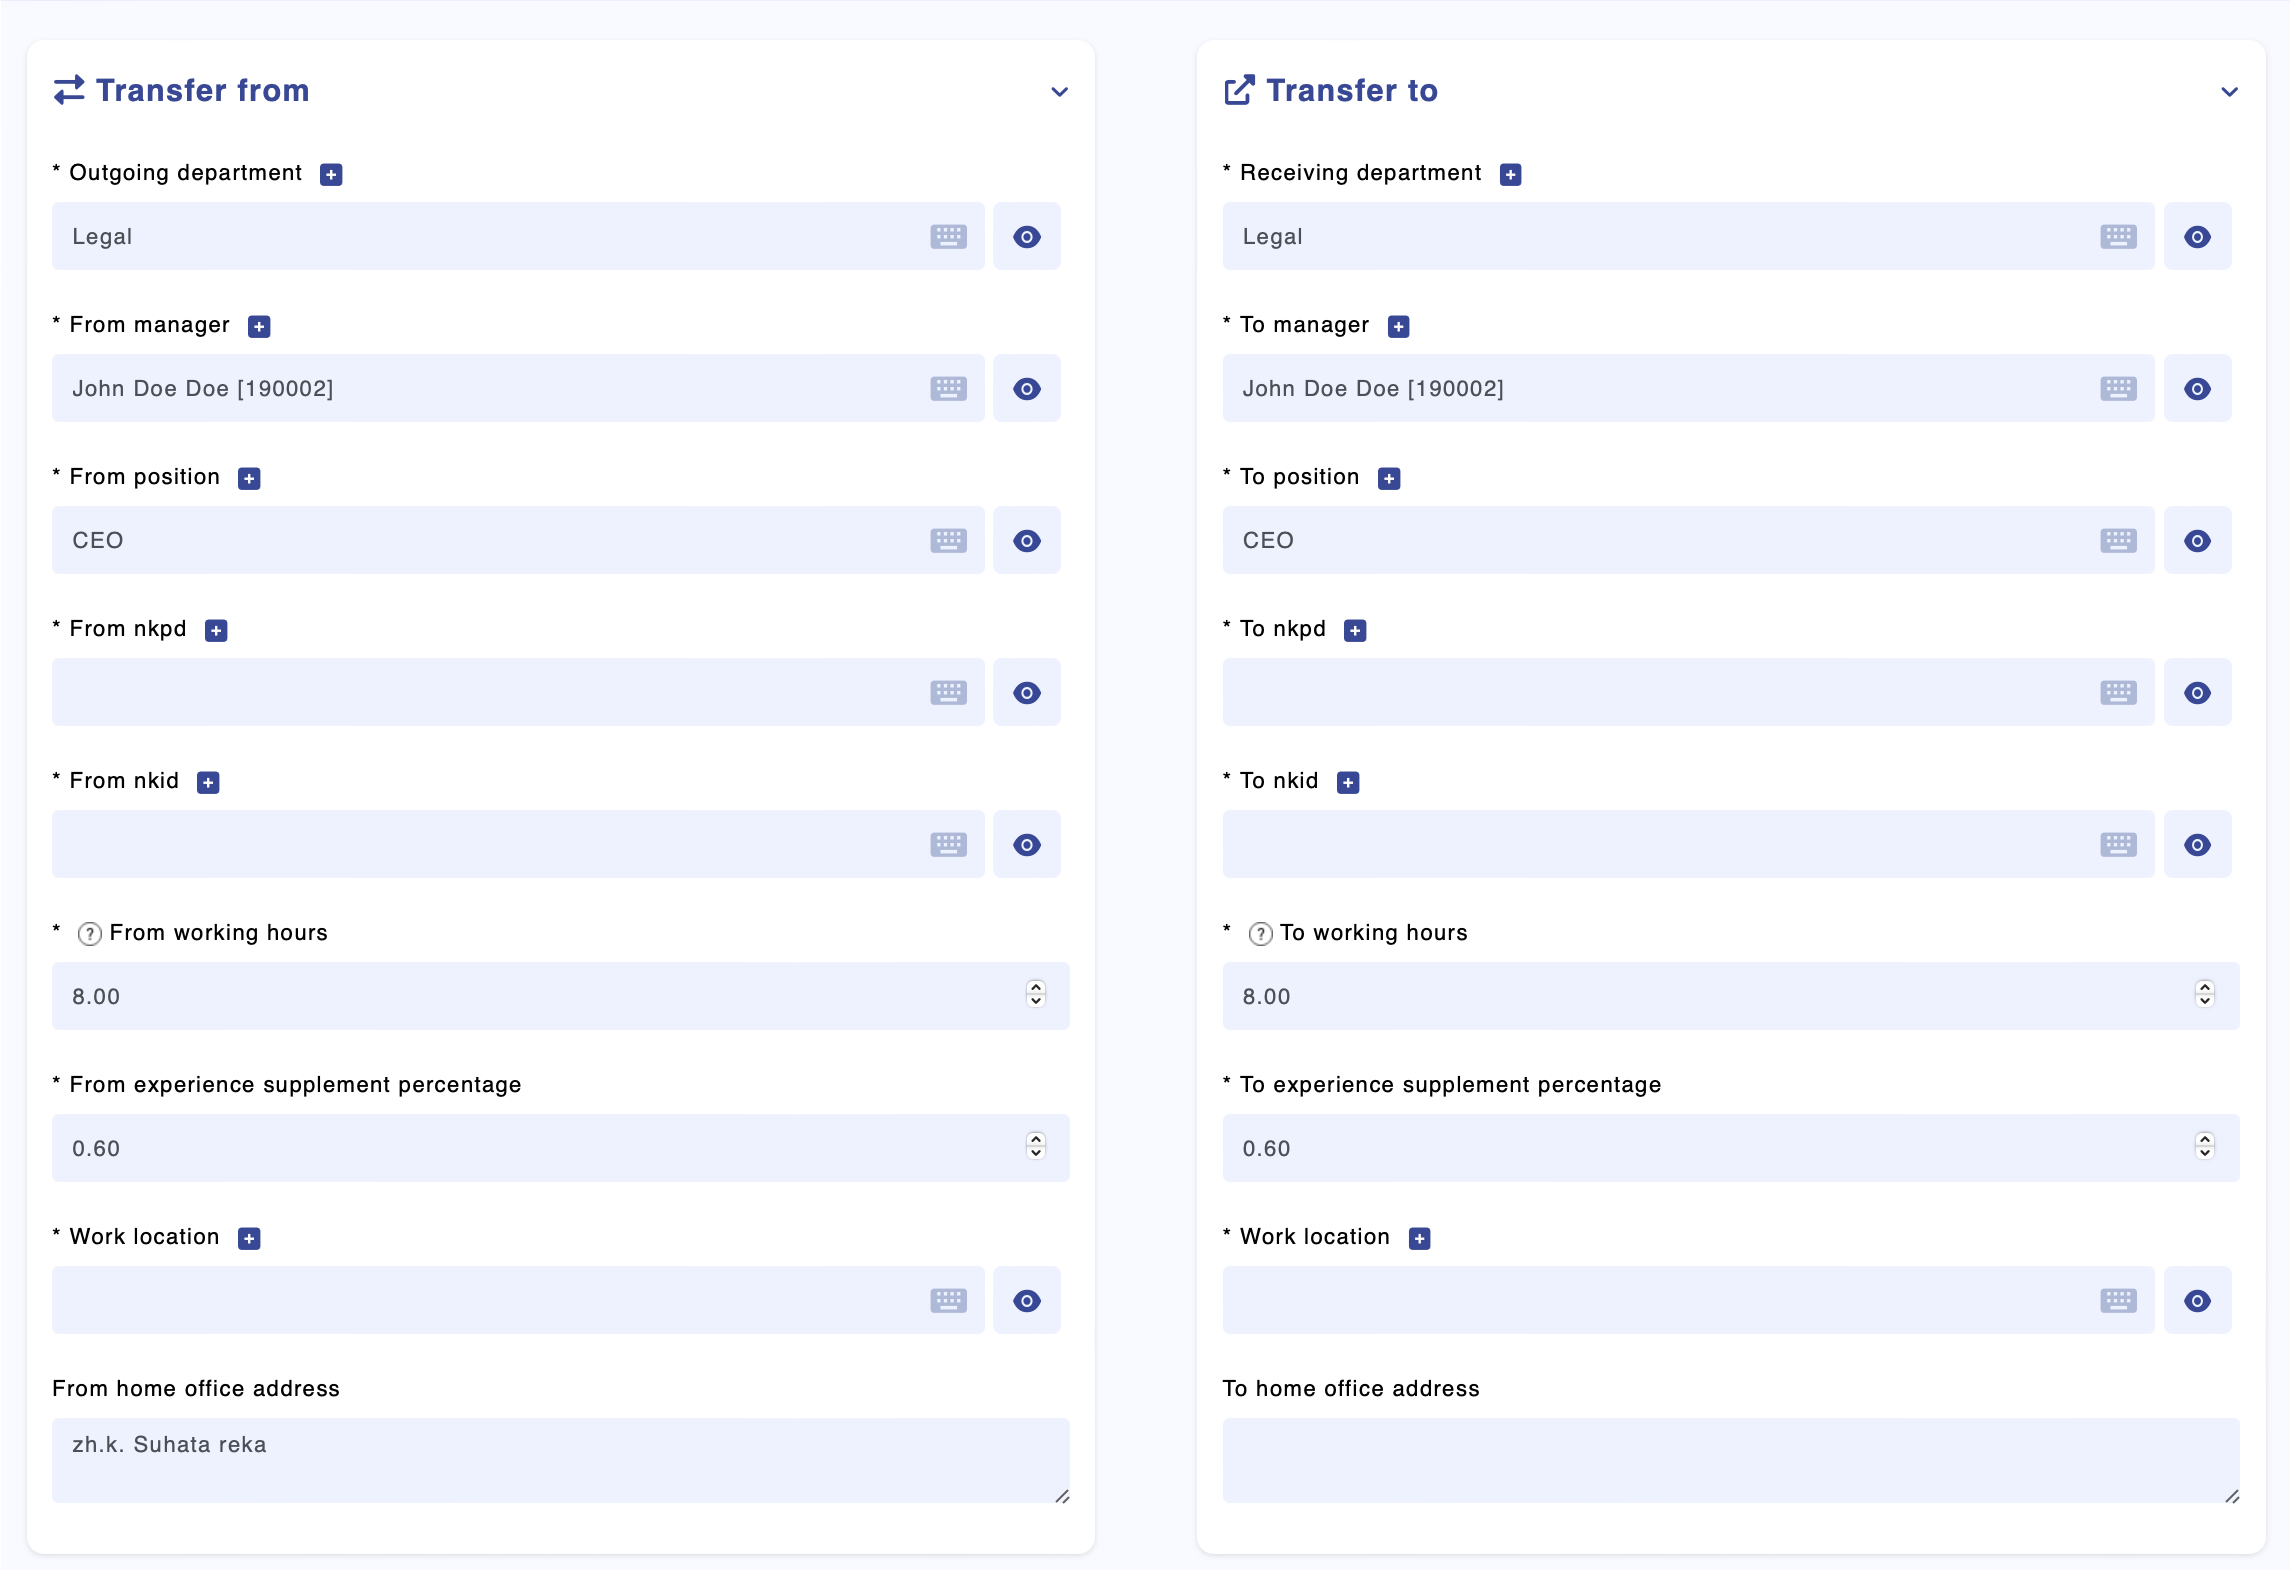
Initiating Contract Termination:
1. Navigate to the 'Contract Termination Details' section in the staff member's profile.
2. Activate a staff member's contract termination by enabling the termination switch, setting the final employment date, documenting the reason for leaving, selecting the type of resignation, and noting any accrued leave compensation due.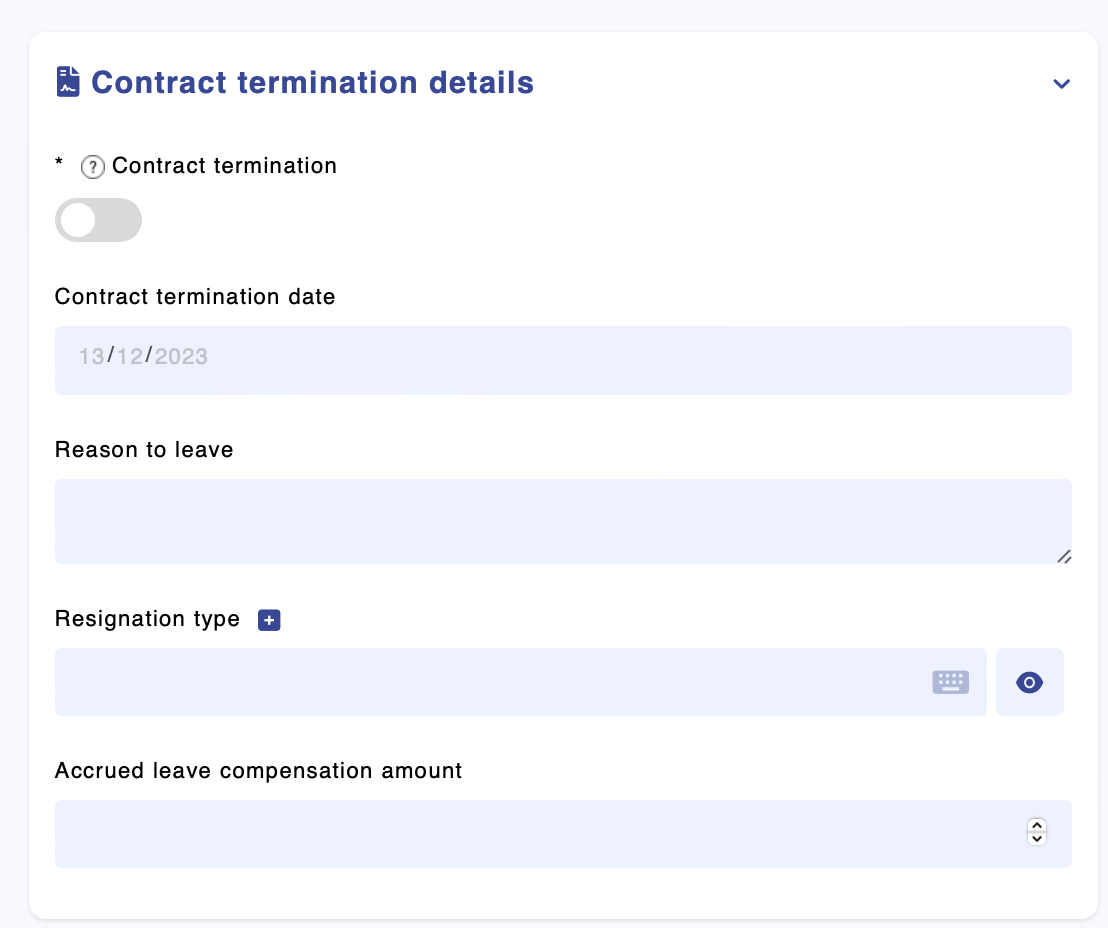
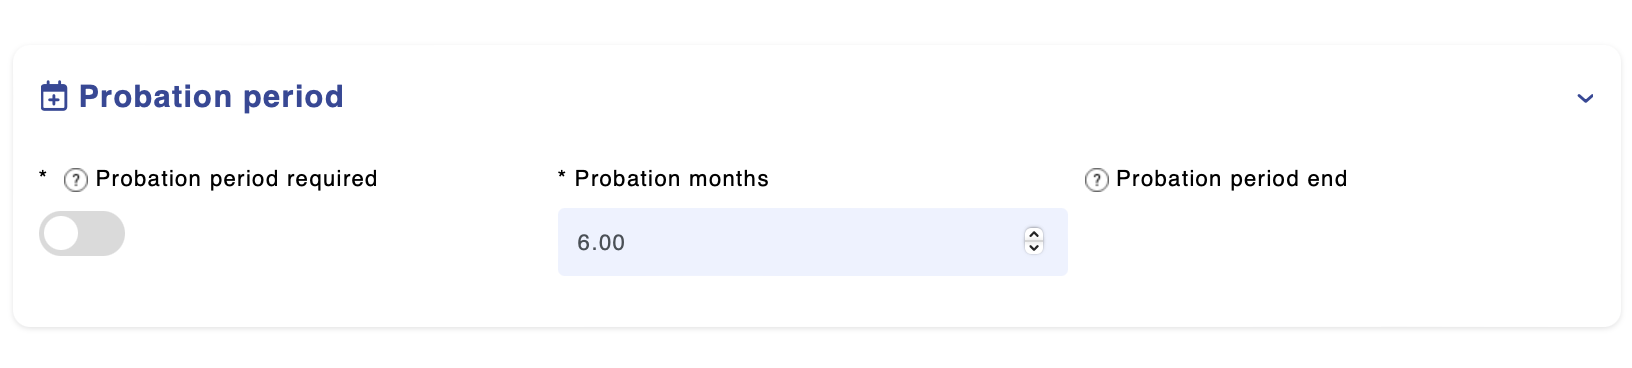
Initiating Probation Period:
1. Navigate to 'Probation Period' section to configure the terms of the probation.
2. Activate the probation period by toggling the 'Probation period required' switch on, input the duration in 'Probation months', and the system will automatically generate a record with the calculated end date in the 'Probation Period' module.
The system tracks the staff member's absences during the probation period. Any absence will automatically extend the probation period, and the 'Probation period end' date will be updated to reflect these changes.