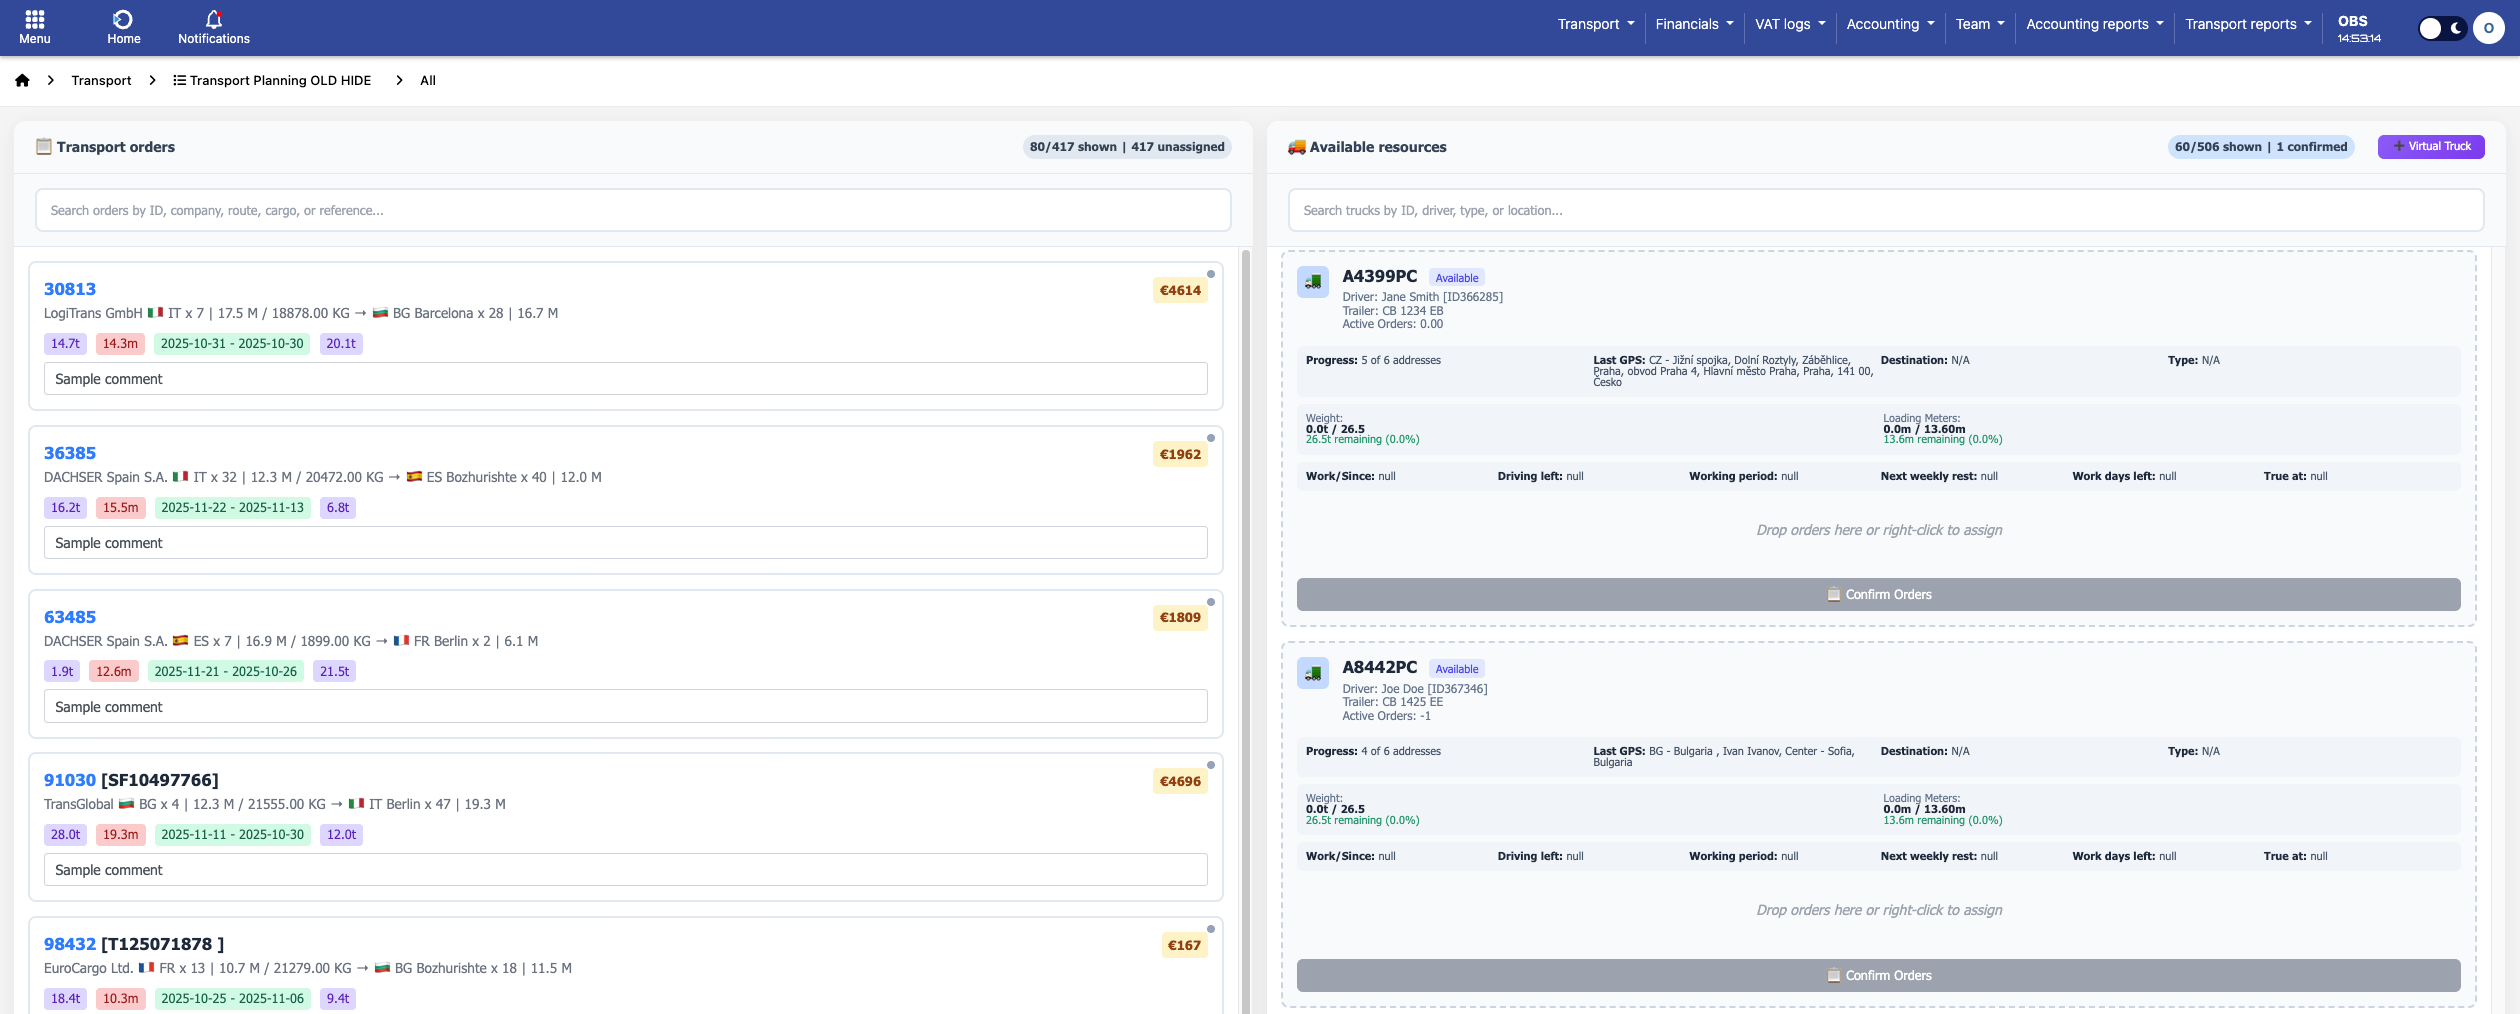
The Transport Planning Interface provides planners with a clear, structured view of both transport orders and available vehicles. The interface is divided into two main panels — the left side lists orders waiting to be assigned, and the right side displays available trucks and drivers.
Screenshot: Transport Planning Interface
Key elements in the screenshot:
• Transport Orders Panel (Left): Displays the list of all available transport orders. Each card includes essential details such as origin, destination, weight, volume, and time windows. Orders can be reviewed and selected here.
• Available Resources Panel (Right): Shows all available trucks and drivers. Each vehicle block provides information like driver name, trailer ID, GPS location, and capacity status.
• Order Assignment: Orders from the left can be dragged and dropped onto a vehicle in the right panel to plan the transport.
• Confirm Orders Button: Finalizes the assignment and updates the plan in real time.
• Weight (0.0 t / 26.5 t): Shows the current weight assigned to the truck versus the total capacity. In this example, the truck has a maximum capacity of 26.5 tons and currently no weight assigned. This helps avoid overloading and ensures capacity is planned correctly.
• Loading Meters (0.0 m / 13.6 m): Indicates how much trailer space is used compared to the total available length of 13.6 meters. In the example, the truck is empty, with the full 13.6 meters available. This is critical for planning partial or full trailer loads efficiently.
The video shows how planners use the Transport Planning Interface in real time. Orders on the left panel are dragged and dropped onto vehicles in the right panel. Once assigned, weight and loading meters update automatically, giving an instant view of capacity usage. Finally, the “Confirm Orders” button completes the planning process quickly and efficiently.
In addition to assigning real vehicles to orders, the Transport Planning module allows you to create virtual trucks. This feature is particularly useful when:
- Planning for future shipments when the actual truck isn’t assigned yet
- Simulating capacity for subcontracted or external transport
- Reserving trailer space in advance
- Maintaining flexibility and control over available resources

Screenshot: Transport Planning Interface
To create a virtual truck, click the “+ Virtual Truck” button at the top-right corner of the resources panel (shown above in the screenshot). A window will appear with a list of available vehicle types, including trailers, trucks, and vans. Each option shows its maximum weight and loading meter capacity.
Select the appropriate truck type and click “Create Truck”. The virtual truck will be added to the right-hand panel, just like a real vehicle, allowing you to assign orders to it. This is especially useful when planning loads before a physical truck is confirmed.