Custom Reports
Custom Reports
The default configuration for data listings might not always meet your specific requirements. If you're utilizing a table template for data listings, you might find it necessary to customize the table columns by adding, removing, or rearranging them. Additionally, there could be a need to generate multiple reports for various purposes. For instance, within the 'Tasks' module, you might desire a report that highlights overdue tasks, as well as another report that exclusively lists active tasks. OBS ERP allows the creation of such personalized reports.
Personalized Layouts (Custom Reports & Table Views)
1. What are layouts?
Layouts are personalized table views that allow each user to define what columns they want to see and in what order.
Each user can create multiple layouts per module, switch between them, and adjust them freely without affecting other users.
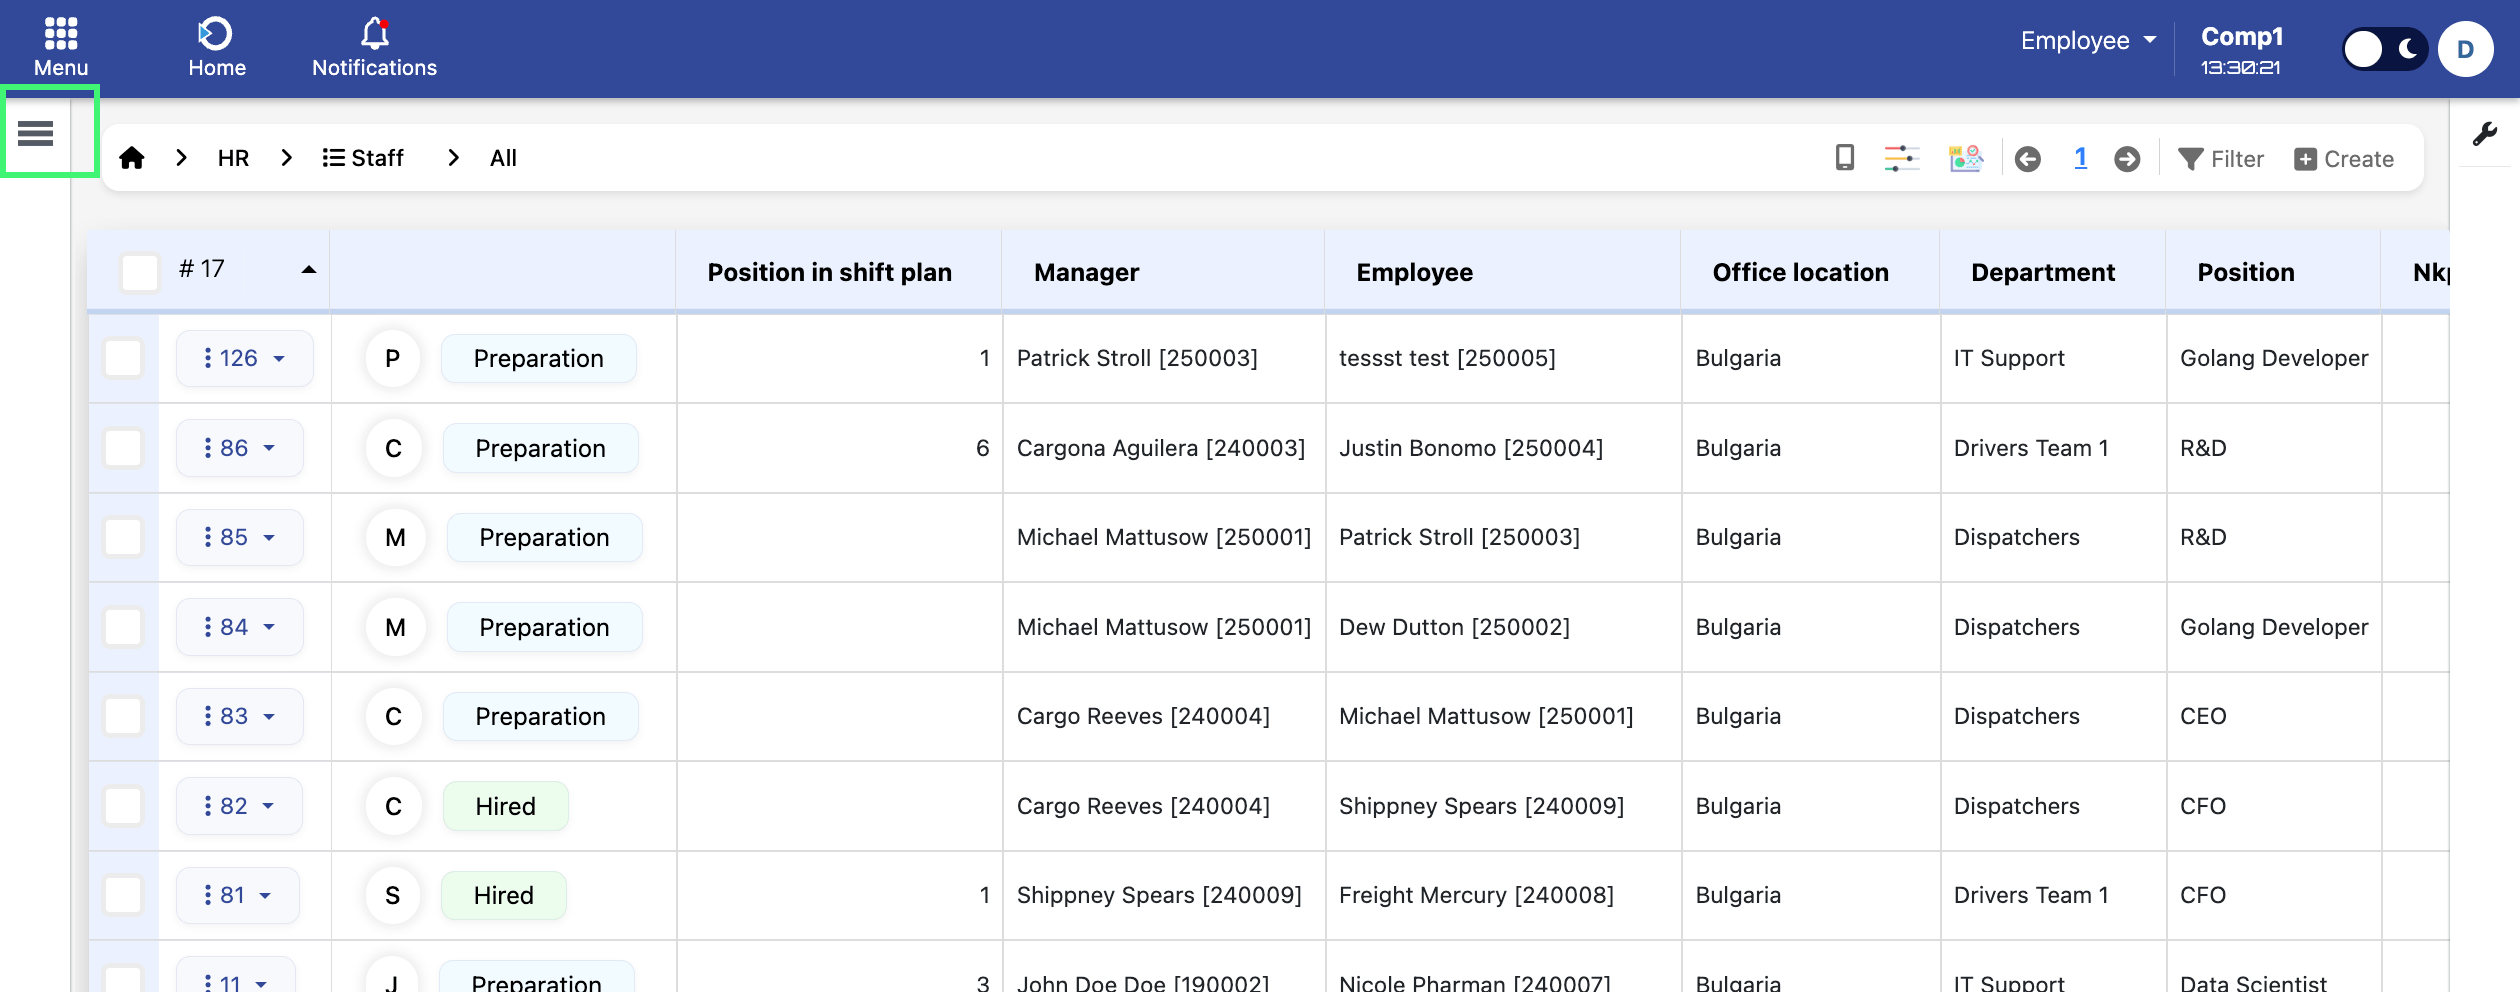
2. Accessing layouts from the left menu
Click the menu icon (three horizontal lines) in the top-left corner to open the left panel.
Depending on whether you have created layouts or not, you will see different options:
Scenario A: You don’t have any layouts yet
You will only see the option:
- + Add a new layout — start your first personalized view

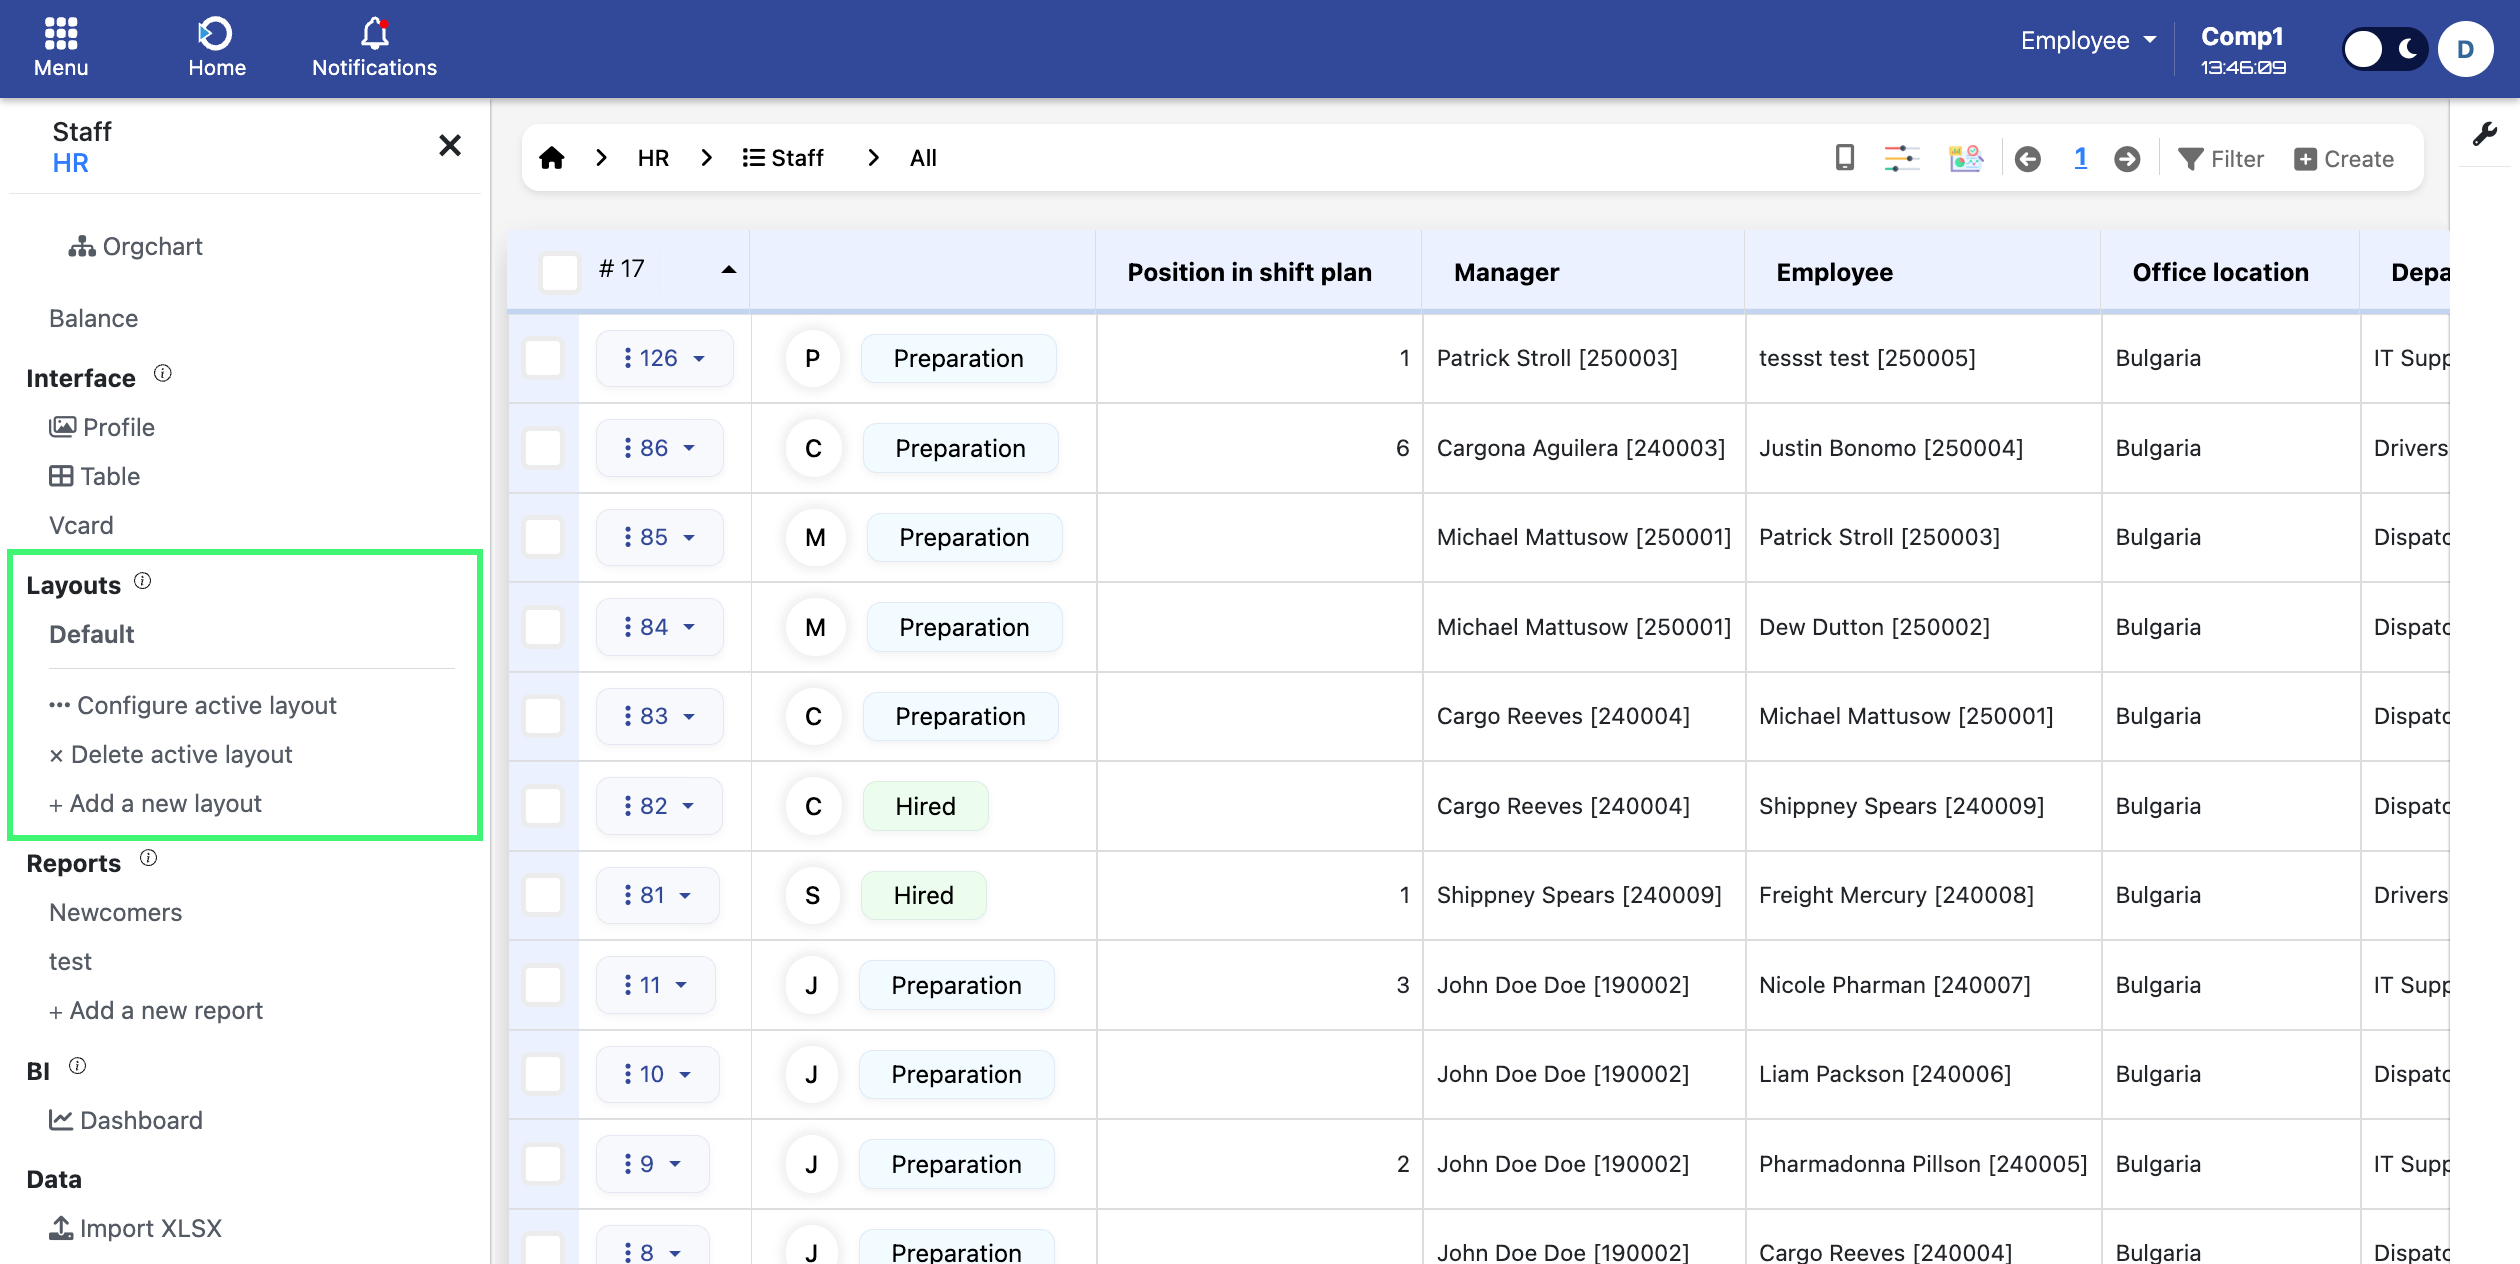
Scenario B: You already have at least one layout
You will see:
- Active layout name — the one currently in use
- Configure active layout — edit its columns and order
- Delete active layout — remove the current layout
- + Add a new layout — create an additional one
3. Creating a new layout
Click “Add a new layout” and enter a name in the popup.
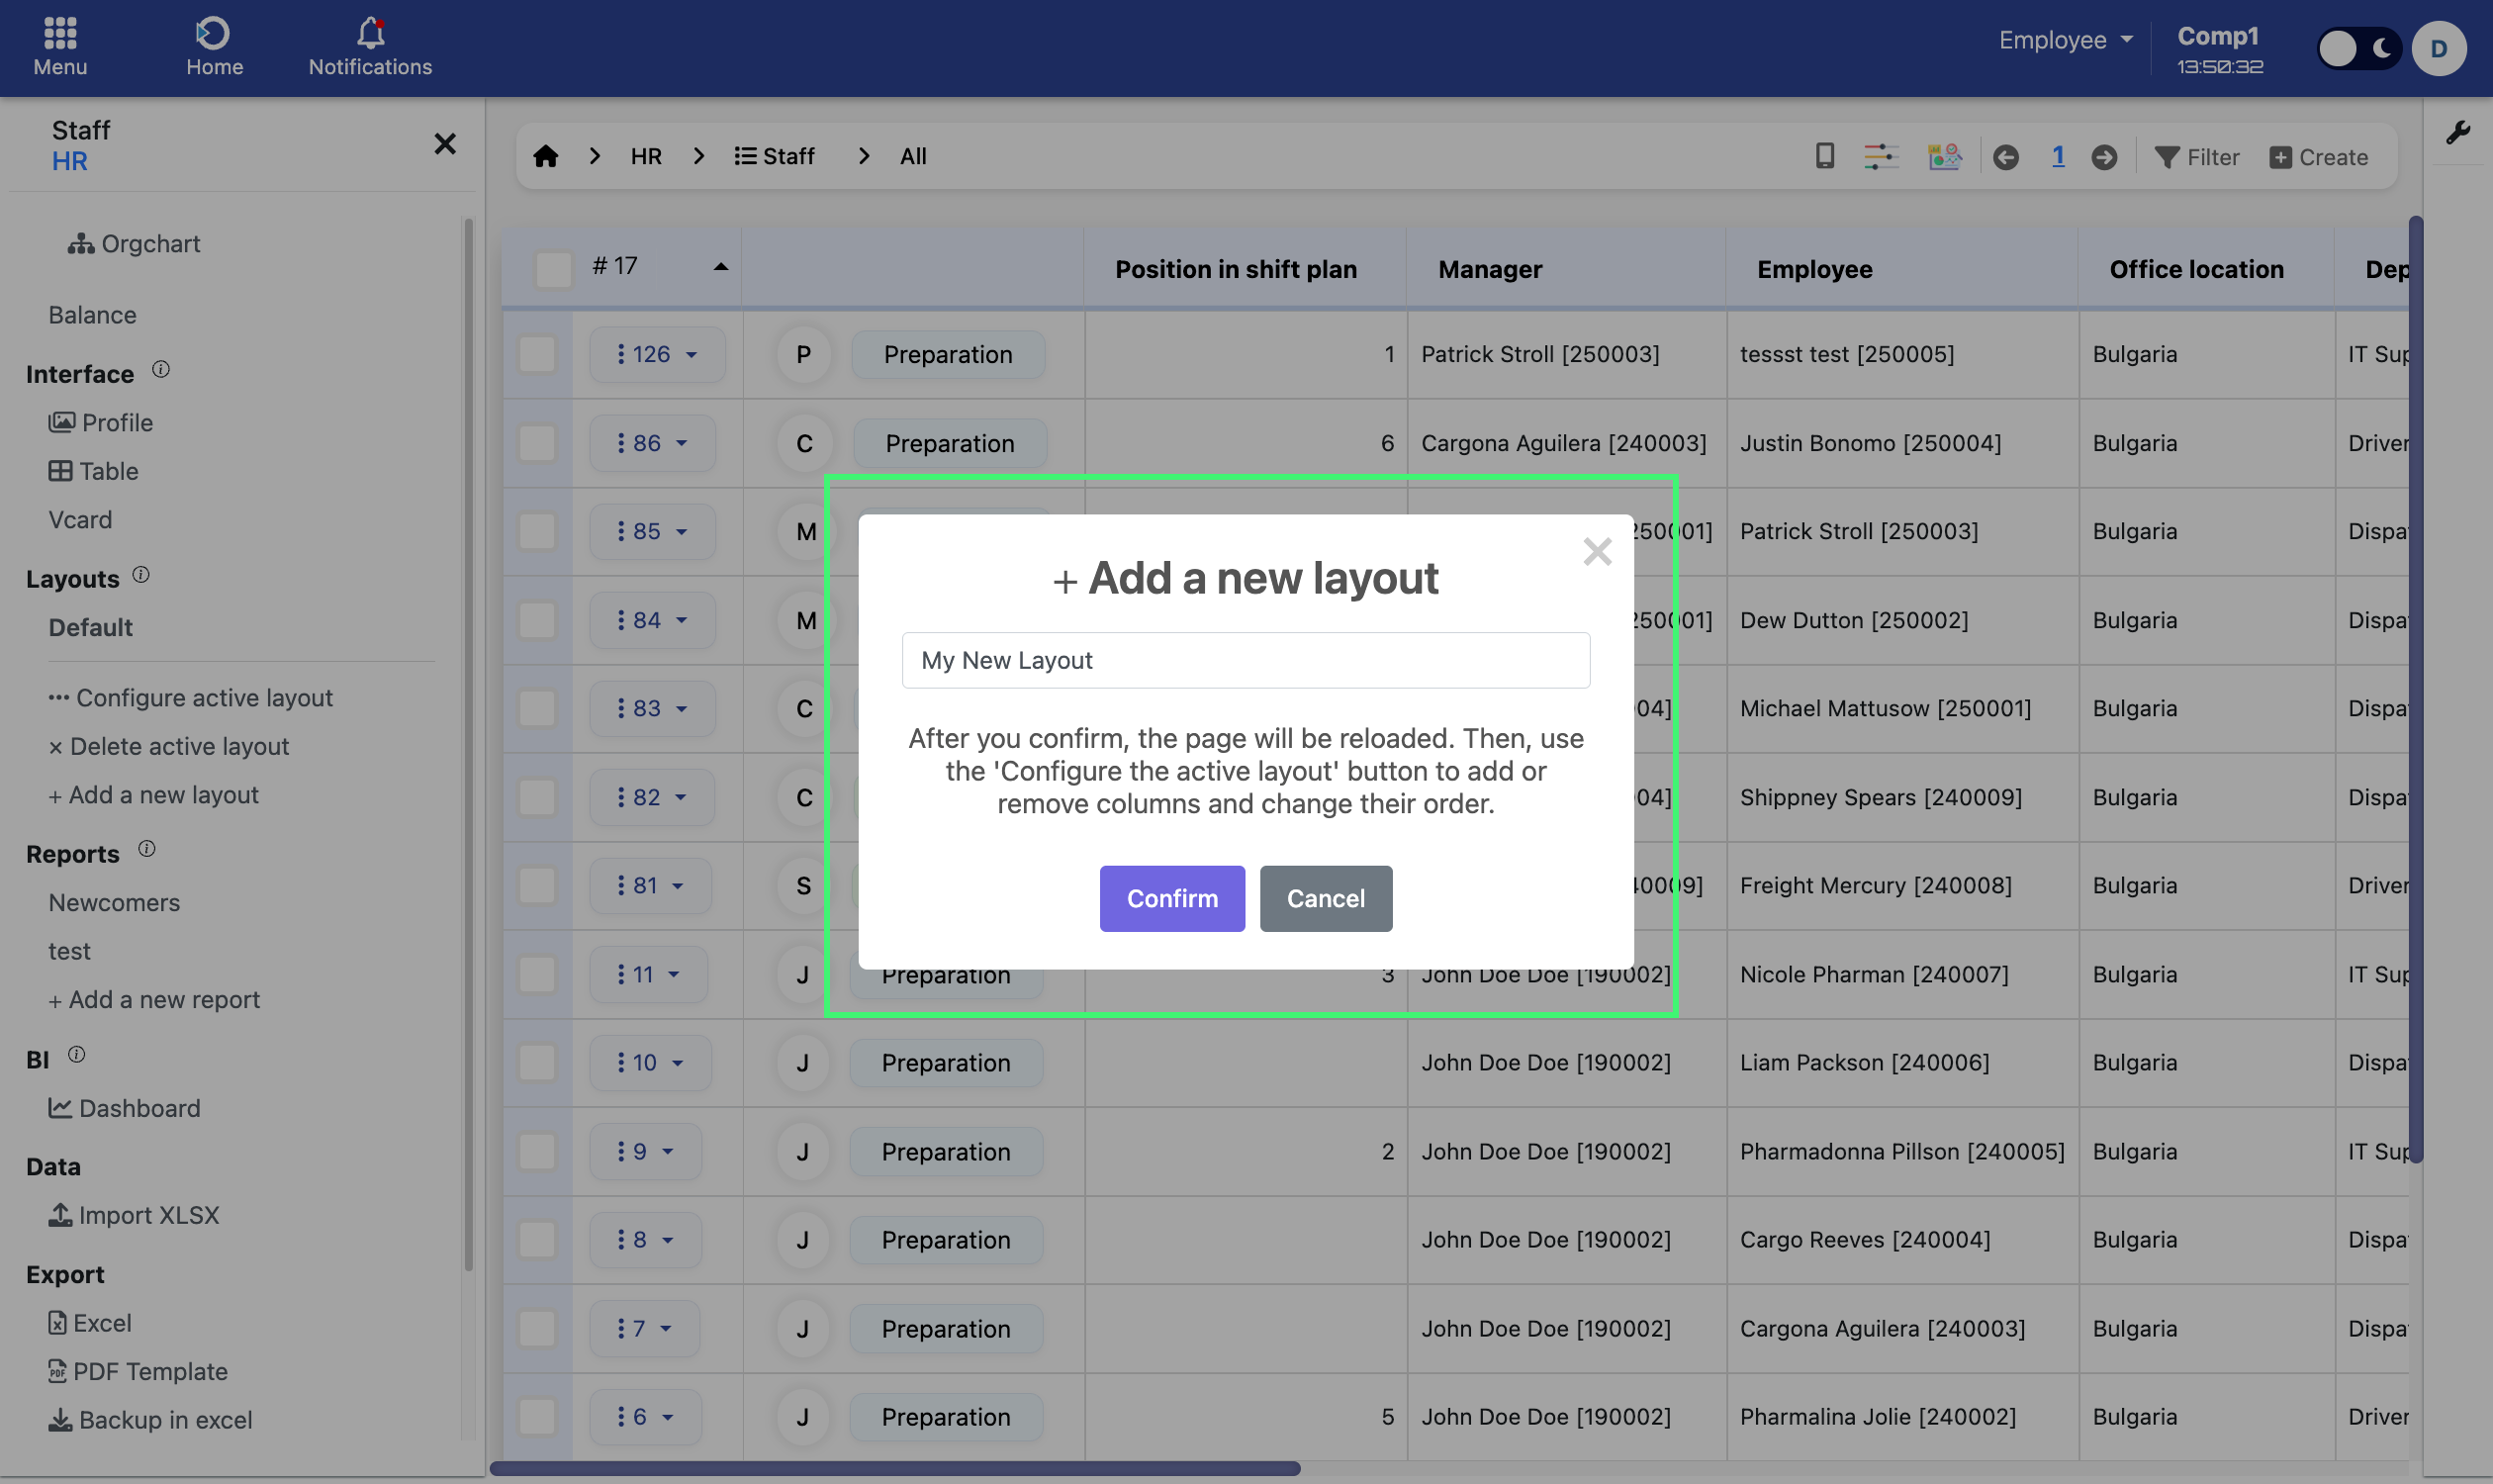
After confirming, the system creates a new layout using the default set of columns. You’ll be able to configure it immediately.
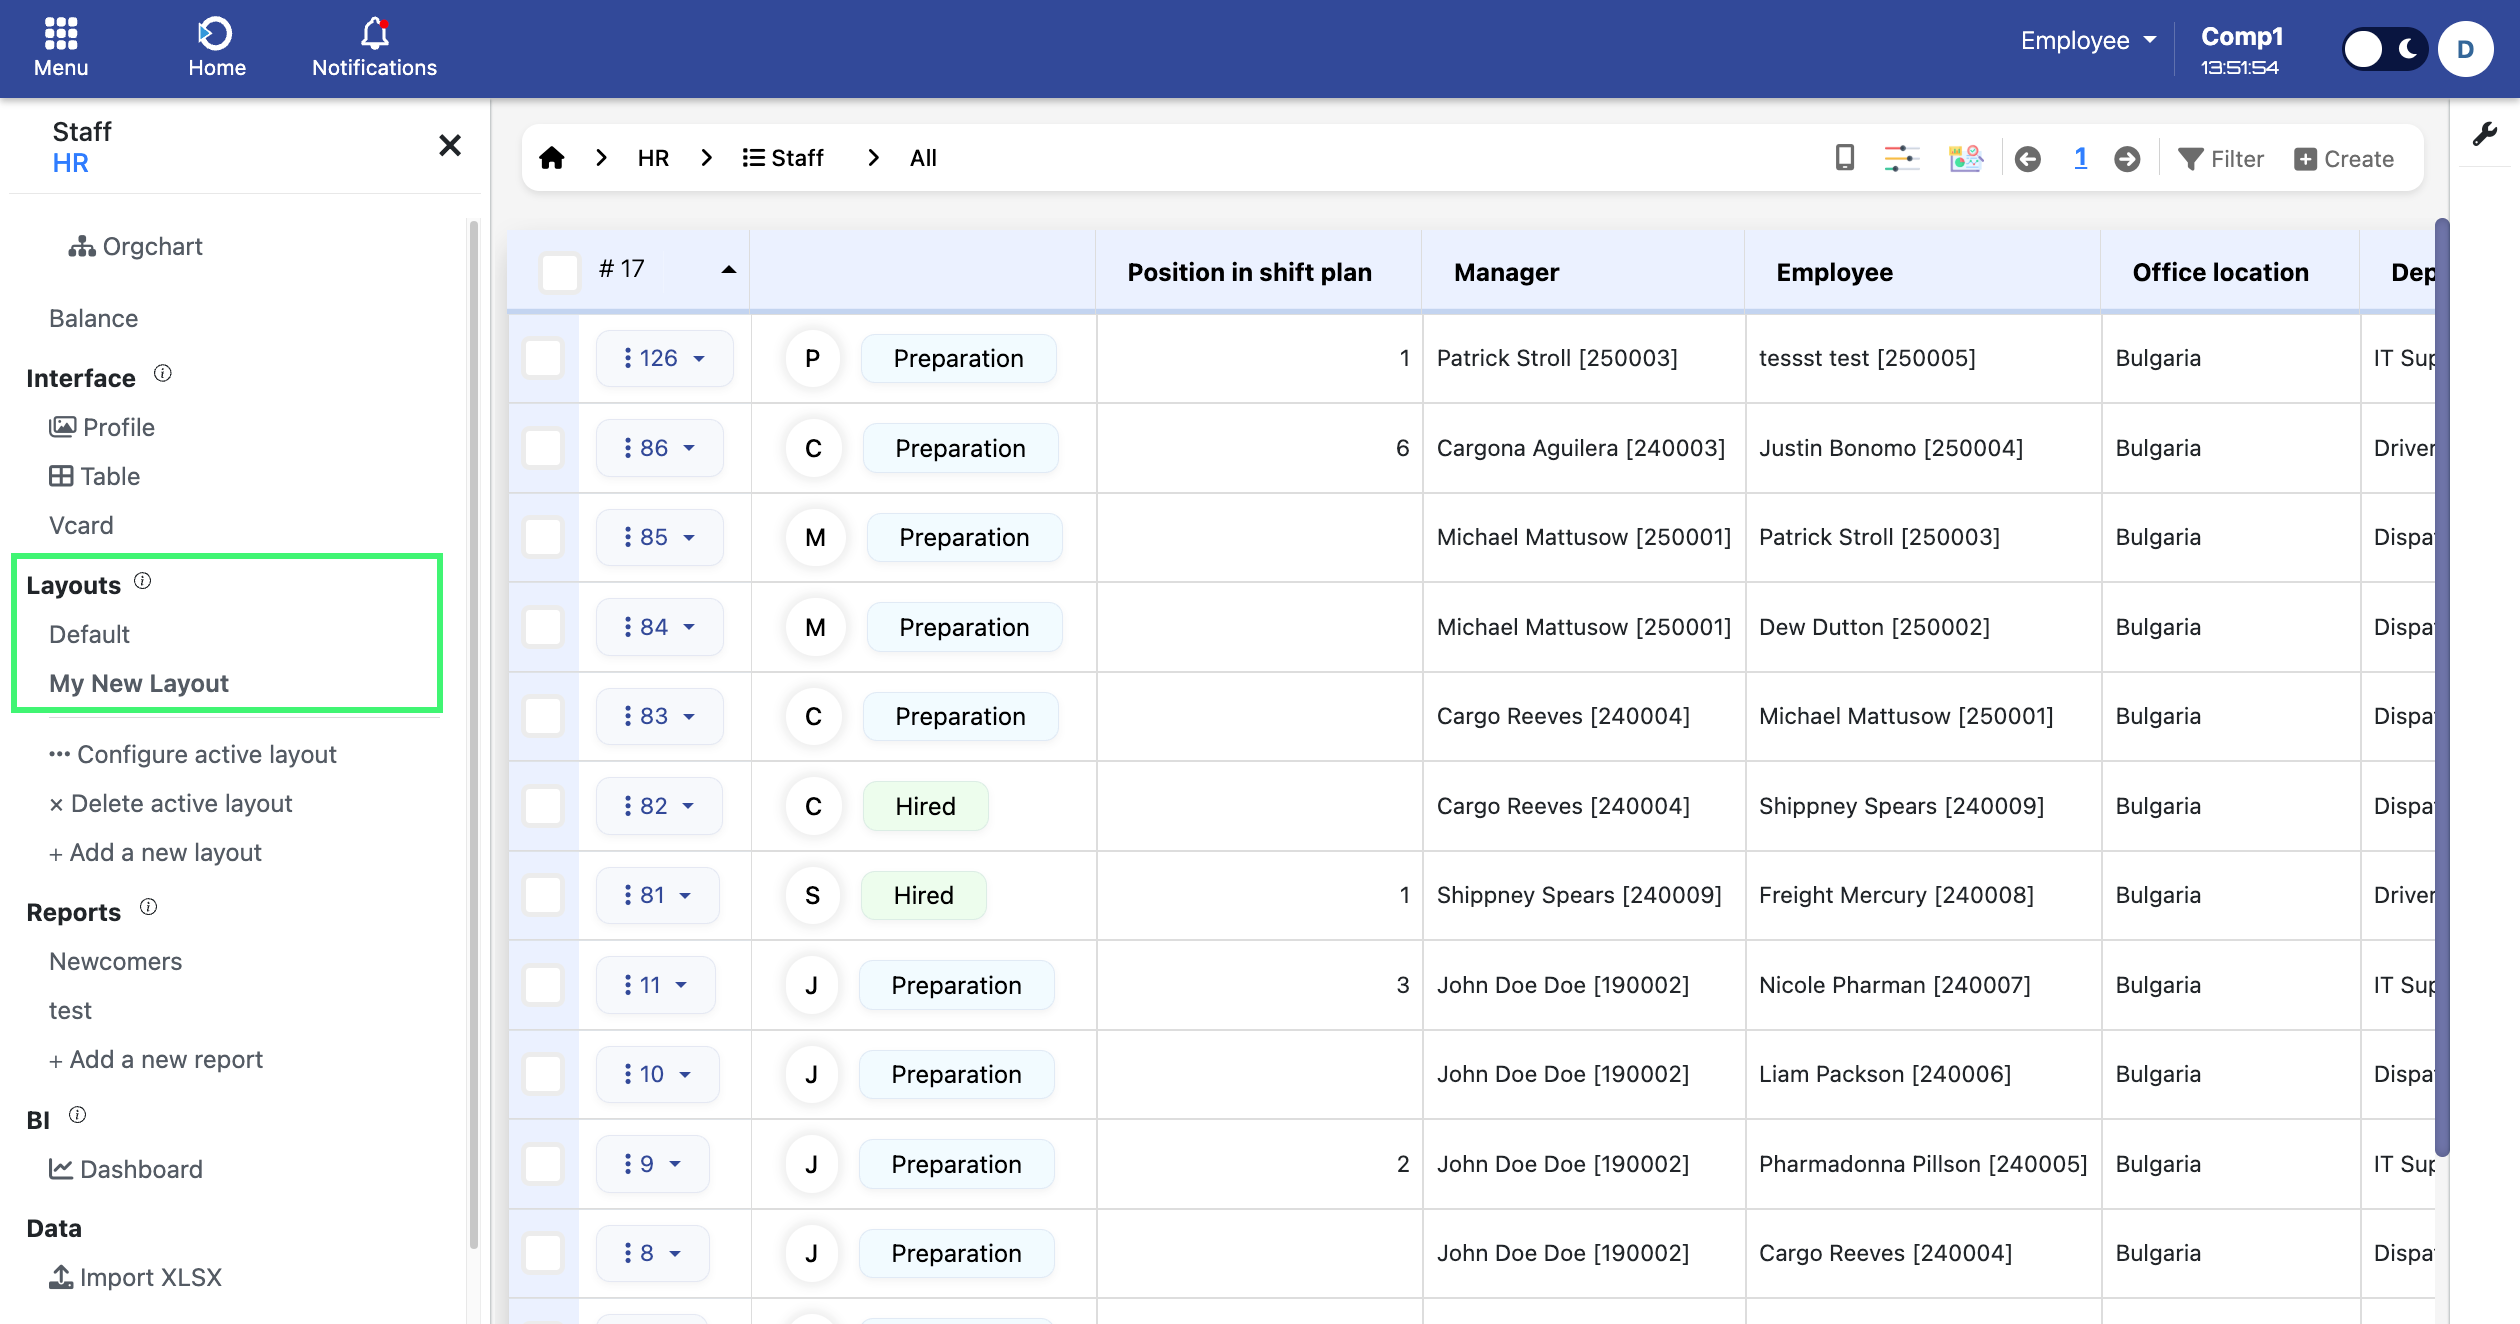
4. Switching and managing layouts
Your current layout is always shown in the Layouts section. You can switch layouts by clicking on their name. Only one layout can be active at a time.
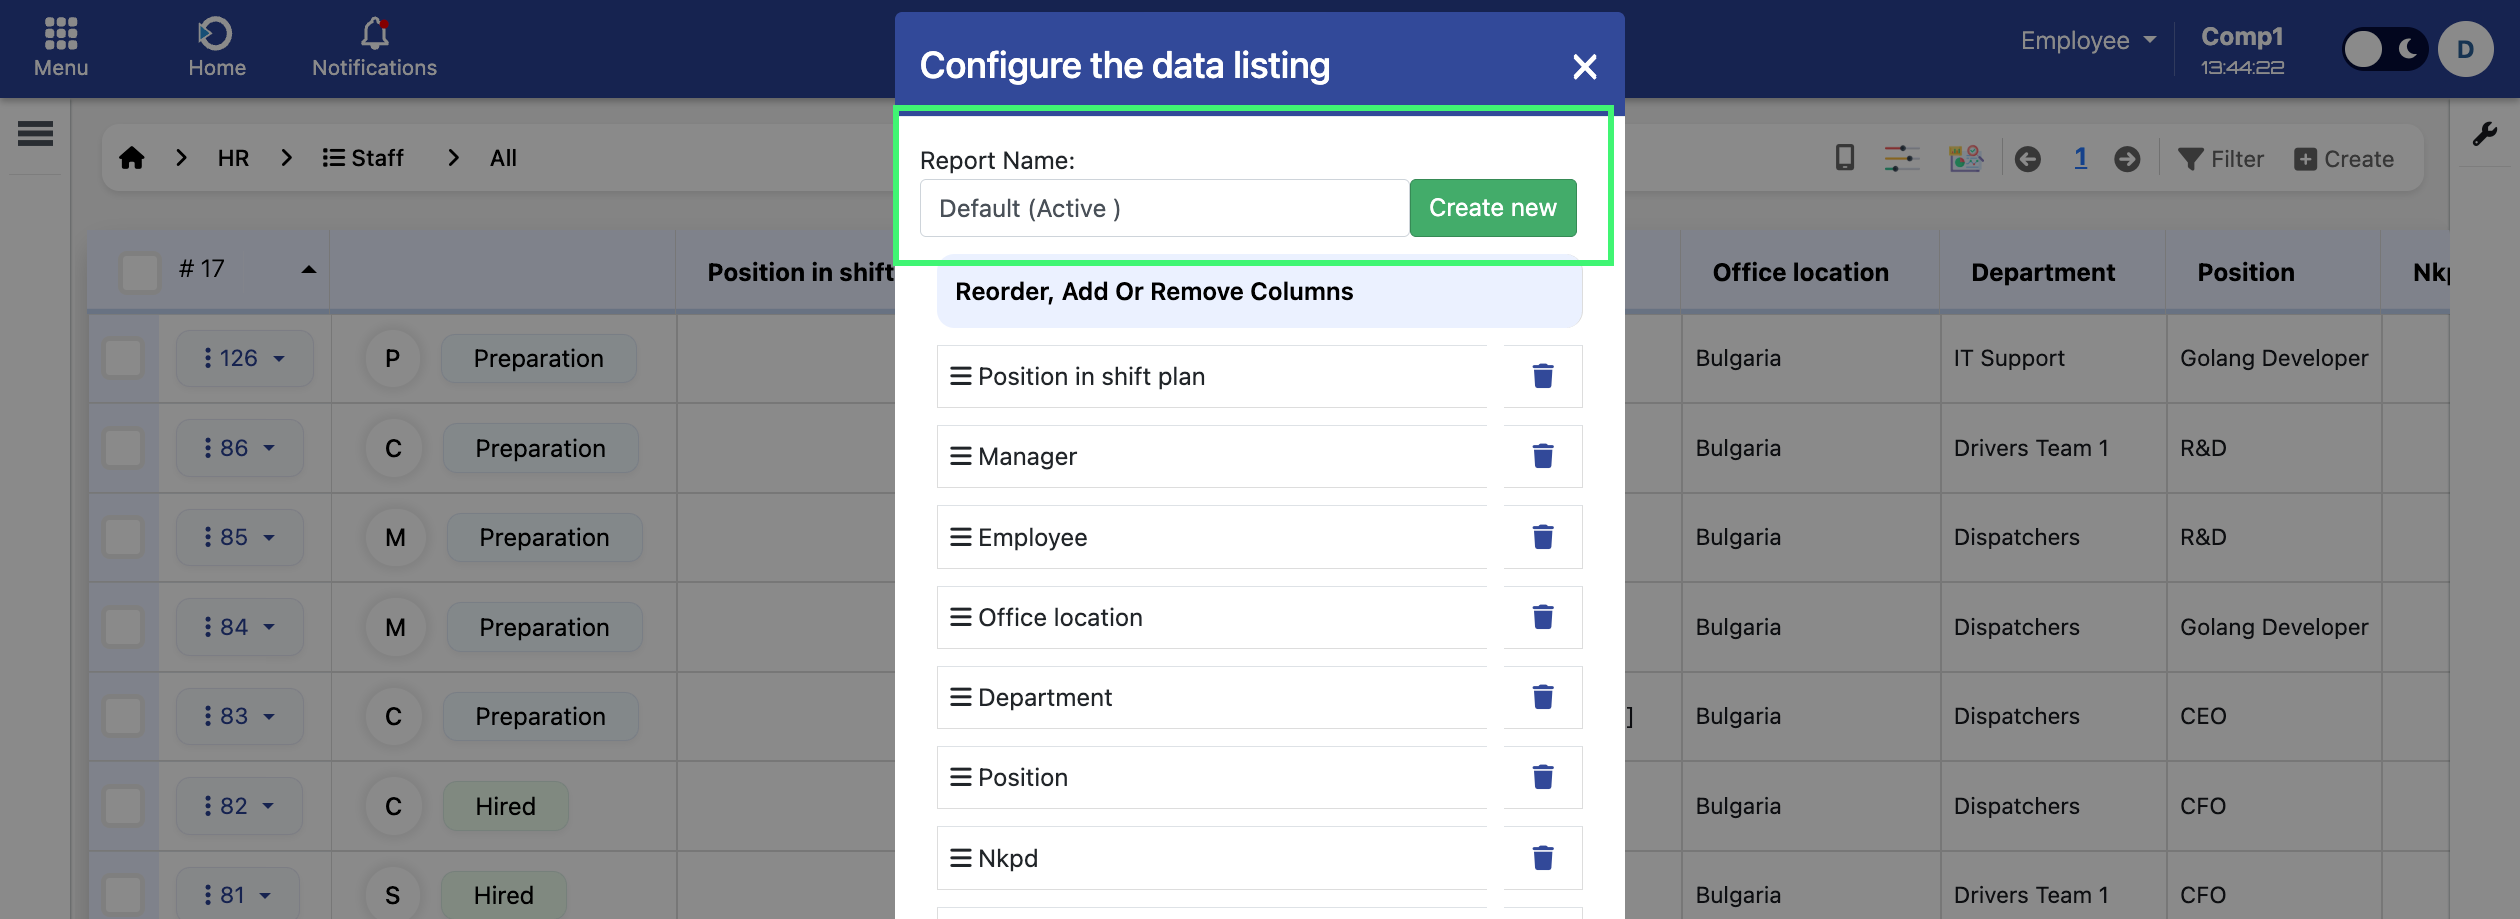
5. Configuring columns (add, remove, reorder)
Click “Configure active layout” to open the layout editor.
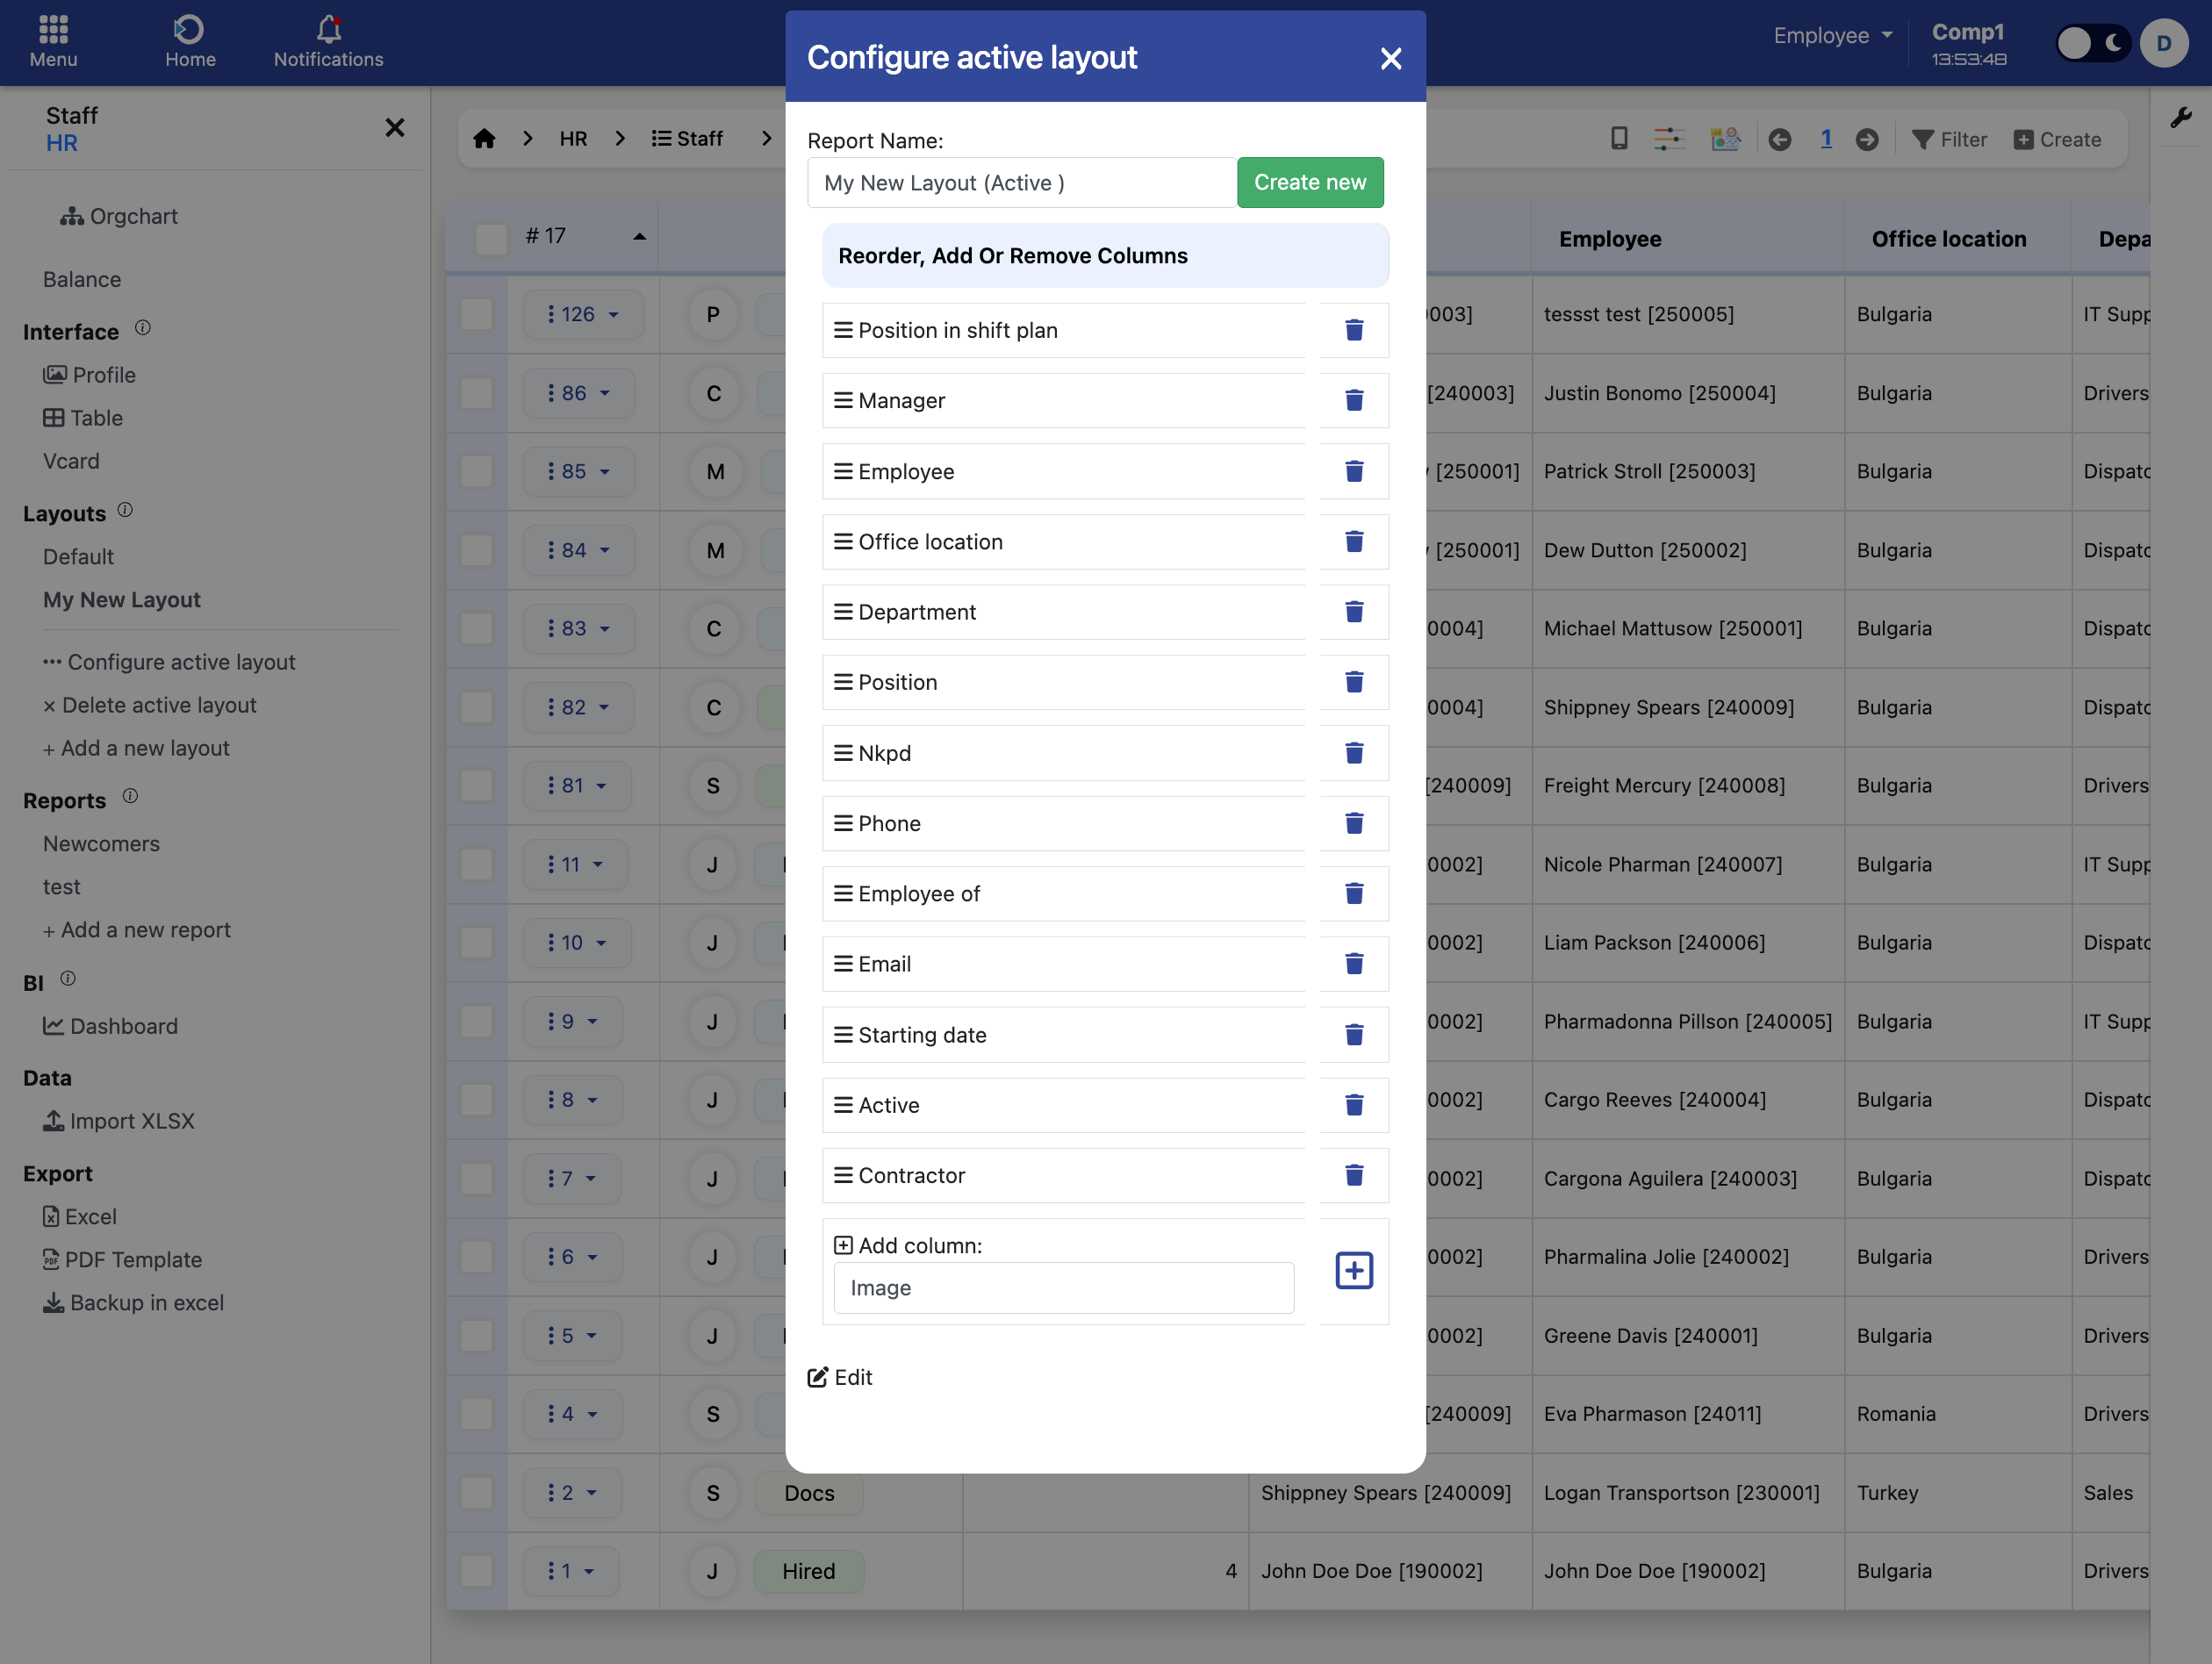
Here, you can:
- Drag and drop columns to change their order
- Click the trash icon to remove columns
- Use the dropdown at the bottom to add new columns
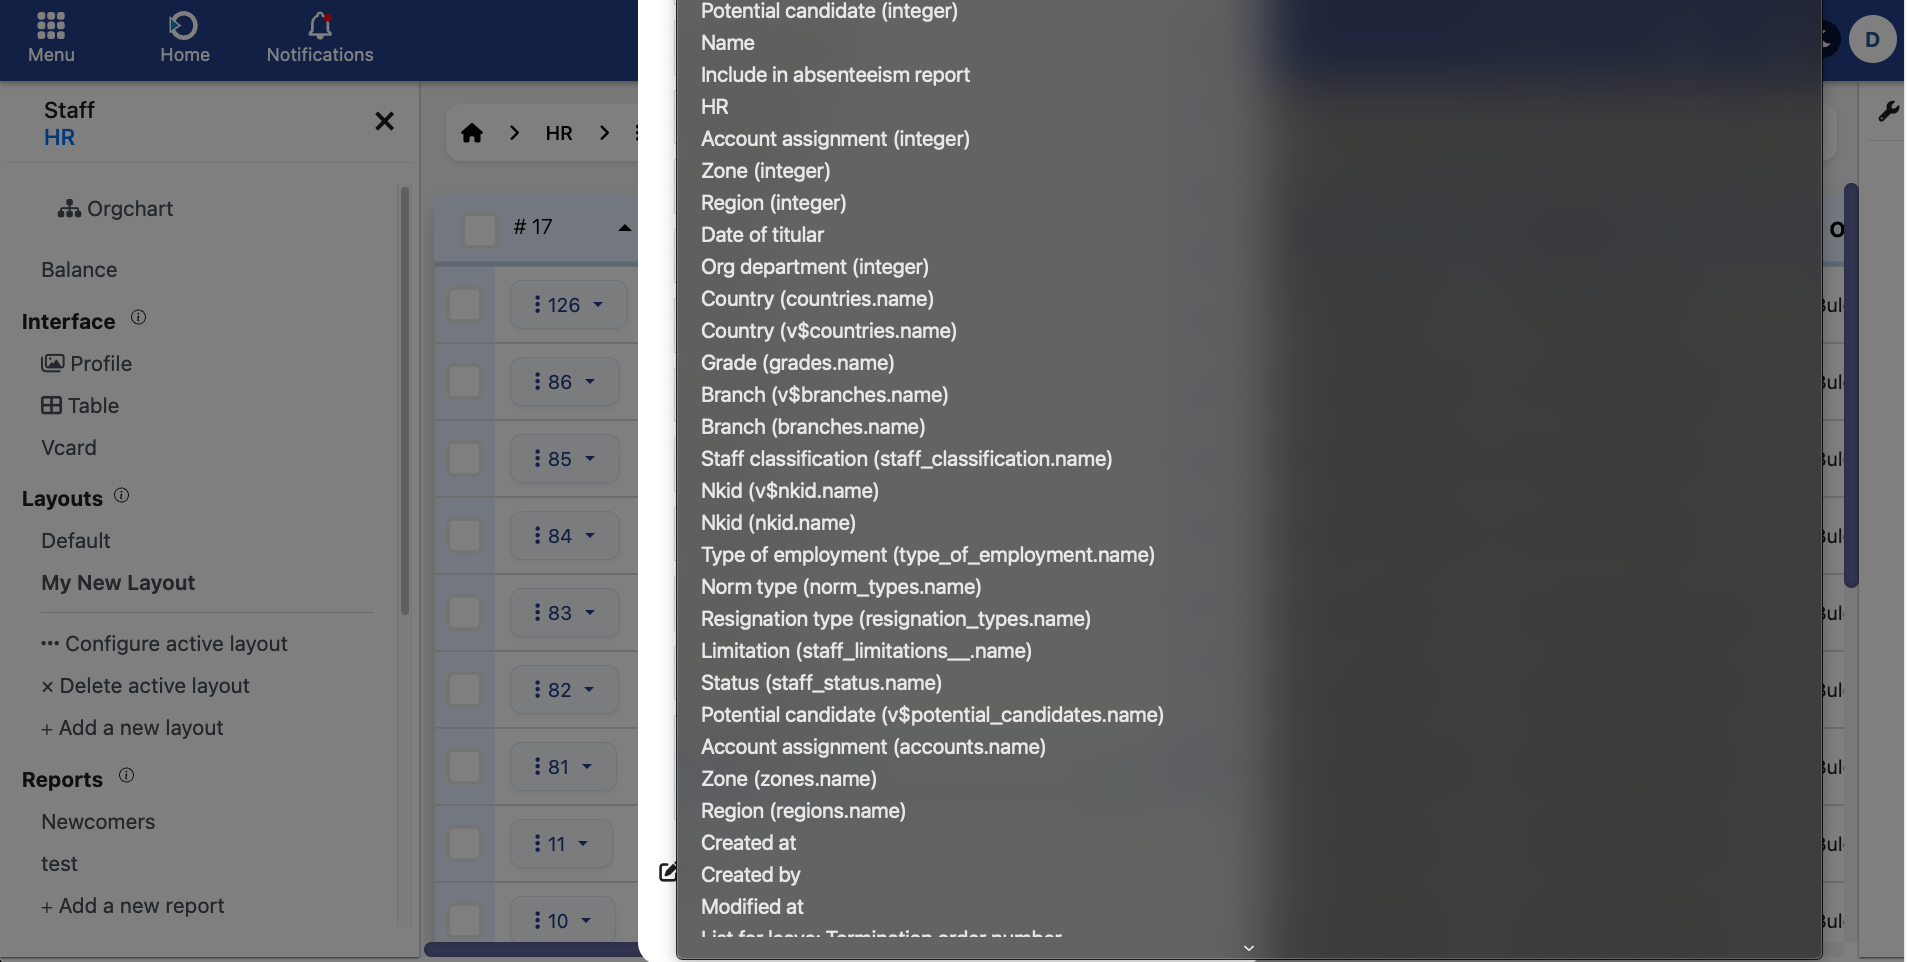
When adding new columns, some fields (like dropdowns or links to other modules) appear in multiple versions.
Here’s how to choose the right one, using Branch as an example:
- Code or ID — shows only a number, such as Branch → 5
This is a technical value and usually not helpful. - Readable name — shows the name of the selected item, such as Branch → branches.name
This is usually what you need and is easy to understand. - Formatted name — same as above but visually cleaner, such as Branch → v$branches.name
If available, this is the best version to use.
Tip: Choose the version that looks like a clear name, not just a number.
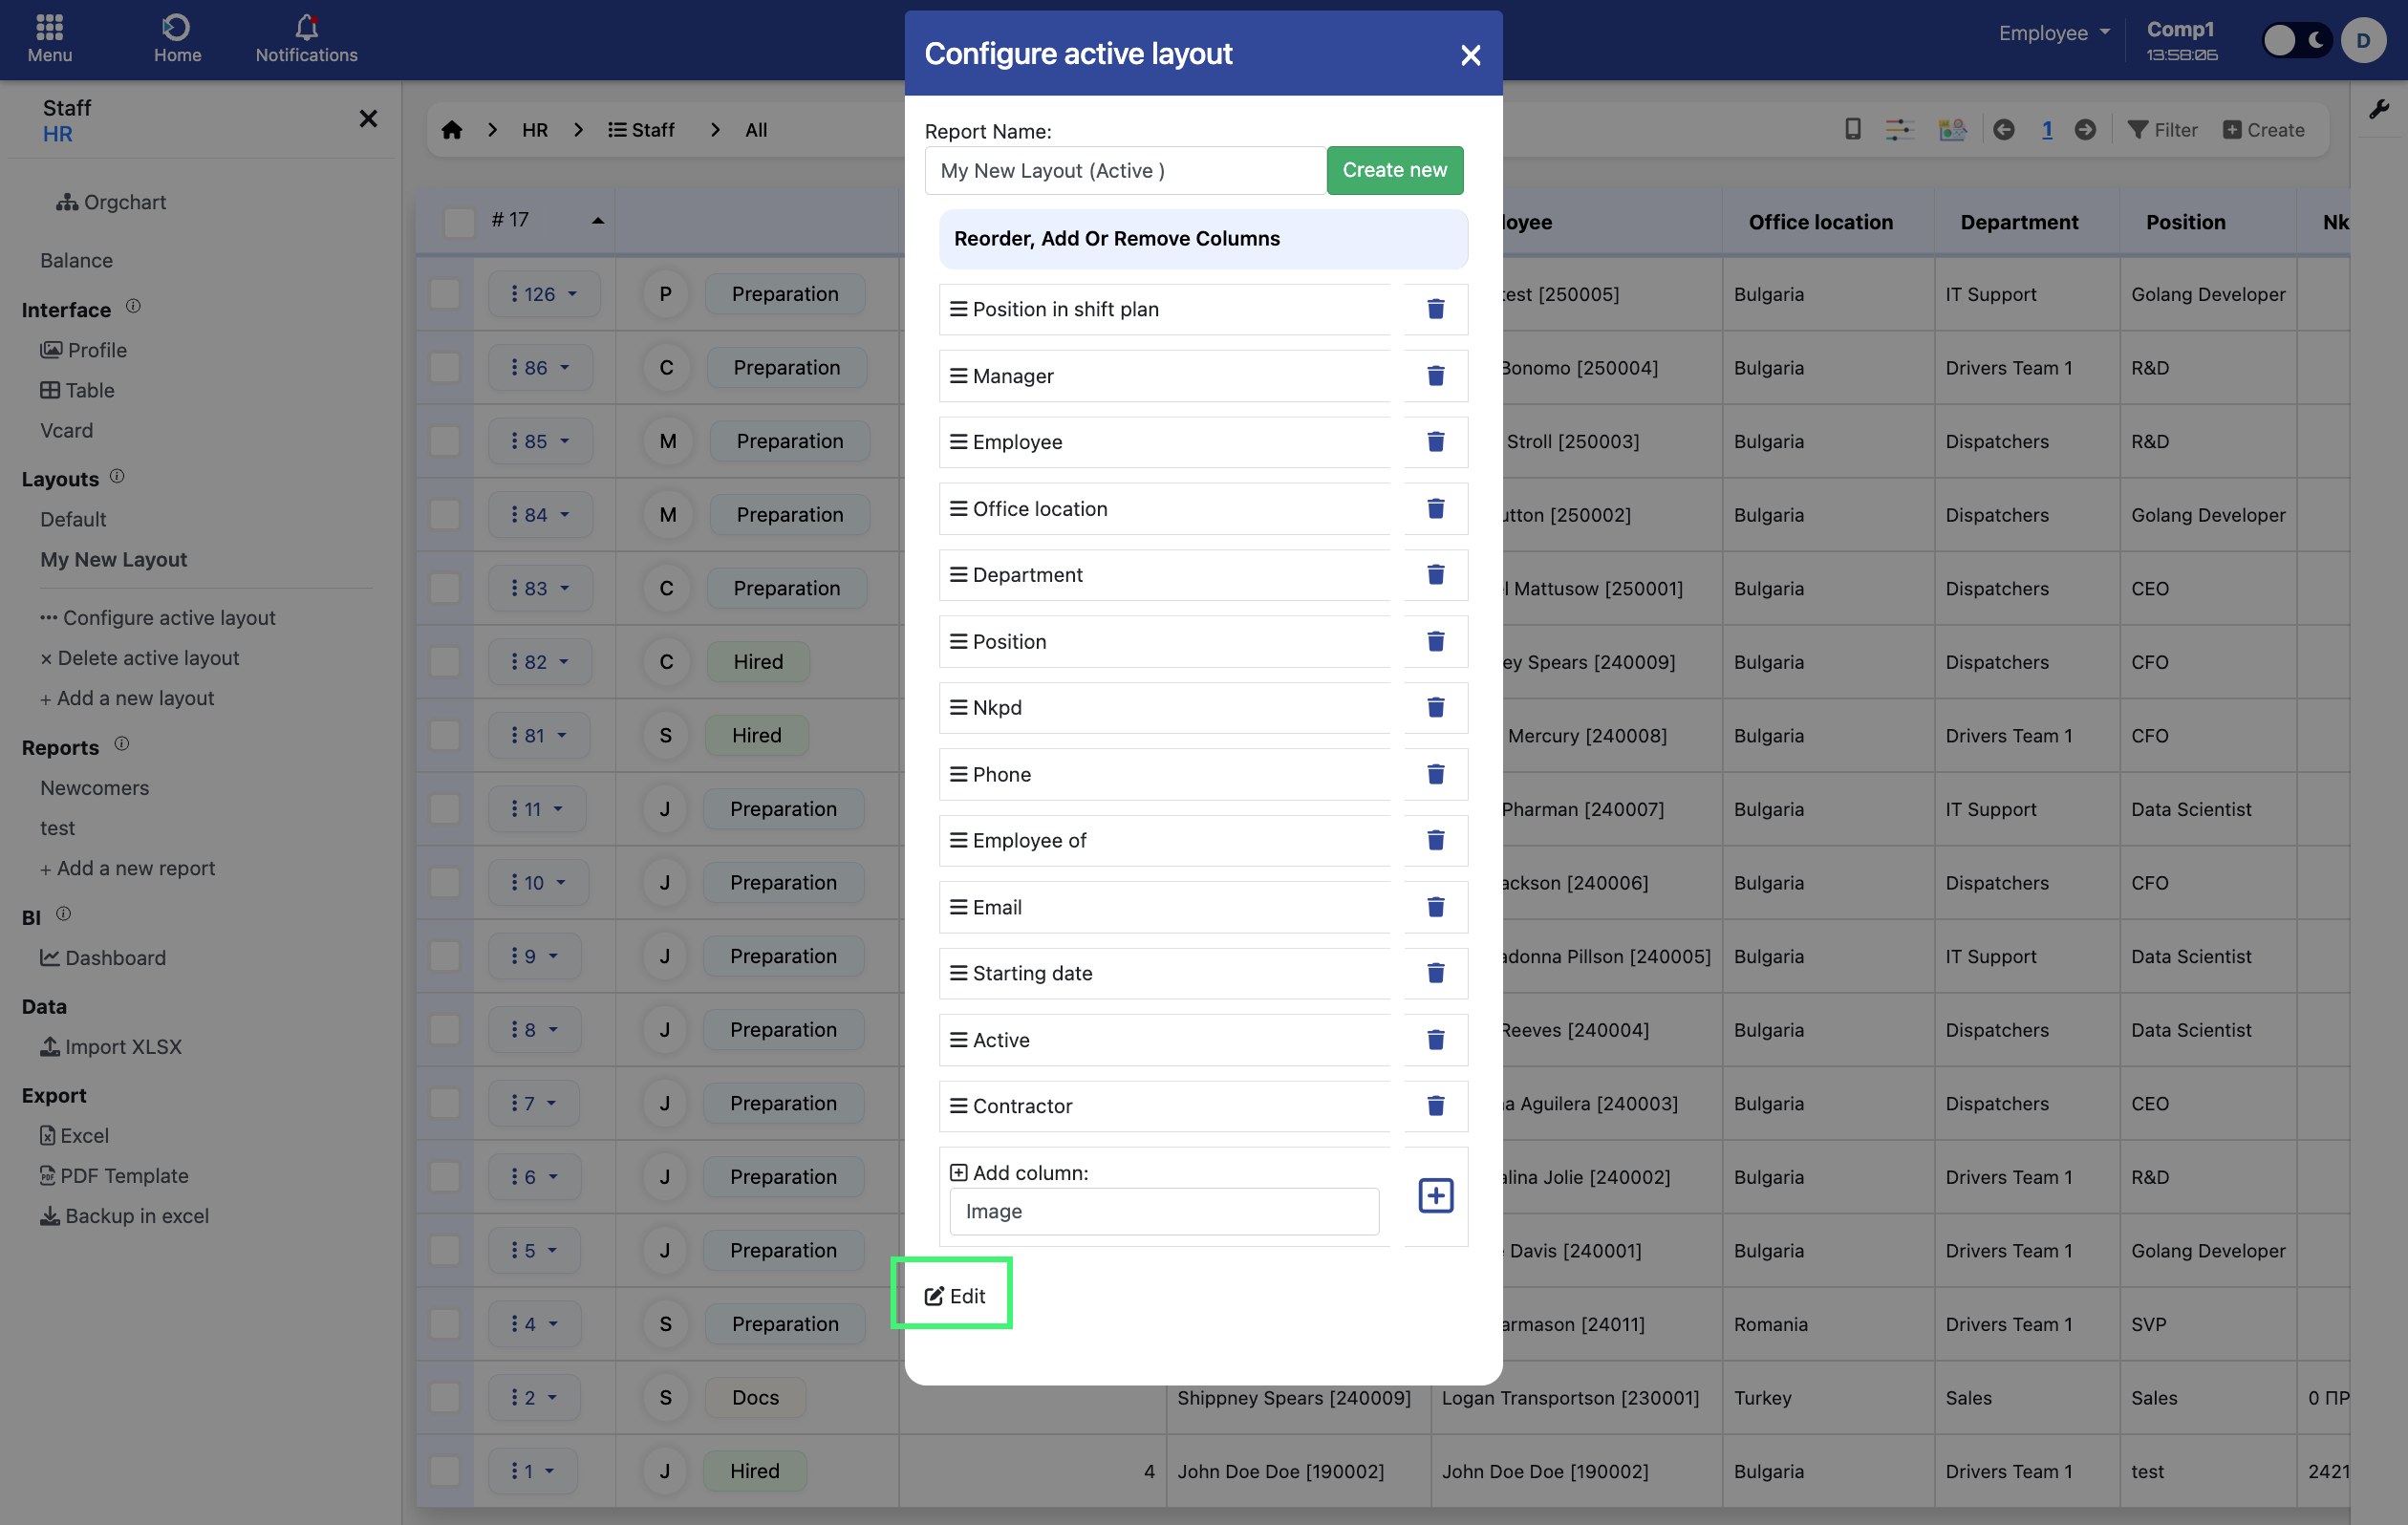
6. Renaming a layout
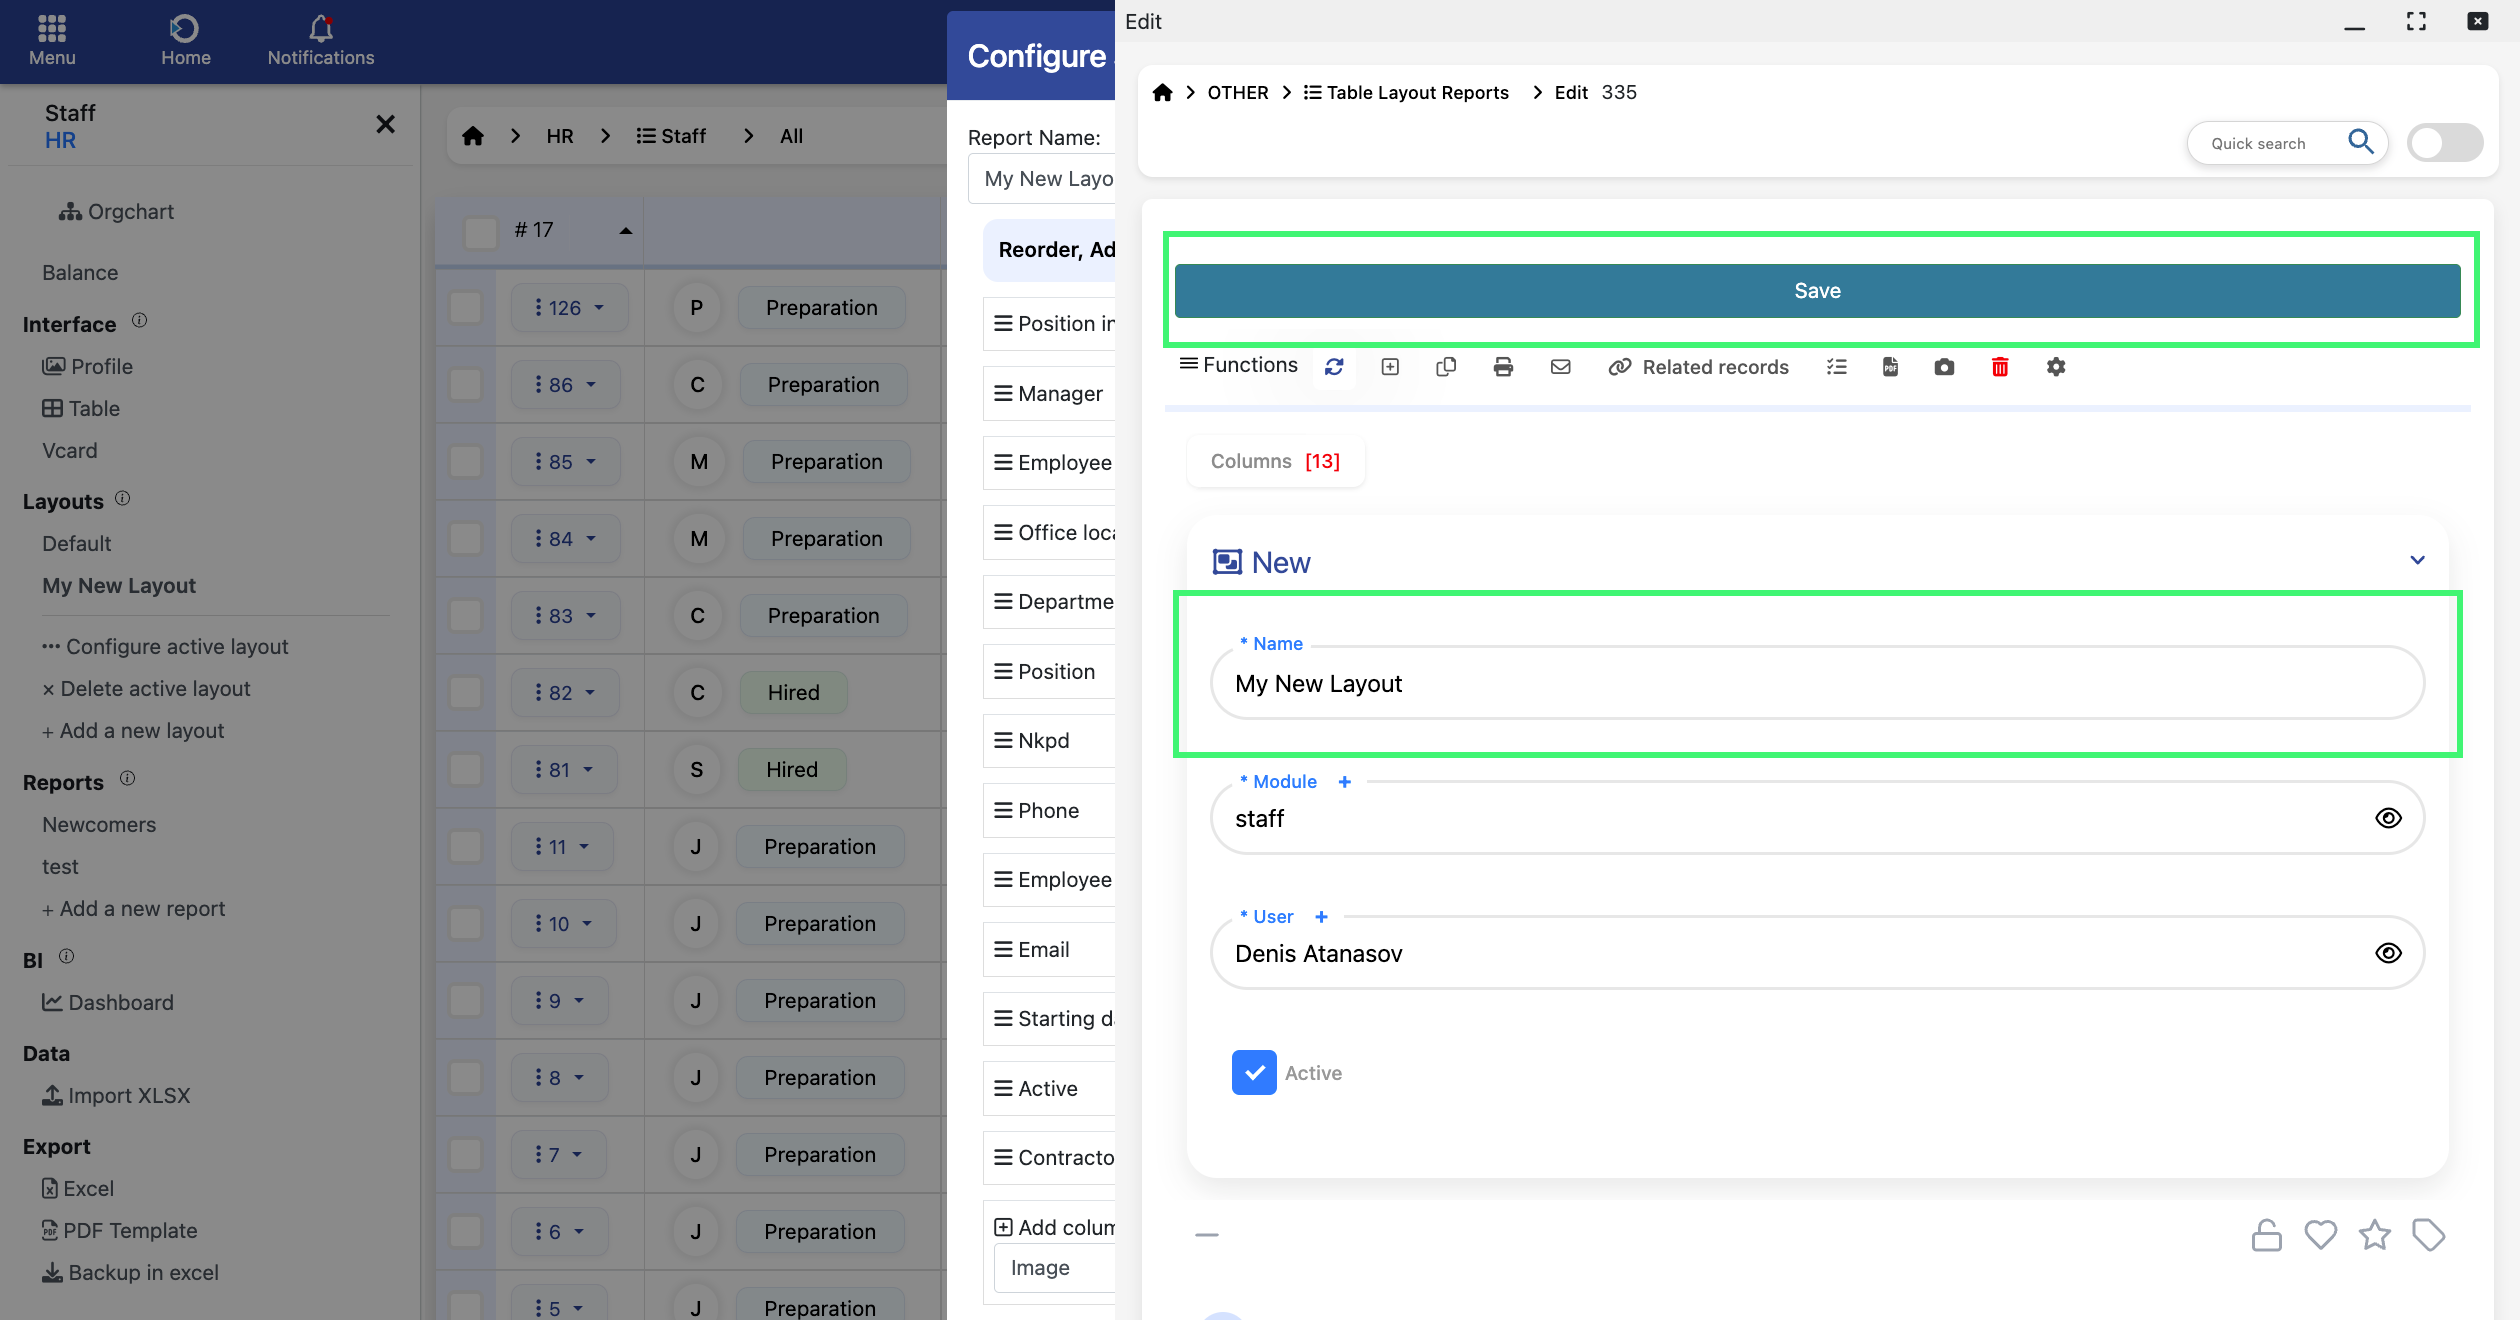
To rename a layout, click the “Edit” button at the bottom of the layout configuration panel.
This opens the layout as a form. You can change the name and click Save.
7. Quick customization via shortcut button
If you haven’t created any layouts yet, click the quick config button (three horizontal sliders) in the top toolbar.
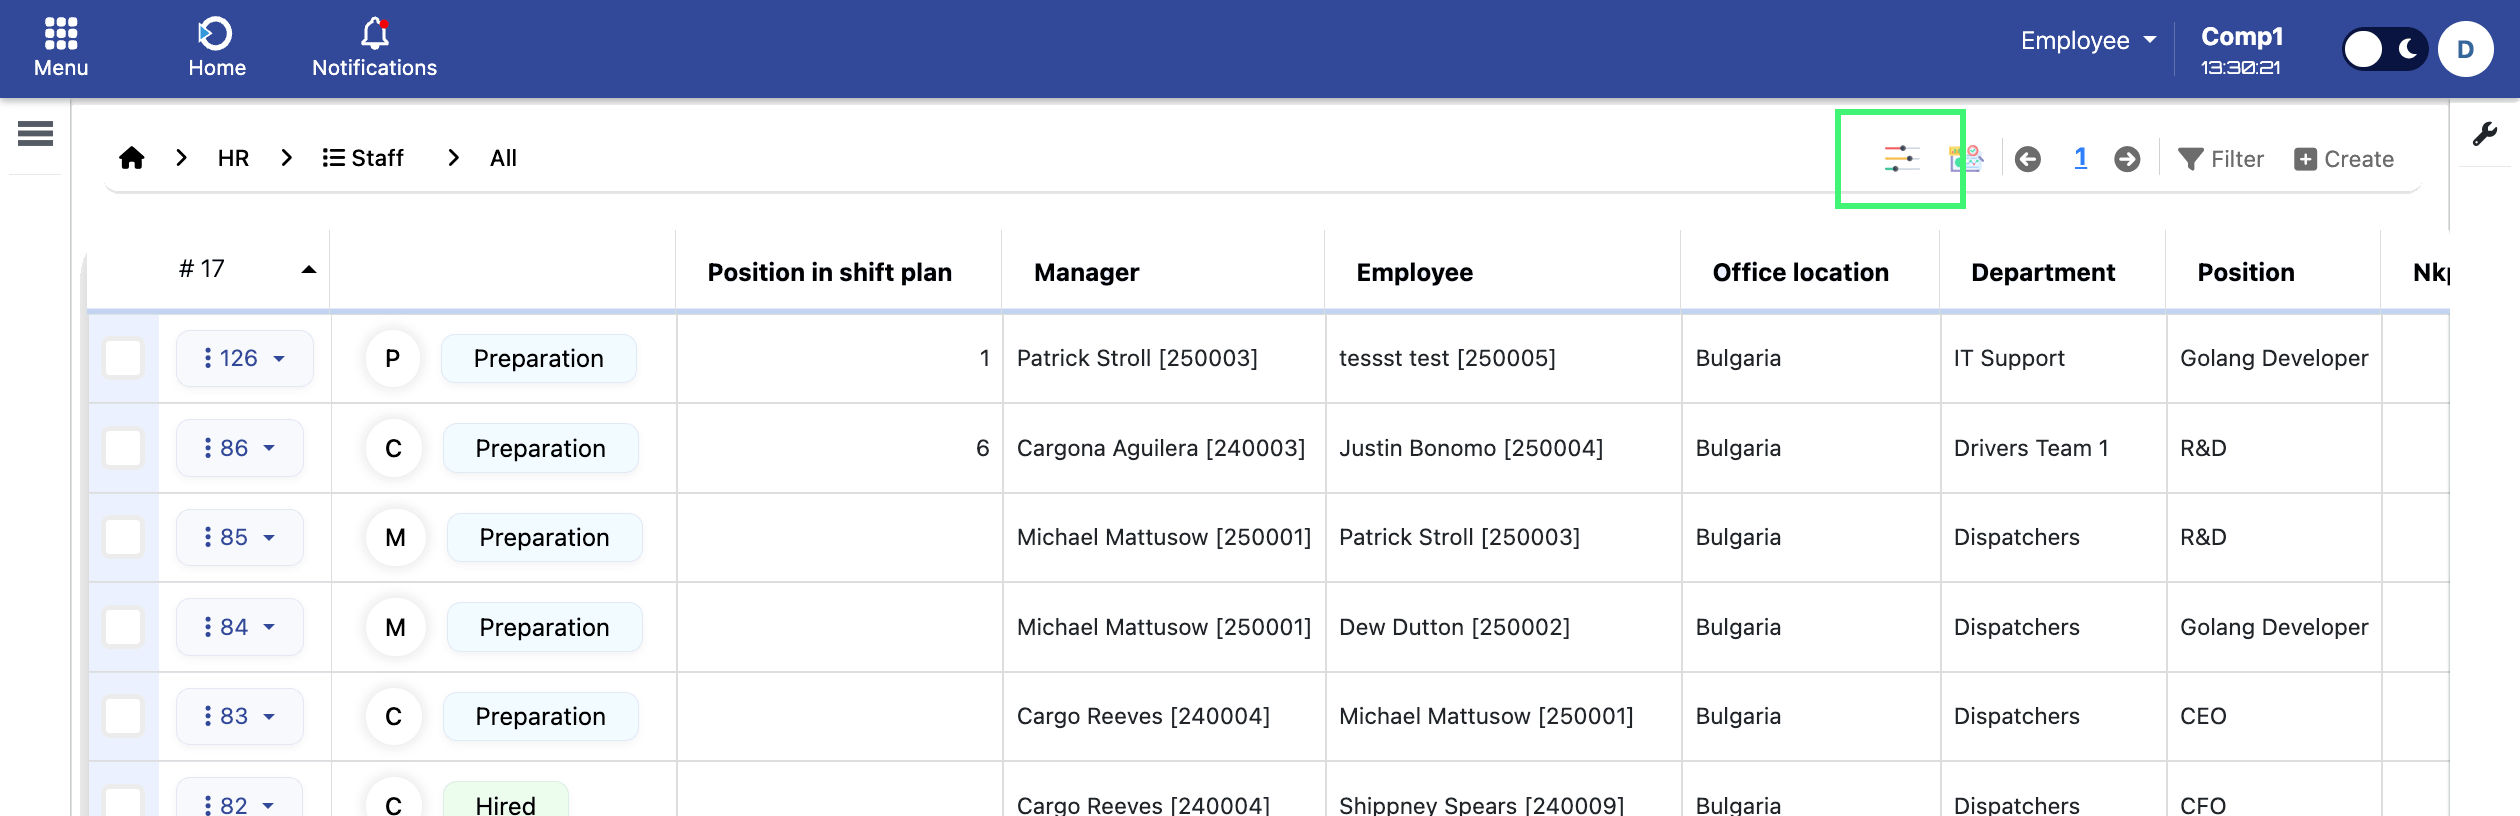
This opens the same column configuration popup. As soon as you make any change (even a small one), the system automatically creates your first layout named "Default".
SQL Reports
OBS ERP allows you to create custom SQL reports based on "select" statements. The results are presented in a section in your ERP instance. This feature is available in Administration ⇨ Developer ⇨ Reports
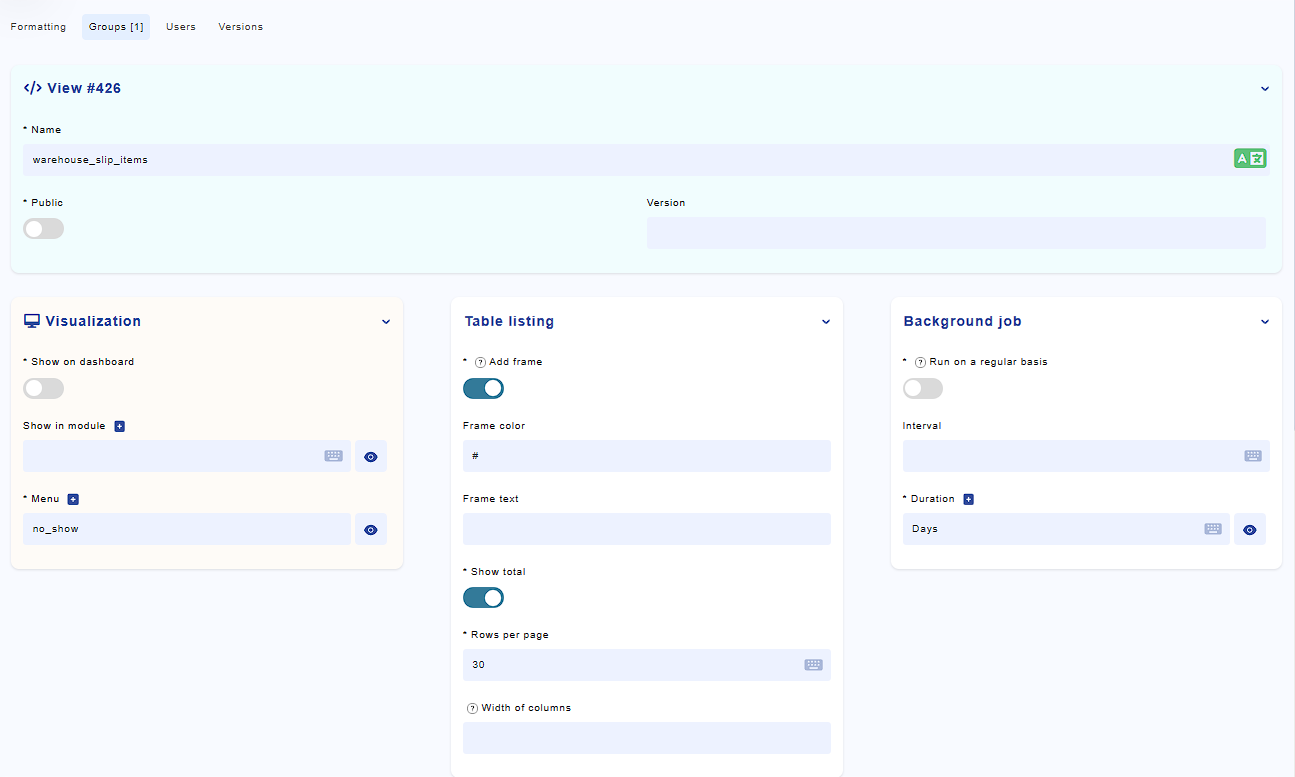
Description:
- Name - the name of the SQL report (view)
- Description - short description of the report
- Show on dashboard - the report will be visible on the main ERP Dashboard
- Menu - if show on dashboard is selected, the report will be visible in the selected section
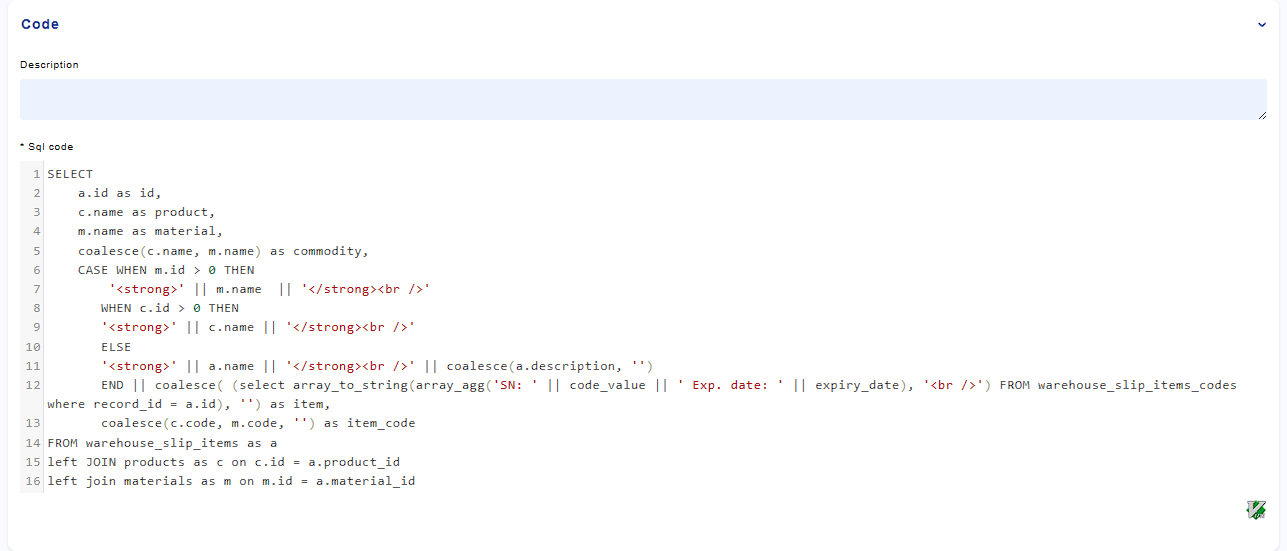
- SQL Code - raw SELECT statement.
- Show in module - if selected the report will be visible in the selected module
Security:
- Groups - access groups allowed to open the module
- Users - specific users allowed to open the module
After you are happy with your select statement you need to select Menu ⇨ Create view to create a database view and prepare the report
SQL Functions
For registered users only