
Initial Assets Import
Initial Assets Import
When migrating existing assets into the system for the first time, you need to not only import the asset records but also reflect the current assignment of those assets to employees. The Initial Assets Import feature handles this in two steps: first, you prepare the import file with assignment data; then, the system creates the corresponding transfers automatically.
- Import your assets via Import XLSX, filling in the two assignment columns.
- Open Initial Transfers Import from the left panel.
- Preview the transfers to be created and confirm.
- The system creates one transfer per employee containing all their assigned assets and marks each transfer as completed.
Preparing the Import File
The asset import file (XLSX) contains all the standard asset fields. For initial assignment purposes, two additional columns are available:
| Column | Description | Required |
|---|---|---|
| import_staff_id | The ID of the employee to whom this asset is currently assigned. Used to group assets into transfers — one transfer per employee. | Optional |
| import_transfer_date | The date the asset was originally handed to the employee (YYYY-MM-DD). If left empty, the system falls back to the asset's date of commissioning, then date of acquisition, and finally today's date. | Optional |
To find these columns in the import template, open the left panel in the Long-Term Tangible Assets module, click Import XLSX, and download the template. The columns import_staff_id and import_transfer_date are present in the file — fill them in alongside the standard asset data before uploading.
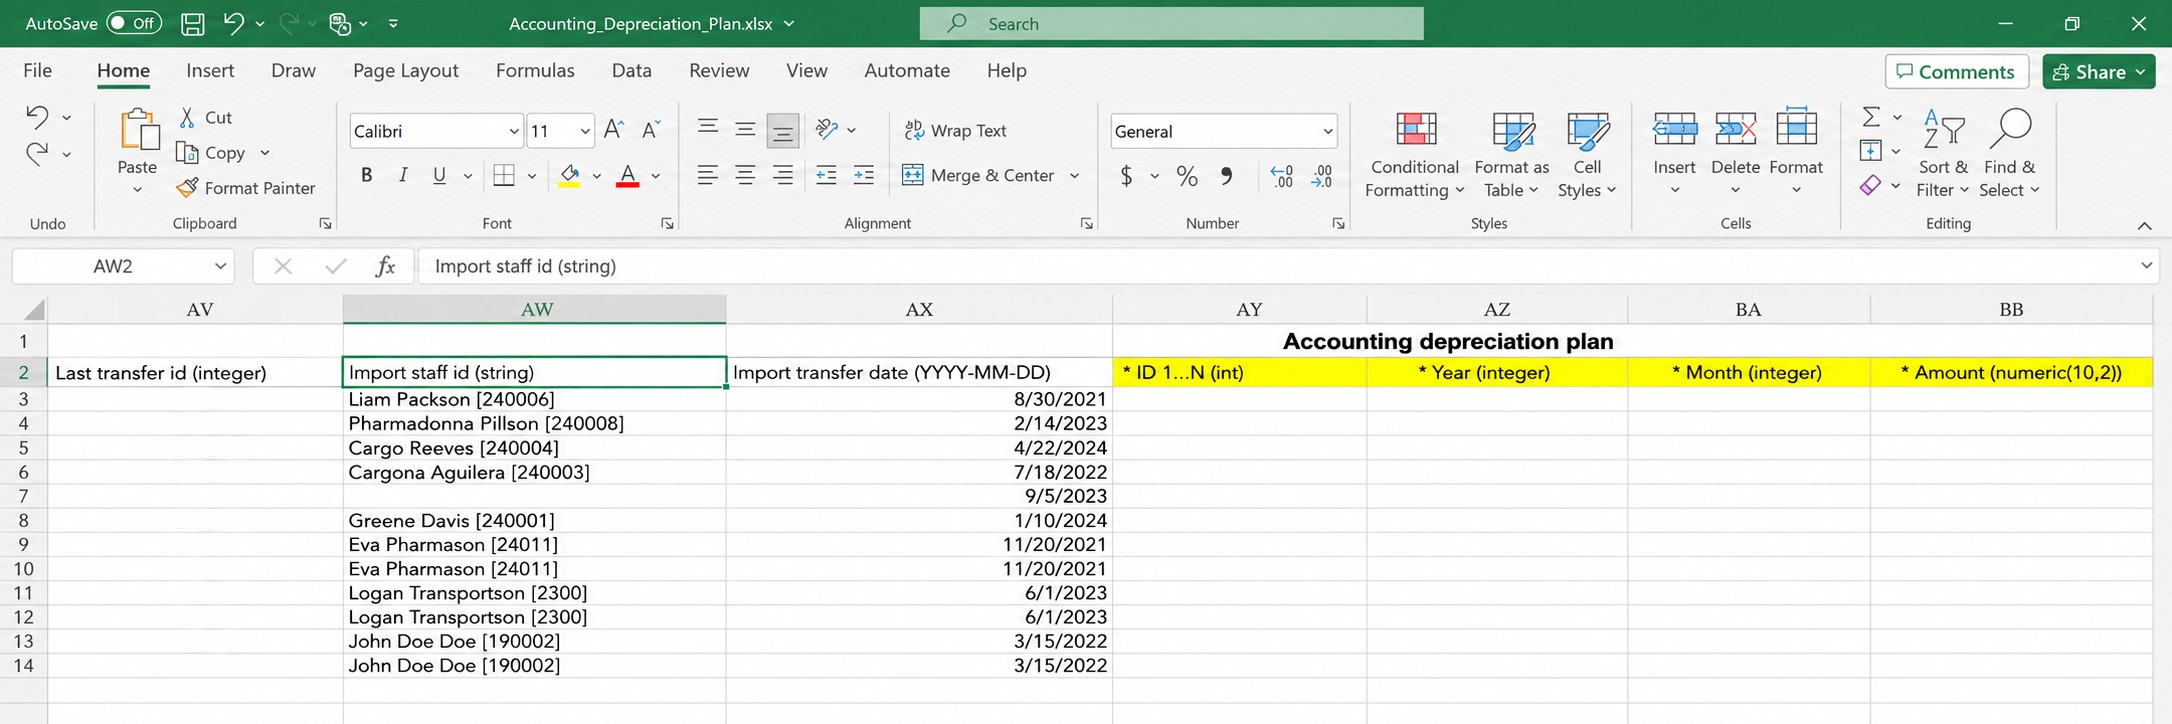
Figure: Import XLSX template — columns import_staff_id (AW) and import_transfer_date (AX)
Assigning Assets to Employees
Once the assets have been imported, open the left panel in the Long-Term Tangible Assets module. Below the Depreciation button you will find the Initial Transfers Import button.
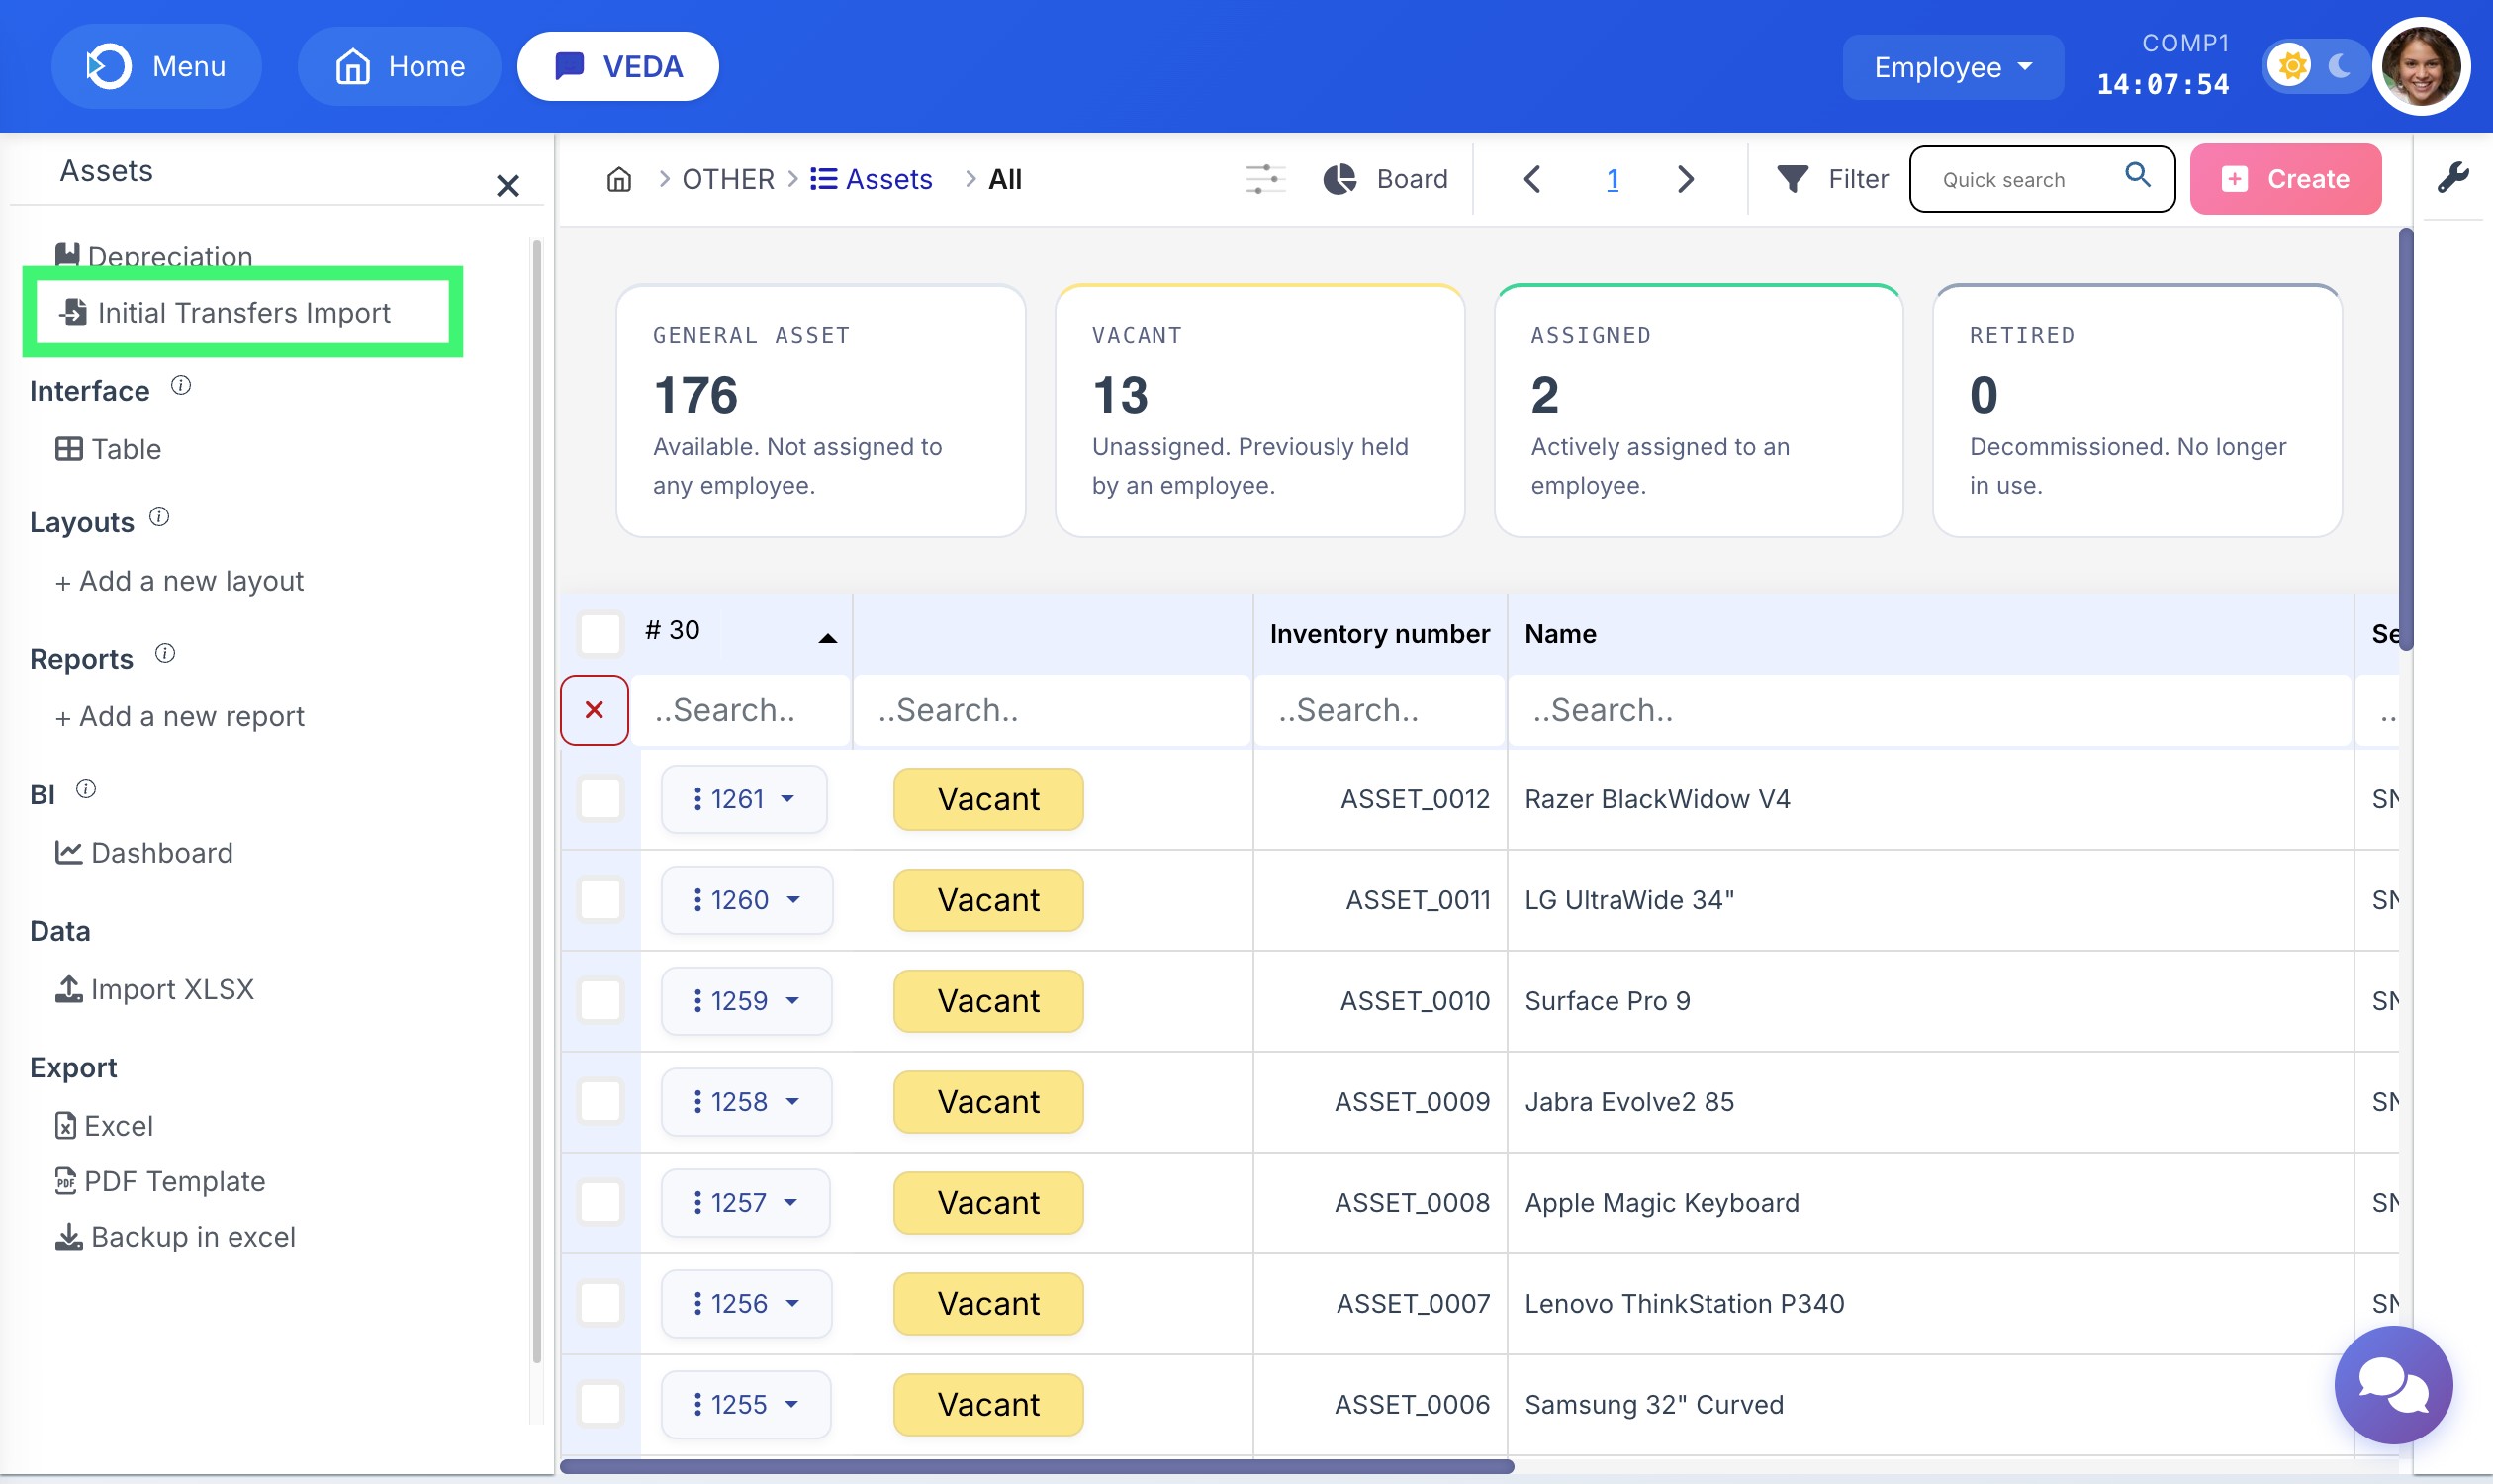
Figure: Left panel — Initial Transfers Import button highlighted
Clicking the button opens a dialog that scans all imported assets with a filled import_staff_id and shows a preview of the transfers that will be created. For each employee the following is displayed:
- Employee — the name and ID of the employee.
- Date — the resolved transfer date (from
import_transfer_dateor the fallback logic described above). - Assets — the names, inventory numbers, and serial numbers of all assets to be included in the transfer.
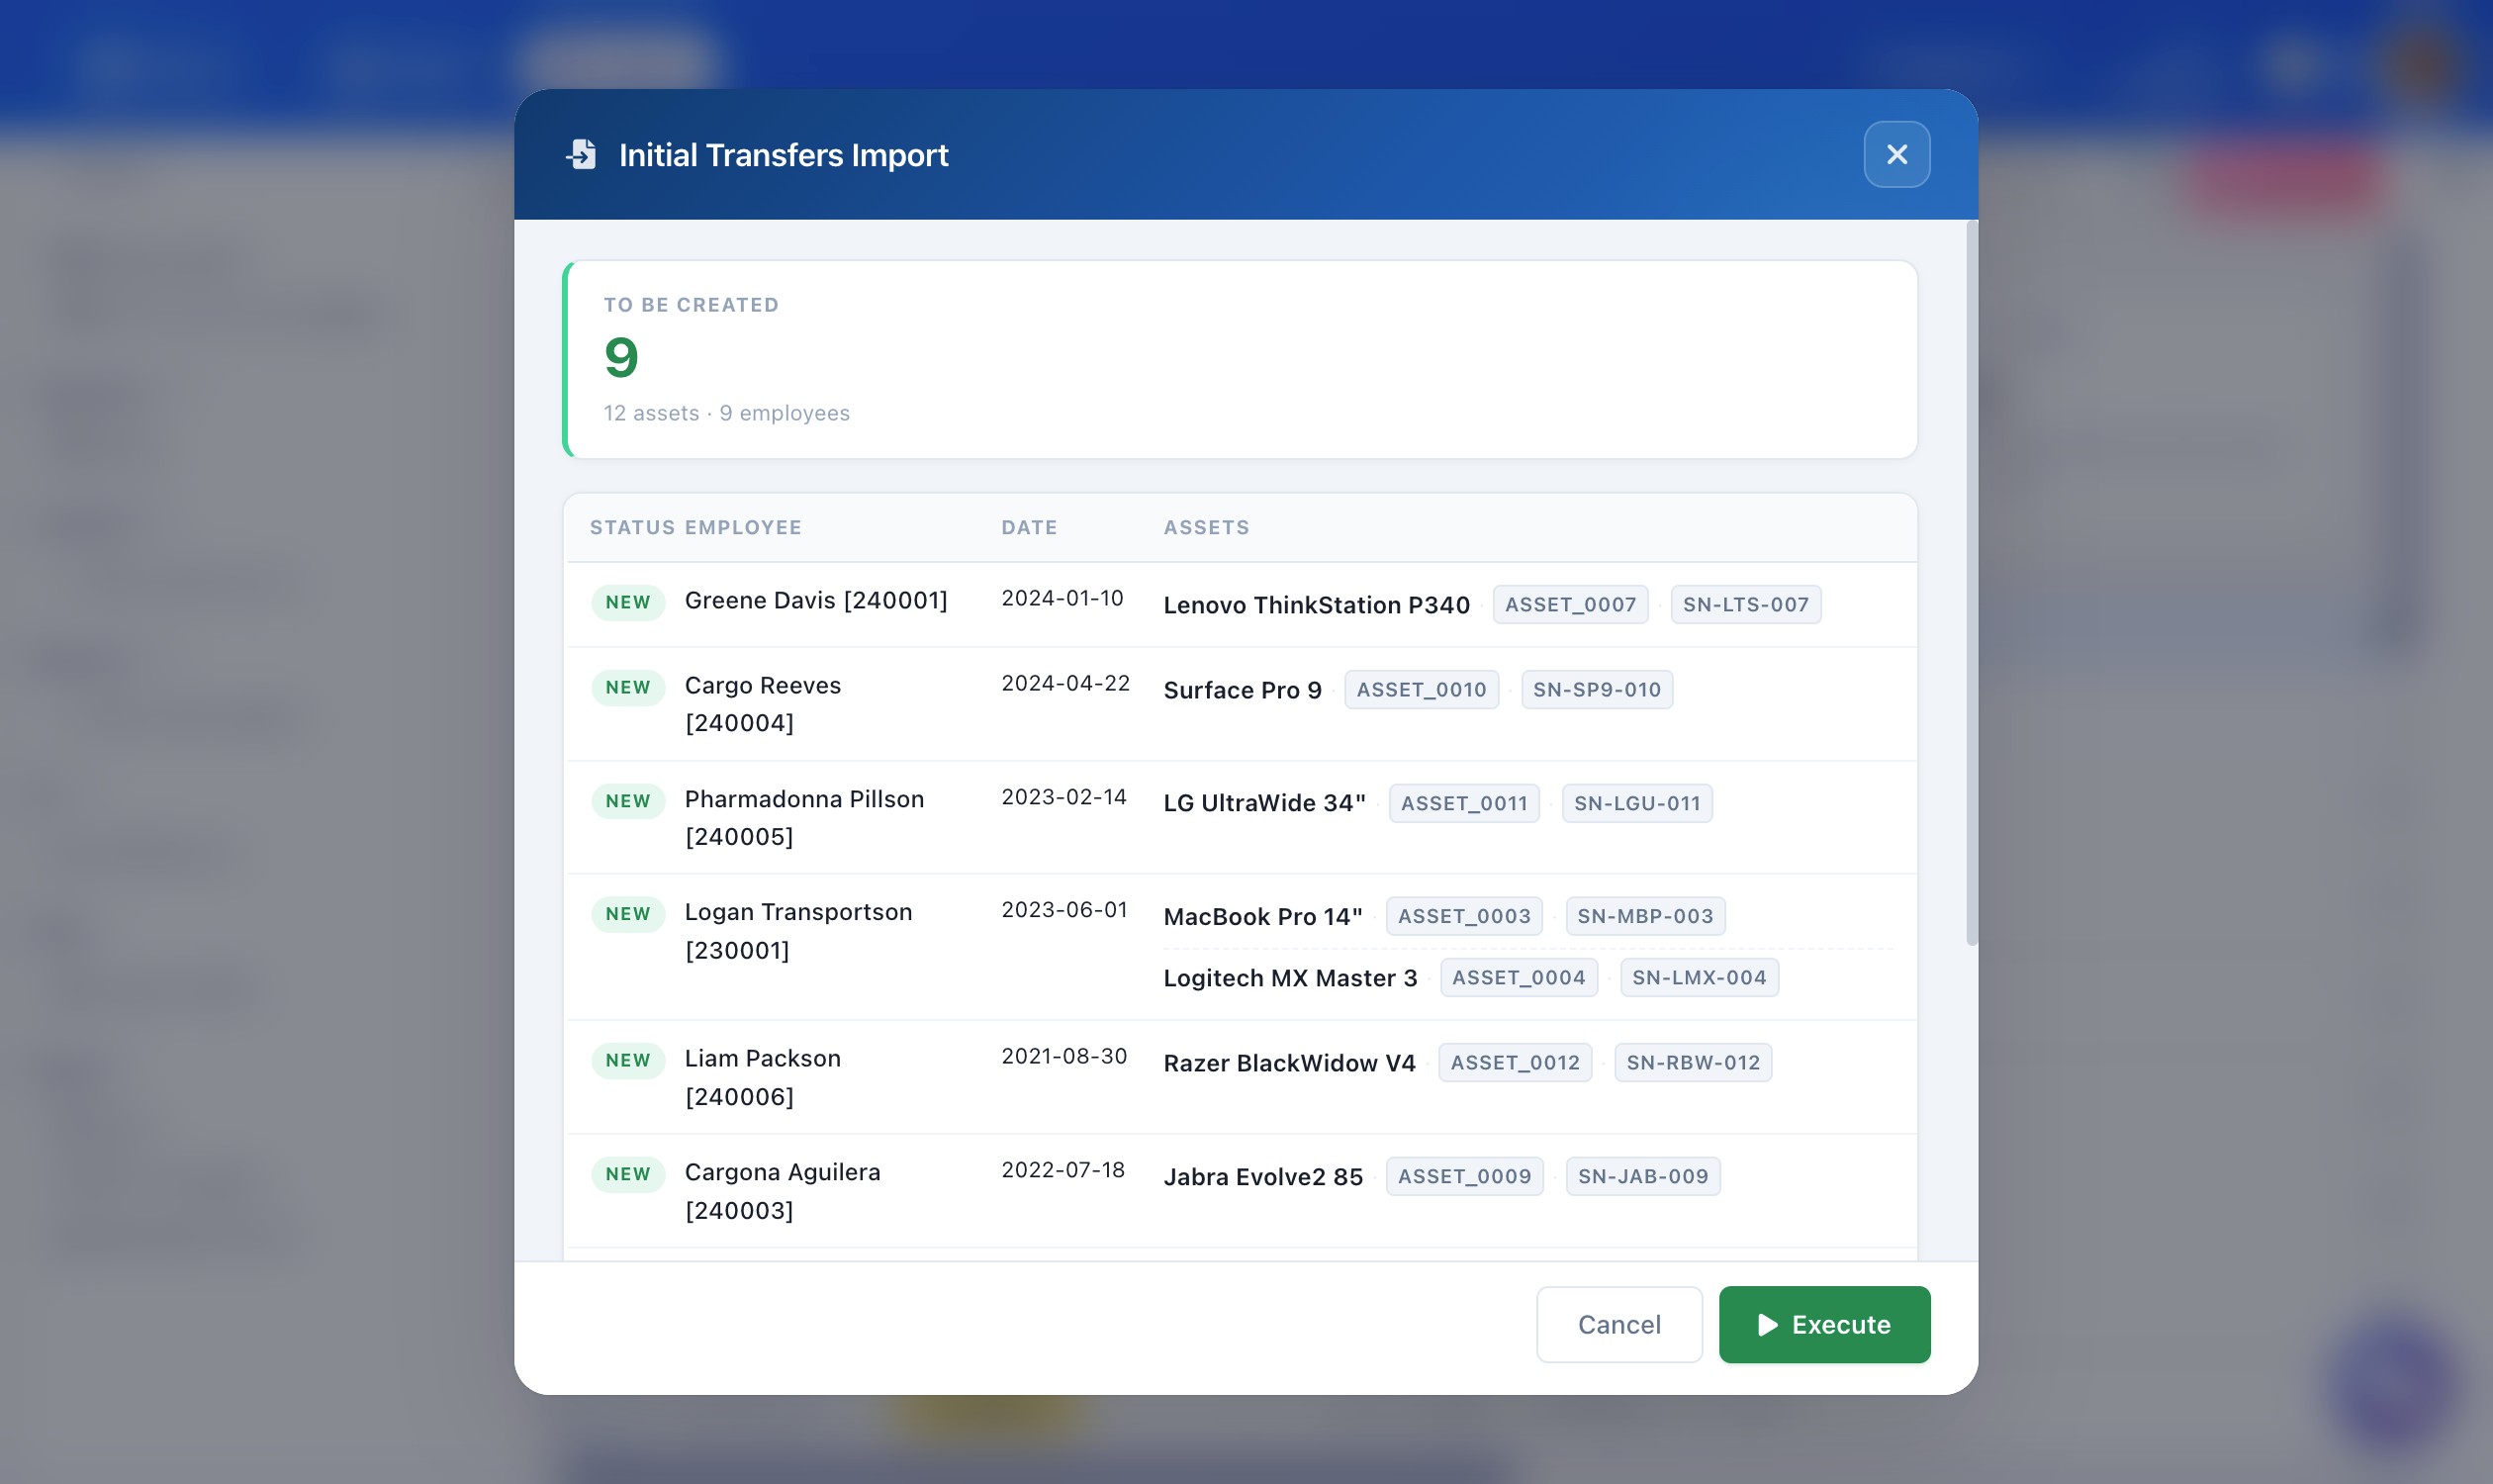
Figure: Preview dialog showing employees, transfer dates, and assets to be created
The dialog is safe to open multiple times. It only shows assets that have not yet been included in any transfer, so employees who already have a completed transfer are automatically skipped. This allows you to run the process in batches — for example, if you import assets in multiple rounds.
- One completed transfer per employee.
- All assets assigned to that employee are grouped into a single transfer document.
- The transfer is automatically marked as Completed — no manual status change is needed.
- The asset assignment fields (current employee, office, location) are updated automatically.
After reviewing the preview, click Execute to confirm. A confirmation dialog will appear showing the number of employees affected. Once confirmed, the system processes all transfers and displays a full summary of the created transfer documents.
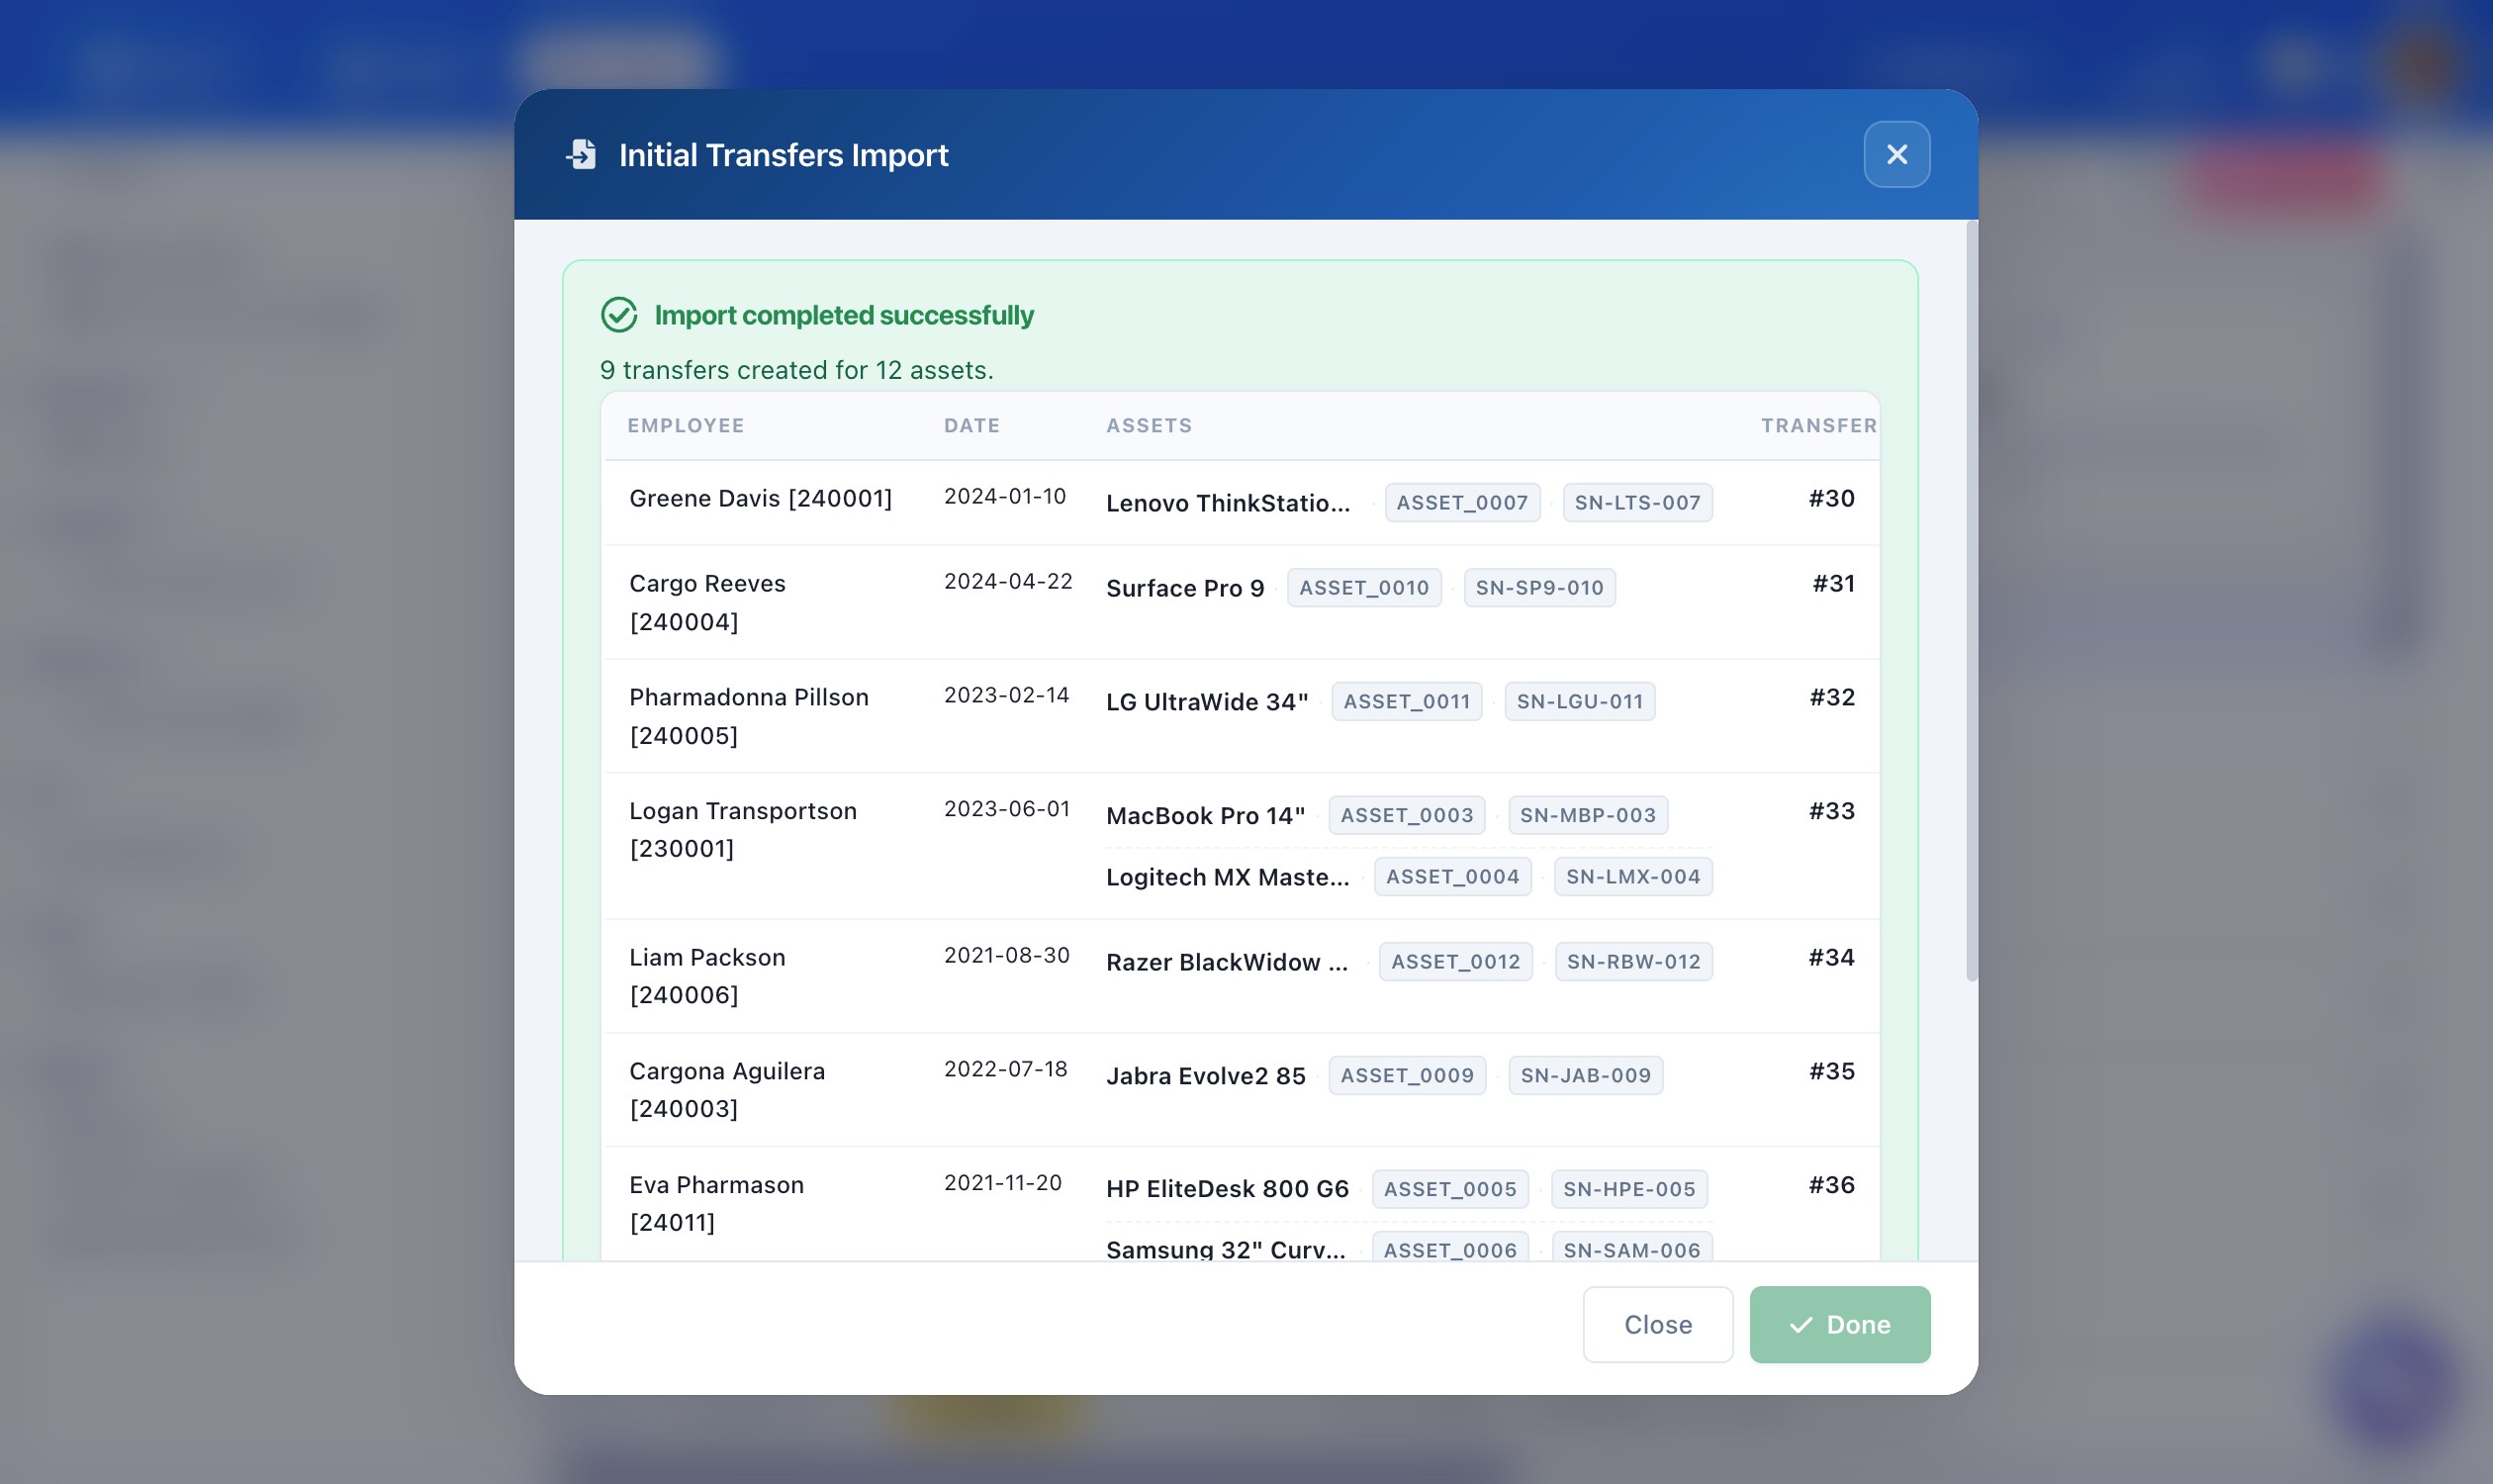
Figure: Import completed — transfer documents created per employee with assigned assets and transfer numbers